I have assembled this How-To while carving a replacement blade for my 14-foot Turbine posted here;
http://www.fieldlines.com/story/2006/11/21/204217/60There are many was to carve wood blades. I have chosen the following method, as it requires a minimal amount of tools and wood-working knowledge.
The linear-profile of this design is the easiest to manufacture for first-timers, providing excellent performance and remarkably quite operation. The term 'linear' refers to straight lines to form the airfoil and twist that the blade makes as moving along the length of the blade, from root to tip. A more accurate airfoil would involve curved lines for carving all dimensions of the blade. My hope is that the detail in this post will clarify, for many, the `illusive Airfoil"... and perhaps after constructing a linear set of blades, you may feel more confident carving a more detailed airfoil for your next turbine project.
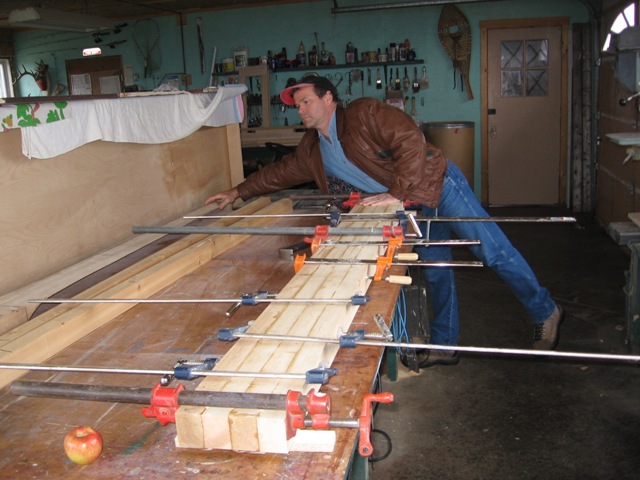
I start with rough Easter-Cedar lumber, planed smooth on the width-surfaces (many different woods are good for making turbine-blades, though). Then rip the boards into 2.5 inch strips, 7 feet long, gluing enough together to form my desired width of 7.5 inches, (insuring to alternate end-grain to minimize warping). My rough-boards were just under two inches thick after planing the faces, so I have glued four strips together, forming a 2.5" by 7.5", 7-foot long blade-blank. You can follow the following design for any small to large wooden-blade by extrapolating from these measurements, arriving at relatively good results. You will find that while aerodynamics of blade design is important, ensuring that all blades are identical is even more important (i.e. twist, weight and profile at every section/station along the blade are equal to the other blades). Water-proof glue should be used!
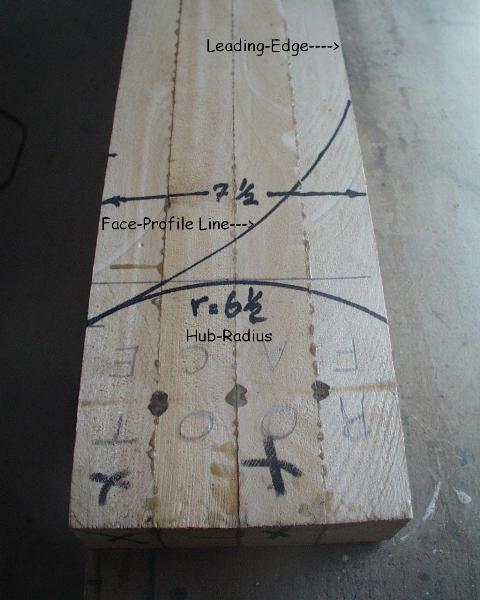
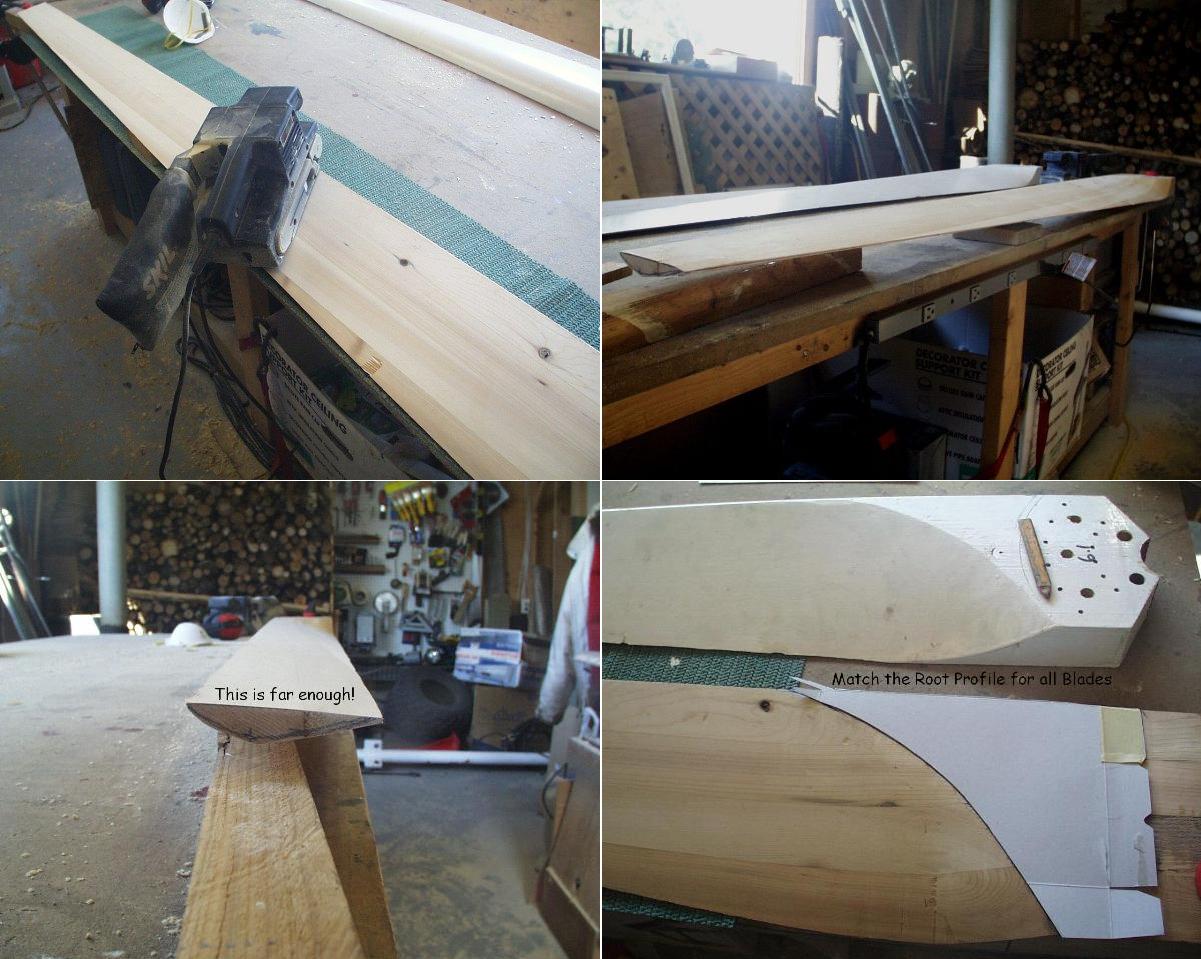
Starting from the Root (this is the widest end that attaches to the Turbine-Hub), we need to draw the radius of our hub. My Hub is 12.25 inches in diameter, so I will draw a radius of 6.5 inches to allow a bit of clearance for my carving lines. Now draw a slow curve from the left-most point of the radius-line to the Leading-edge as shown above, forming a Root-curve/border-line to follow when carving the steepest angle at the Root.
Now draw another slow curve down the side to meet the opposite-face of the blank ending `in-line with' that edge. This will finish the Root-curve line as well as establishing the first Trailing-edge mark to start forming the `Trailing-edge' of the blade. It is this edge that forms the slow 'twist', or flute, from Root to Tip. These blades will turn clockwise in the direction of the wind.
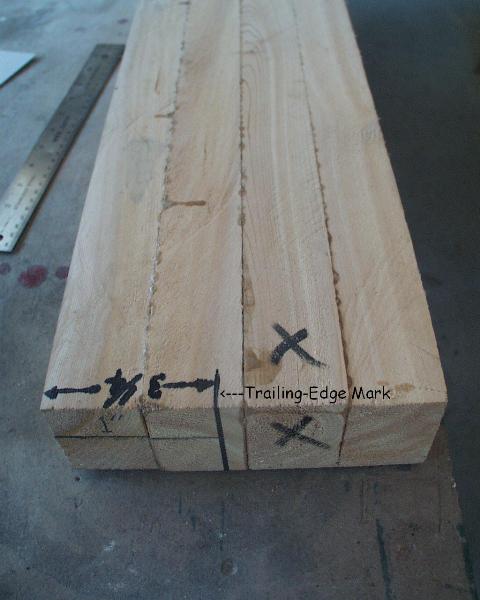
At the opposite end (the `Tip' of the blade), mark a line a little wider then the desired width of the Tip. In my design, I want a 3 inch Tip no thicker than 3/4 of an inch. So I have marked 1/4 of an inch larger for both dimensions, allowing for rough cuts and removal of the bulk of the waste material. Now we have the two Trailing-Edge marks needed to make our first cut.
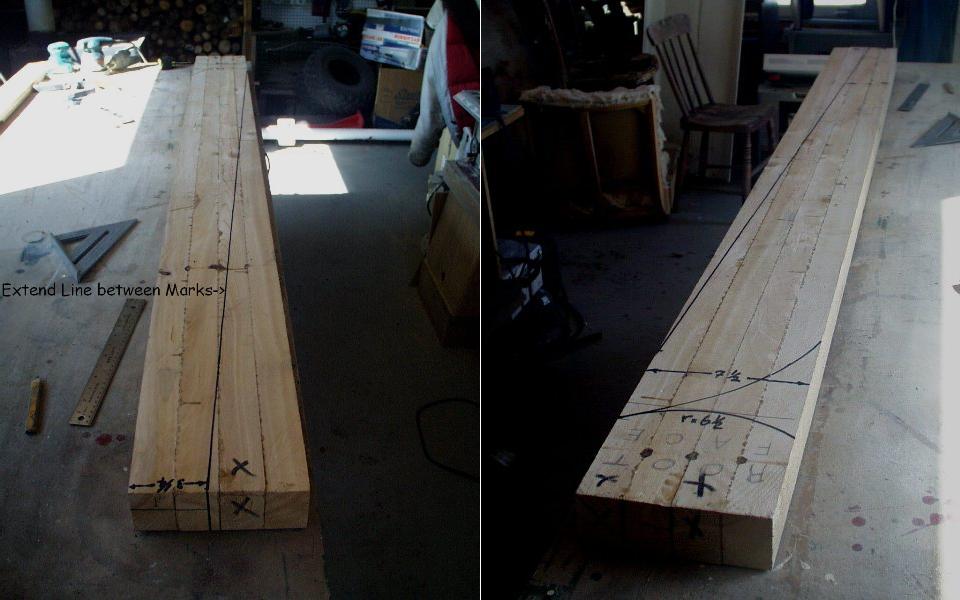
Draw a line between these two marks from Tip to Root on the `Face' as seen above.
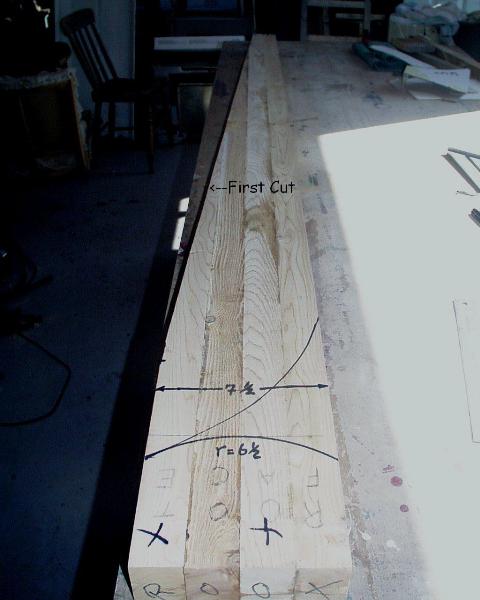
Using a circular-saw, cut along this line, removing the waste material, forming the 'Face-taper' of the blade.
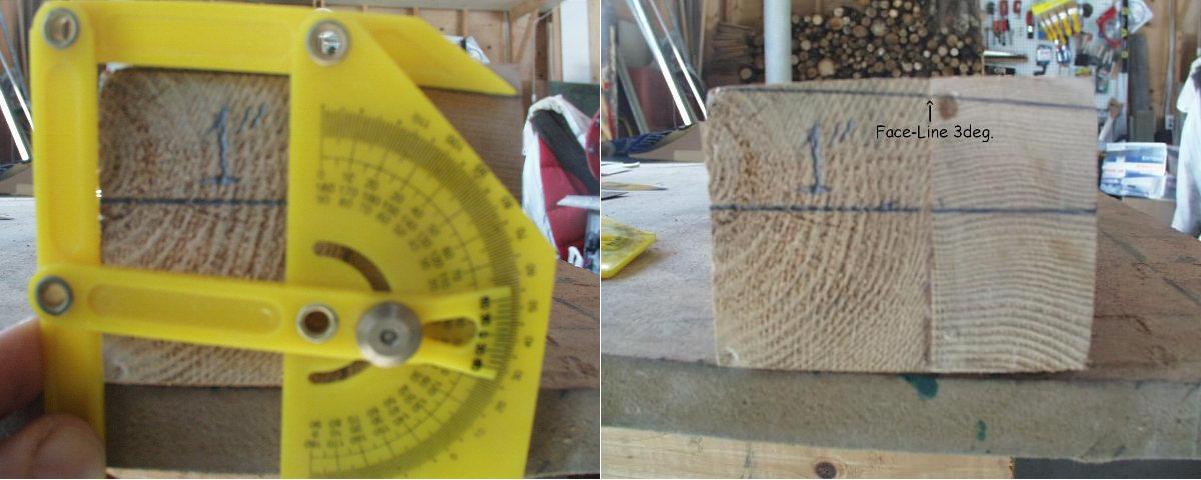
Mark the desired Tip-Angle for the 'Face' of your blade using a protractor, maintaining the Leading-edge corner of your blank. I have selected 3deg, and can adjust to 5deg with finish/detailed sanding.
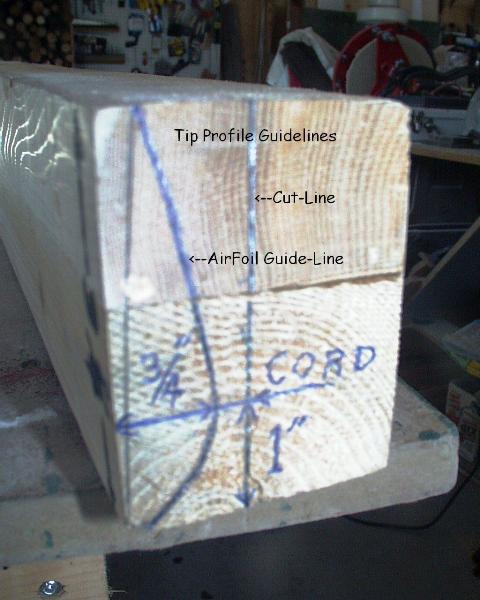
Place the leading edge of the blade against the table and draw a mark up from the table 1/3rd the width of your Tip (I will call this the Cord-line; the thickest part of your blade at all stations). My Tip-width is to be 3 inches, so my cord is 1 inch from the Leading-edge at the Tip. Now draw a curve (similar) as shown above to form the back-side profile of the blade (I will call this the Airfoil). This is where the power of the wind is converted to turning forces needed to rotate the Turbine.
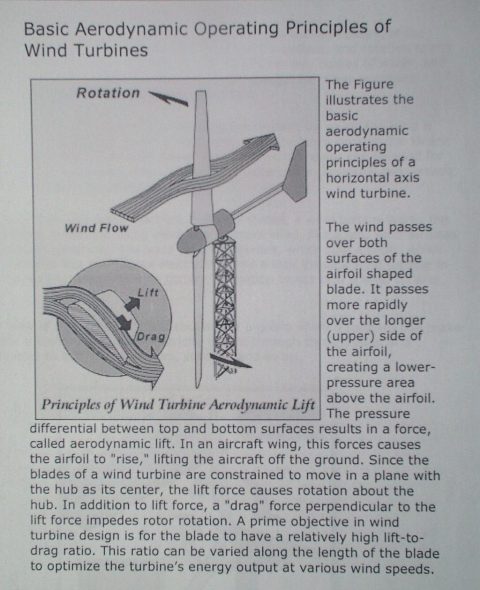
At this point, it may be wise to understand, a little better, the desired goal and purpose of a good airfoil. Which is to extract sufficient power from the wind to rotate the alternator and produce electricity. The above document describes the airfoil action well.
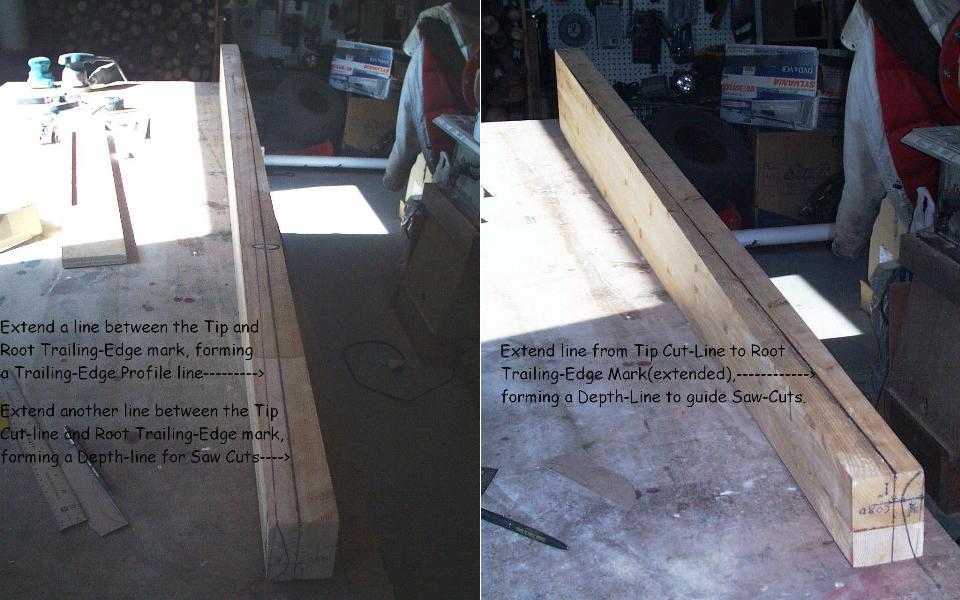
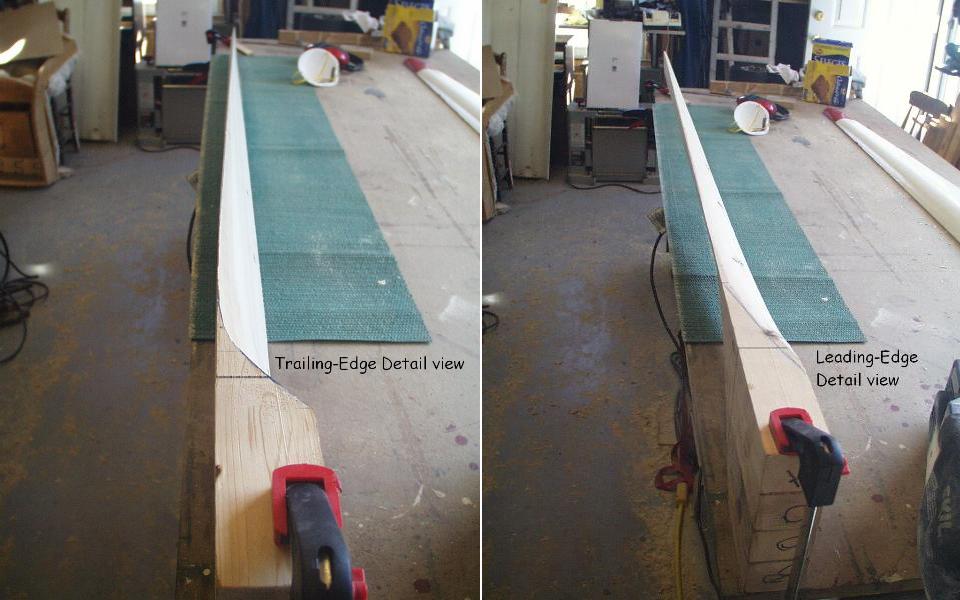
Draw a line from the Root Trailing-edge mark to the Tip Airfoil line as shown above. Draw another line from the same Root Trailing-edge mark to the Tip cut-line on both edges as seen in the above Trailing and Leading Edge photos, forming a depth guideline for bulk-removal of material from the Airfoil side.
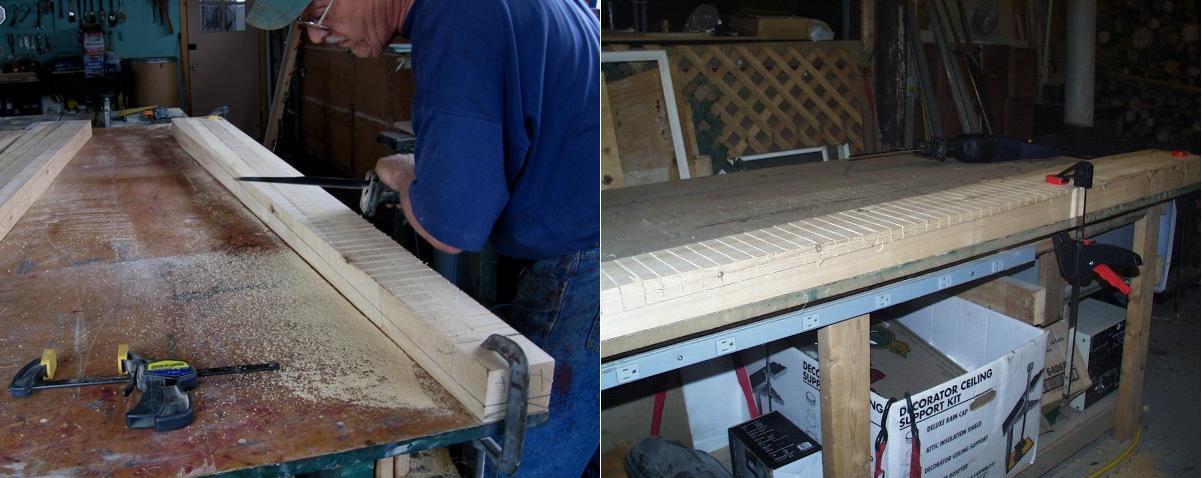
Place the blade-blank `Face' down on a flat surface. Cut several lines 1.5 inches apart, perpendicular to the blade length, down to the "depth guidelines" along the foil side. These cuts will serve as brake-points when chiseling away the bulk of the waste material. I used a Reciprocating-Saw for this task.
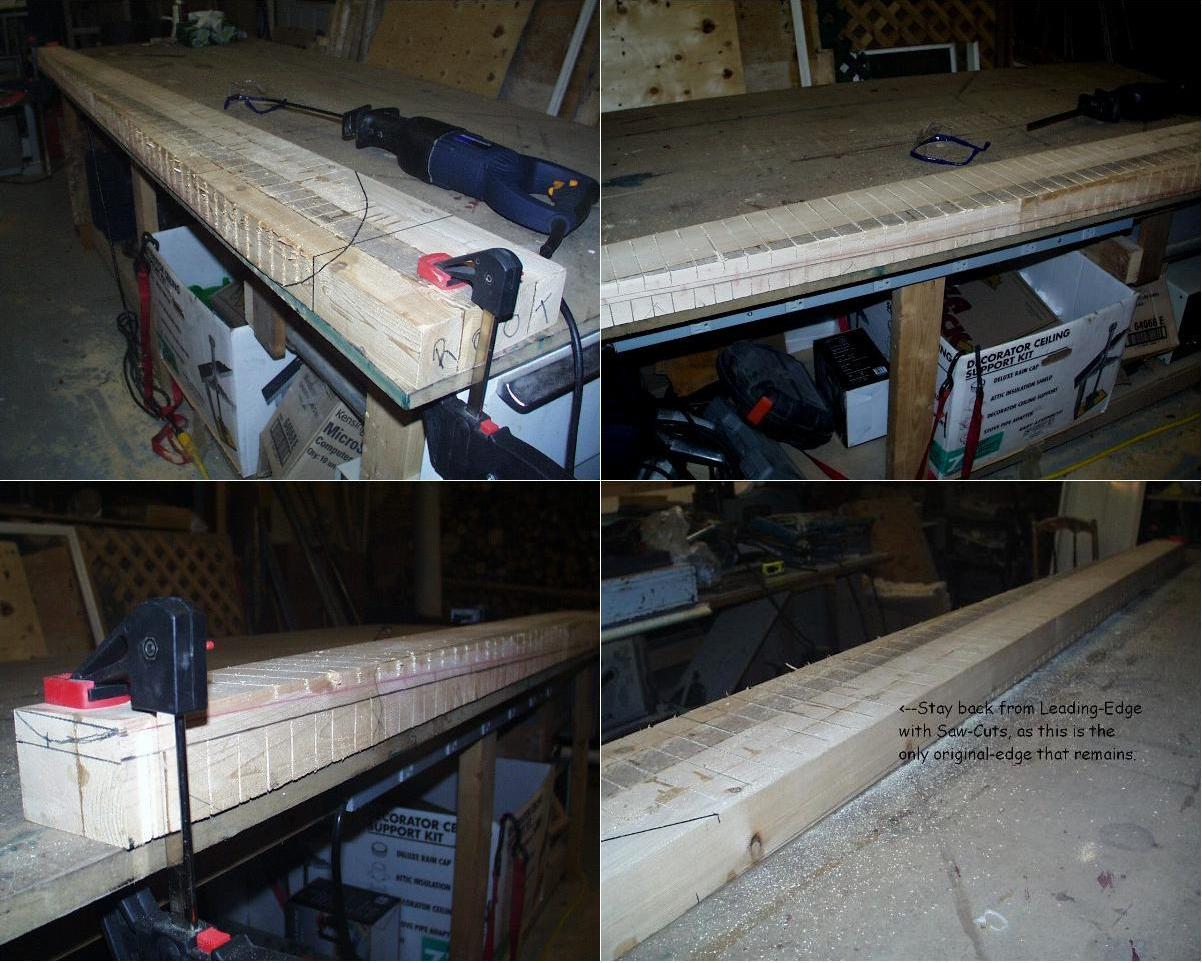
Turn the blank over and cut similar lines along the Face, down to1/8th of an inch above the Trailing-edge line (the red-line above bottom-left photo), and not quite to the Leading-edge. It is important that you maintain (do not cut/remove) this Leading-edge. When you approach the Root, be careful not to go beyond the Root-curve lines that we established in the beginning. Now we are ready to start carving!
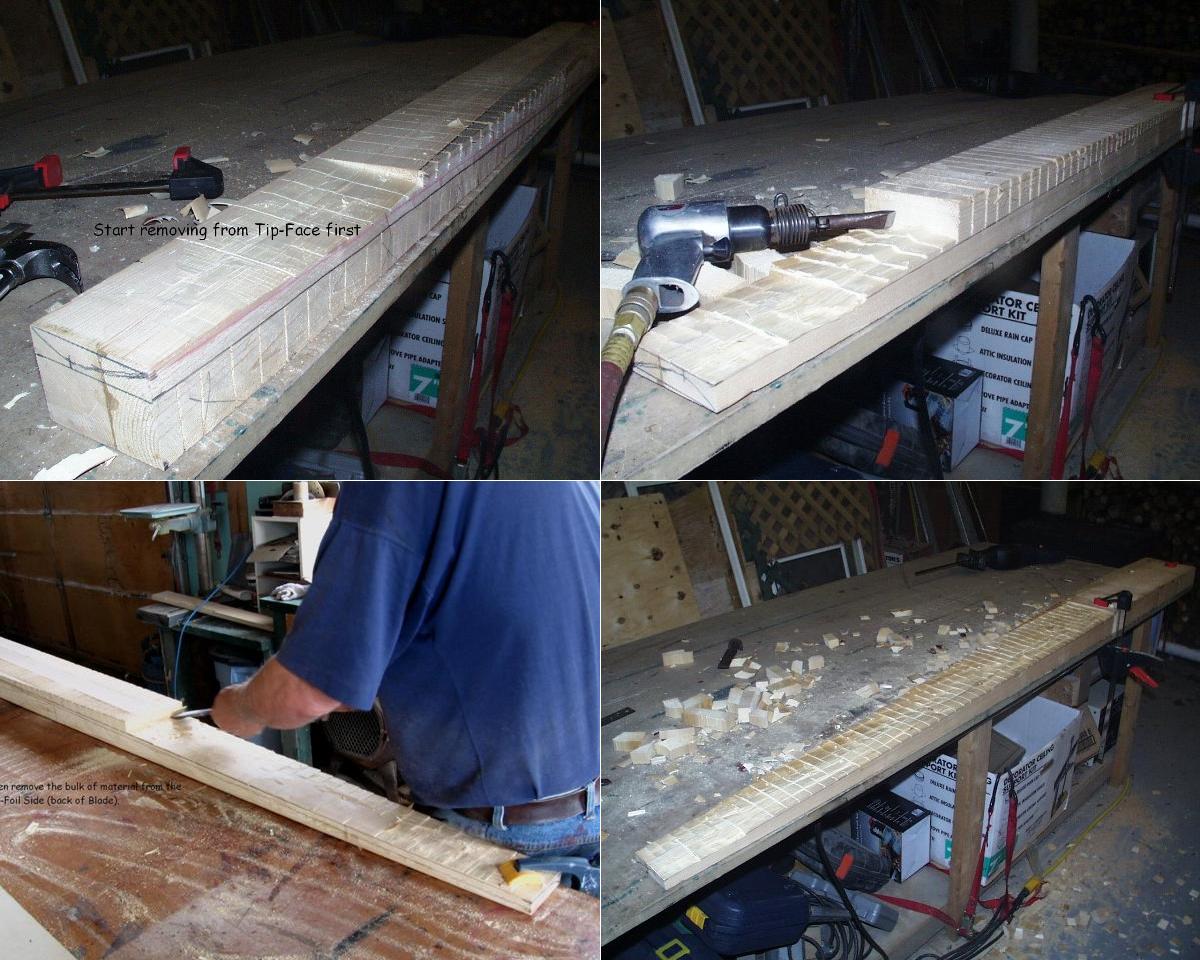
With a sharp and wide wood-chisel, start at the Tip and remove the material from the face, being careful not to go deeper than your saw-cuts. When you reach the Root-curve, chisel from the Root end, downward, to where you left-off. Flip the blank over, and starting from the Tip again, remove the material from the Airfoil side. My arm got tired at this point, so I decided to use an automotive Pneumatic-Chisel to finish. This work surprisingly well, so I am going to make a wider and longer chisel to fit this air-gun for future projects.
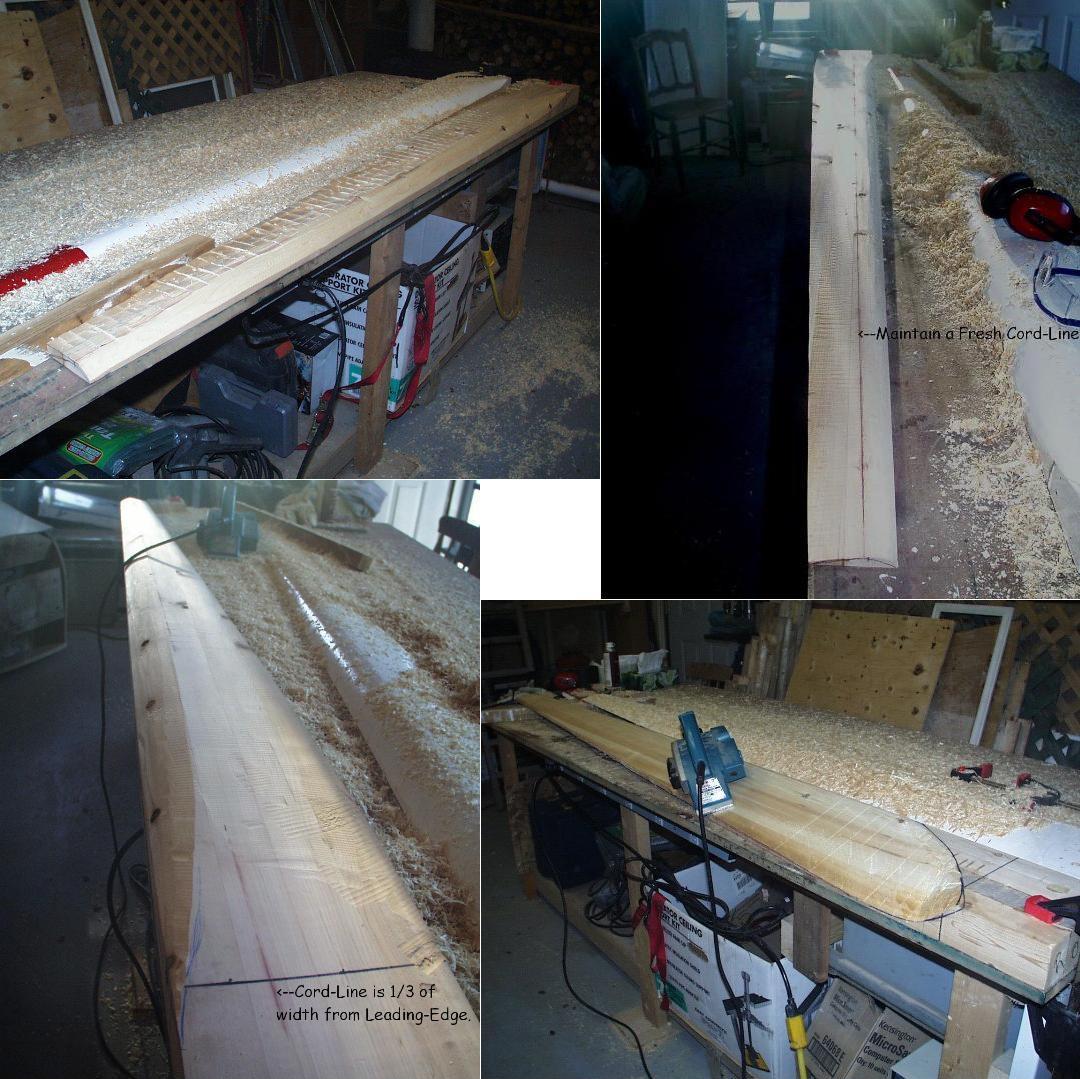
Place the blade (I guess we can call it a blade now) Face down and plane away the bulk of the material from the Leading-edge Airfoil side, forming an ever-shrinking radius from the Root to the Tip, (use the Airfoil radius-line at the Tip as a guide). I used a Power-Plane to do this quickly, however, do not get too close to the guidelines and Leading-edge line at this stage. Repeat this process on the Trailing-edge Airfoil side as shown on the lower-left photo. Snap a chalk-line every now and then to maintain a Cord-line down the length of the blade. The cord is 1/3 of the `total width' from the Leading-edge at any station. This blade is 7.5 inches at the root, so I've marked 2.5 inches from the Leading-edge at the Root-line (extended around from the Leading-edge), and snapped a line from the Cord mark at the Tip. The Cord is kept linear down the length of the blade, as well. When you have the rough shape of the Airfoil completed, flip the blade over and plane the Face surface, flat, removing the saw-cut lines. Remove just enough material to stay above the established guidelines. Do not be to fussy with the Root-curve at this point, as a course-grit belt sander is best suited to form this taper.
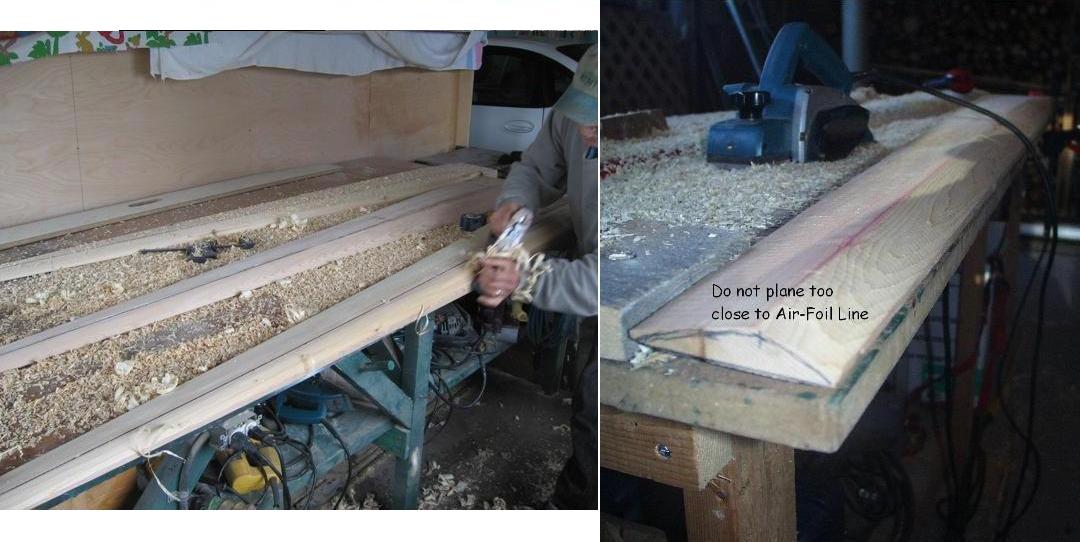
You may wish to switch to a Manual-Plane to clean-up and get a bit closer to the guidelines.
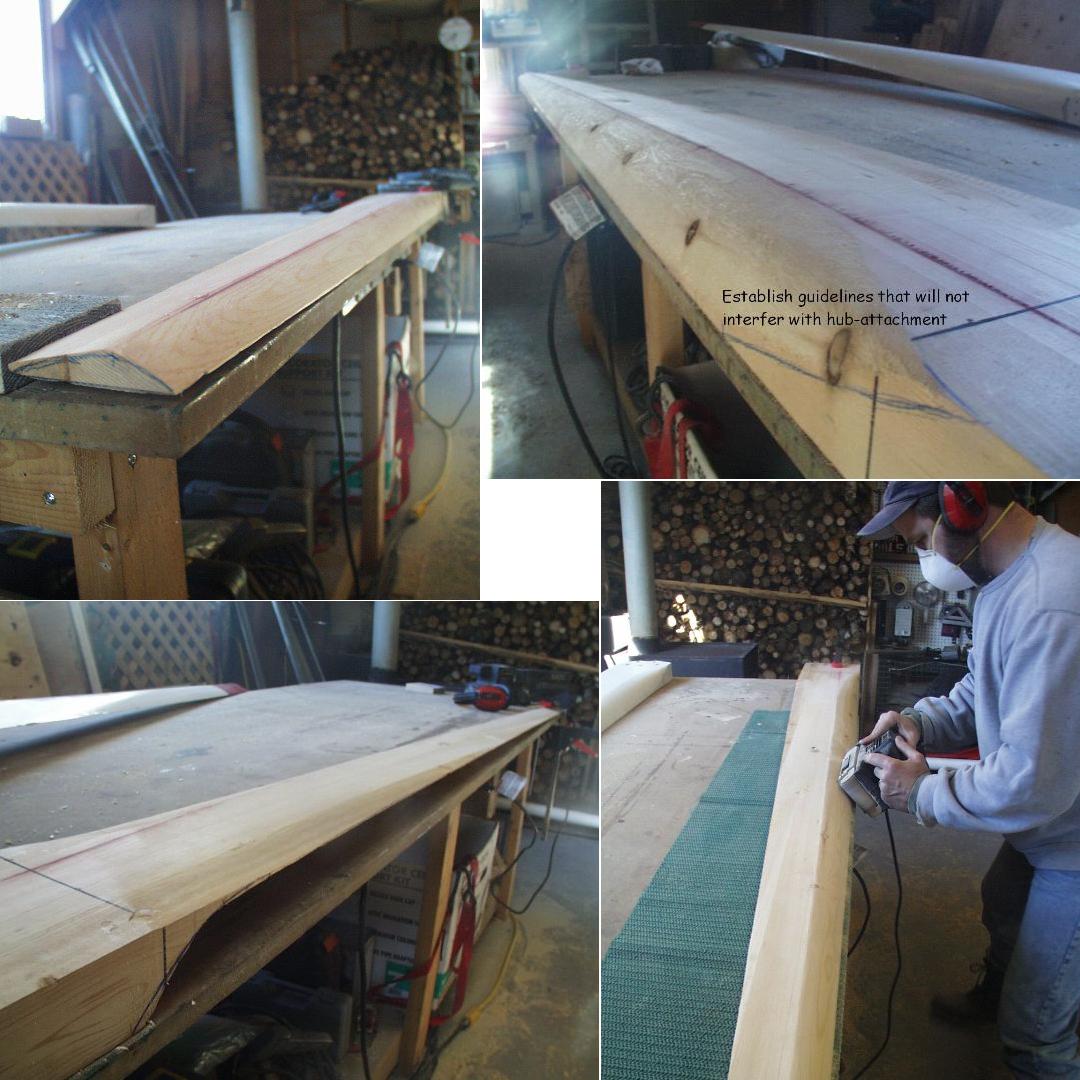
Using a Belt-Sander, with a course-grit belt (40-60), we can sculpt the Airfoil side by holding the sander parallel to the length of the blade and making a rolling action to form a smooth radiused Leading-edge. With a similar, but longer, rolling action the Trailing-edge side of the Airfoil is made; As you approach the Root, this radius will diminish slowly while you maintain your Trailing-edge guideline.
Flip the blade over and detail the Face by holding the belt-sander at a helical-angle to the length of the blade as shown above, and work the sander along the length of the blade until a flat, fluted Trailing-edge forms. Use the round-nose of the belt-sander to shape the Root-curve. Here I'm verifying the same profile as the other blades by using a card-board template.
We have been at this for a few hours now and you should be ready for detailed sanding using a palm sander with 80-grit paper. The above images show that we now have a good Airfoil and twist to the blade.
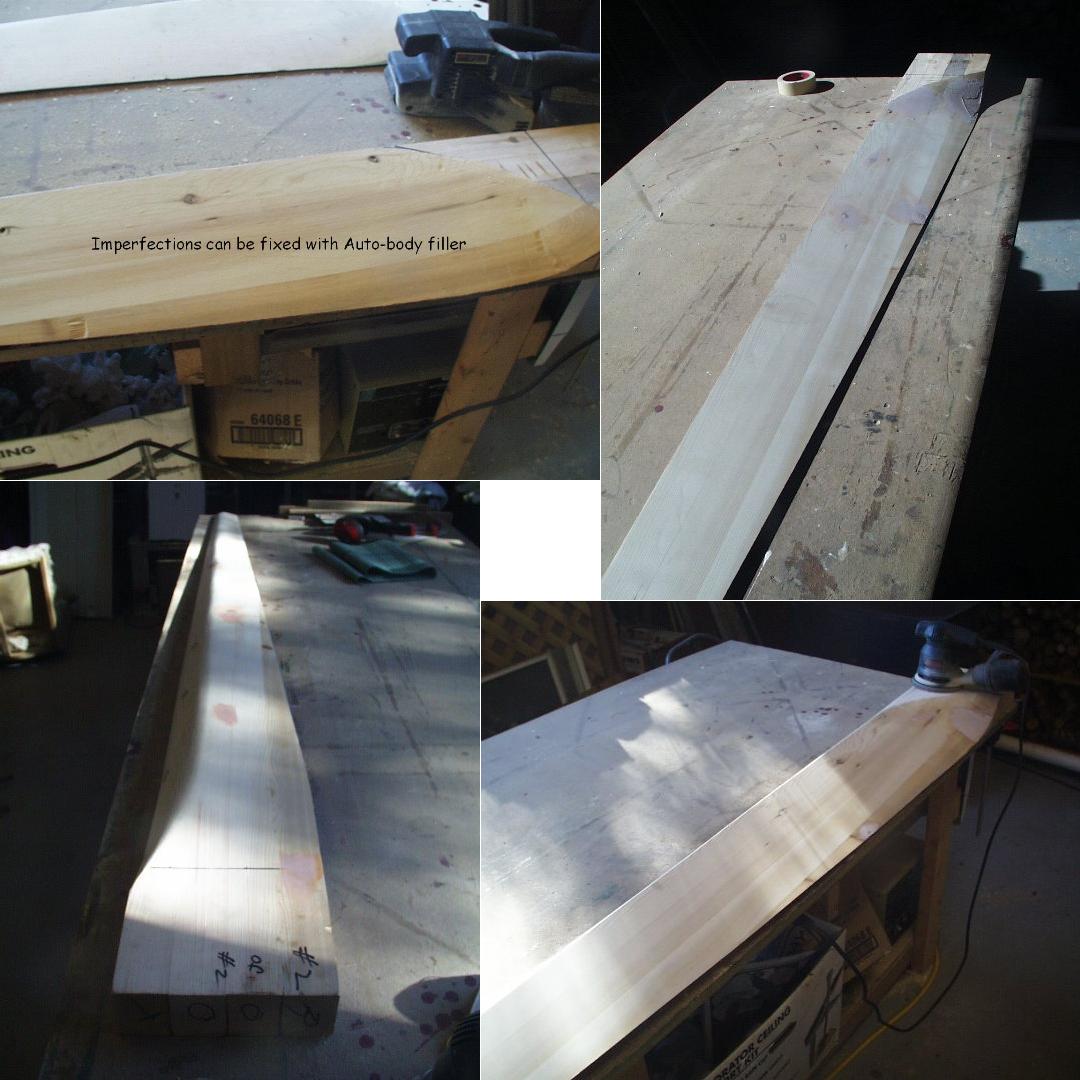
Any minor imperfections can be fixed with automotive body-filler during the detail sanding stage.
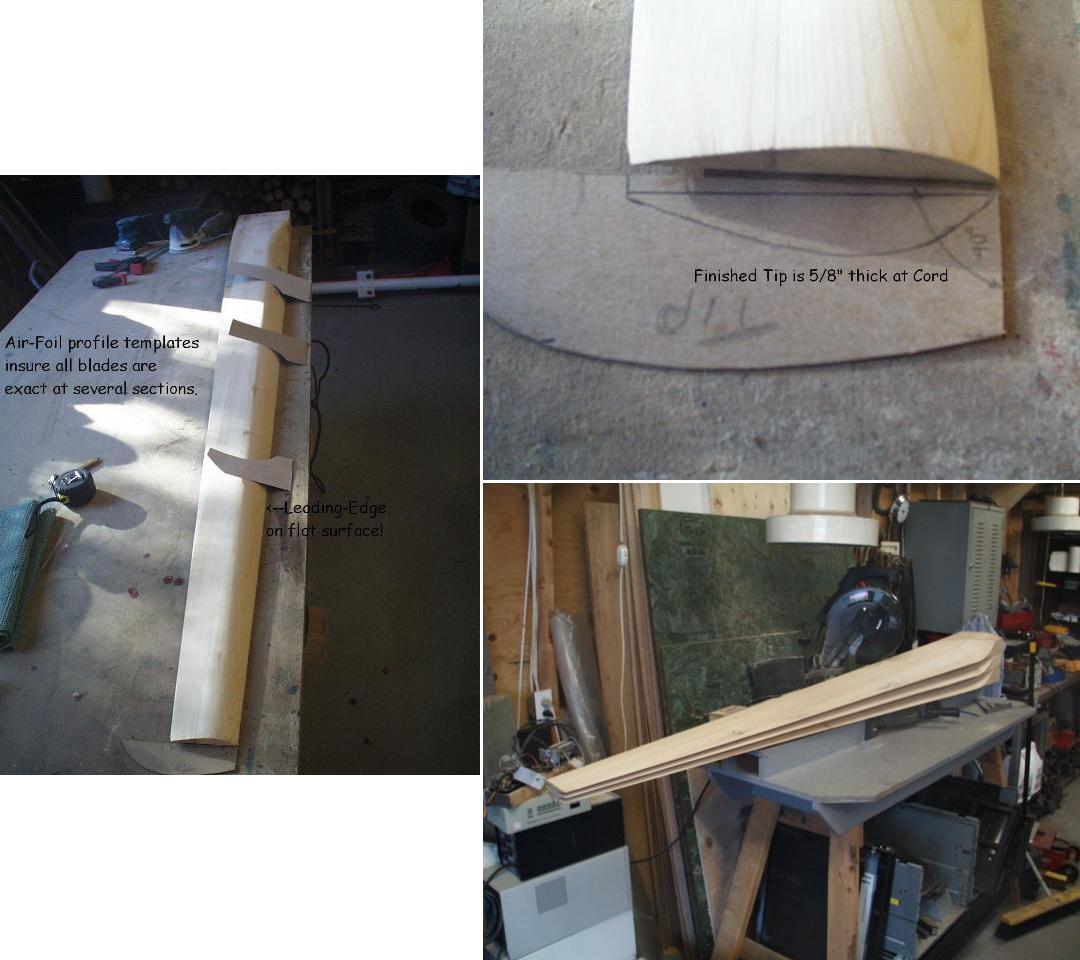
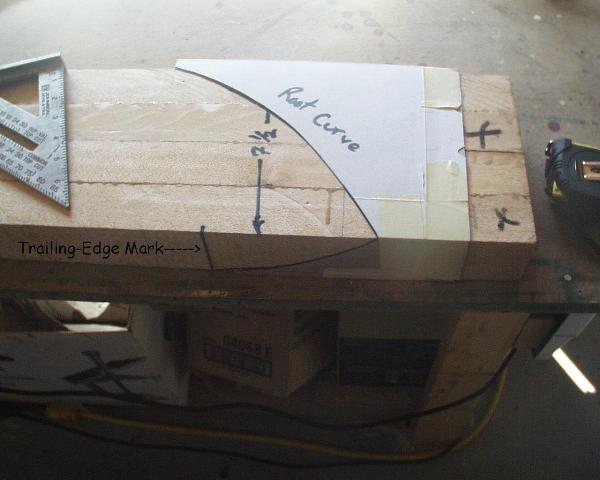
As mentioned, it is very important that all blades are identical before mounting on the hub. This is best accomplished using several card-board templates at different stations (every 16 inches or so) along the Airfoil side. Using a flat table-surface, cut the templates using the initial blade as a guide, as shown above. These templates will be used as gauges while carving the additional blades to ensure the exact same profile as the first blade.
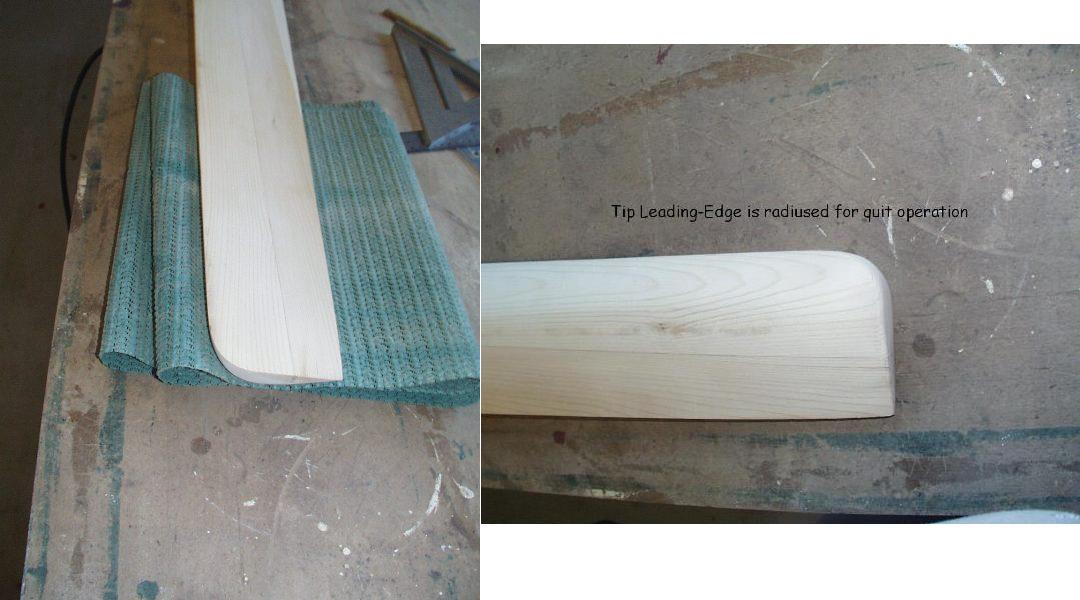
I have decided to carve a small radius at the Leading-edge of the Tip. This will allow the air-flow to smoothly re-form as it passes around the Tip, making for an even quieter operation at high speeds. At this point you can carve two more blades (if you are building a tri-rotor Turbine) and then move on to the finishing stage.
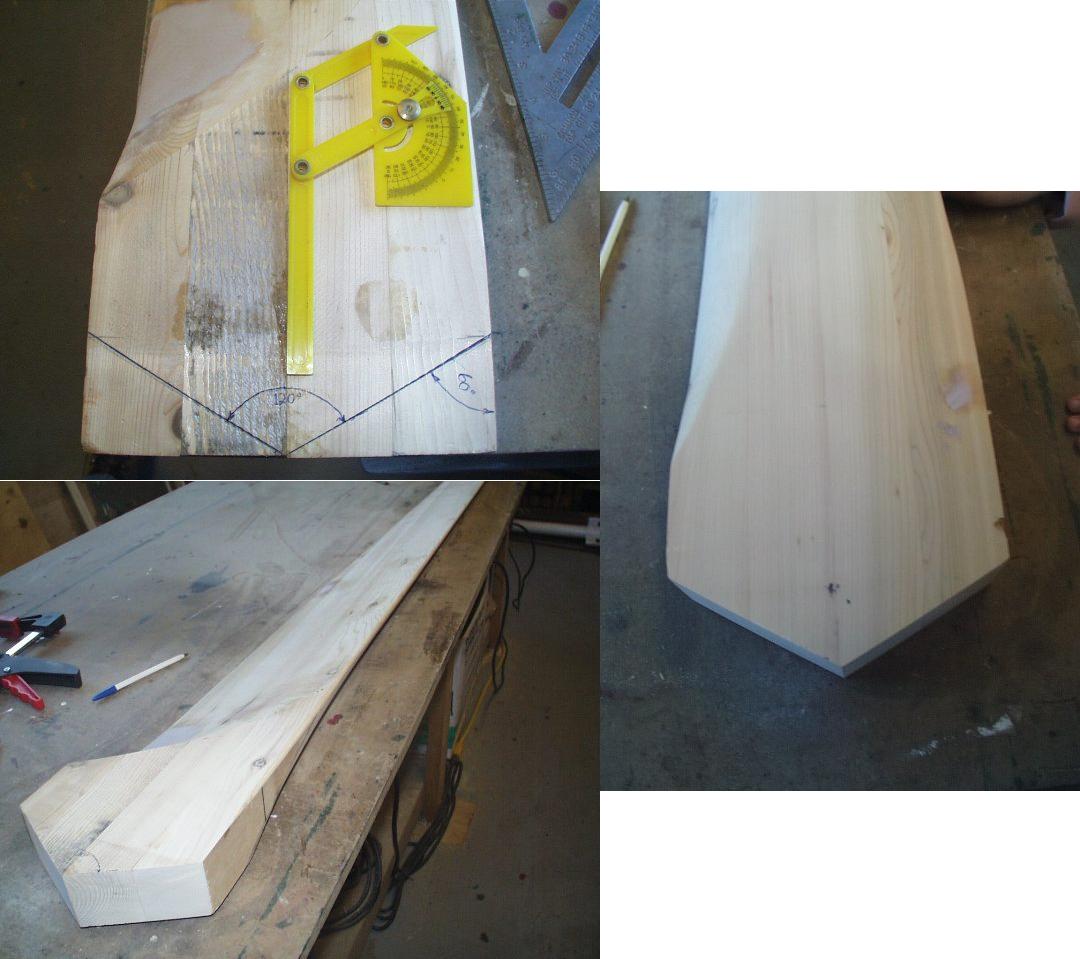
For a tri-rotor design, the blade Root will need to be cut at a very accurate 120deg from the center-line of the blade. I use a 10 inch Chop-Saw (miter-saw) for this task.
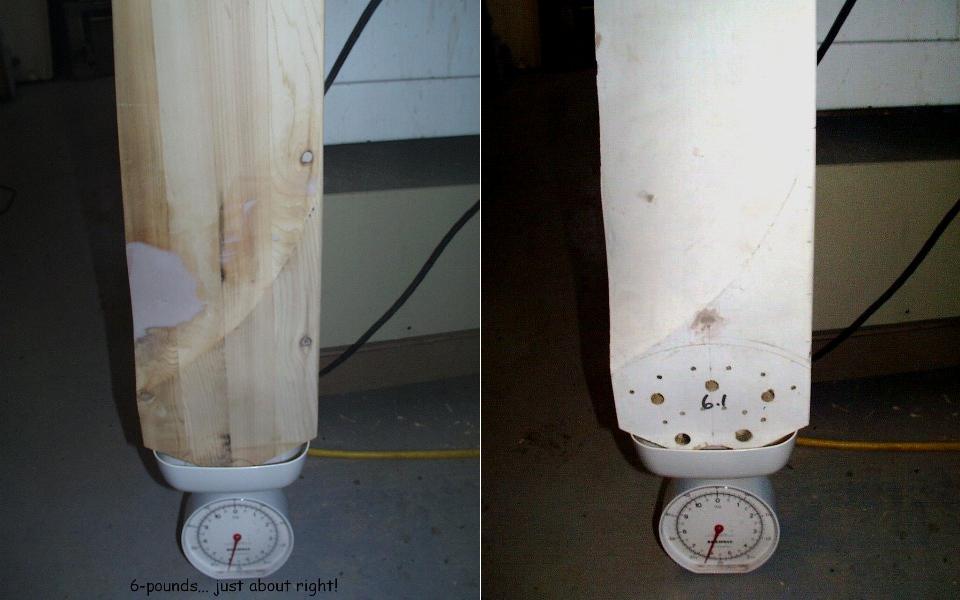
Make sure all of the blades are close to the same weight. With a good coat of epoxy-paint, I am just about right on the money with carving this replacement blade.
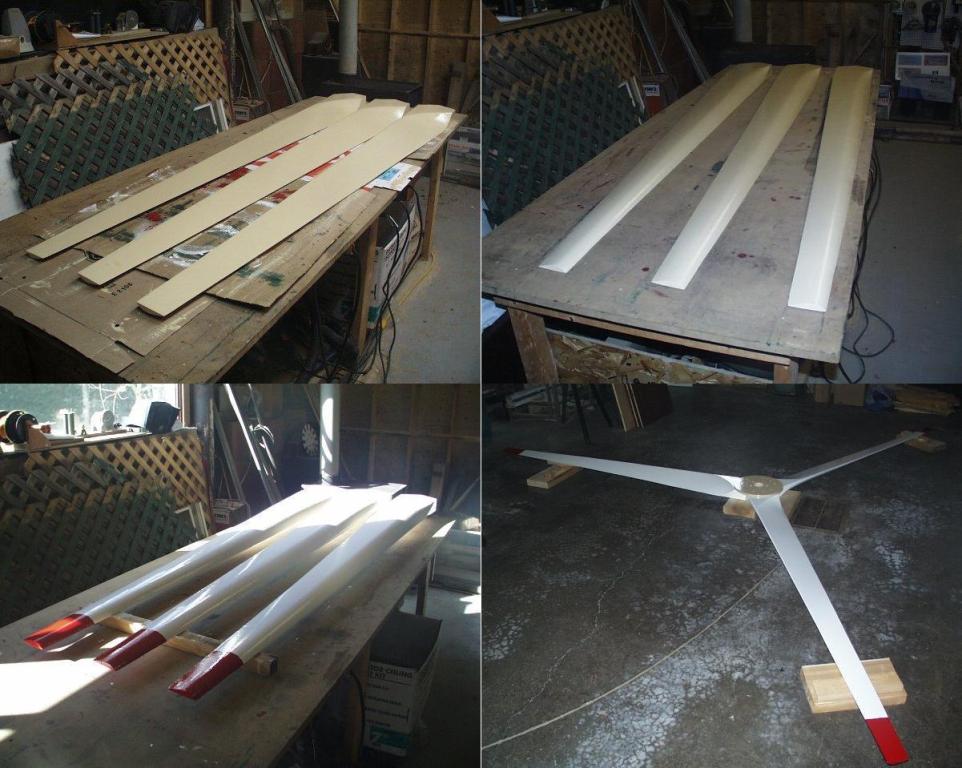
After applying the finish, layout the blades with the hub and measure Tip to Tip for identical placement. Then secure to the hub with fasteners. Static balancing is all that is needed, and then you are done. Cheers!
