Hi all. I promised I'd share a few photos and tales of my construction, and I am up this morning before anyone else, so this like a good a time as any to type away. So on with the show.
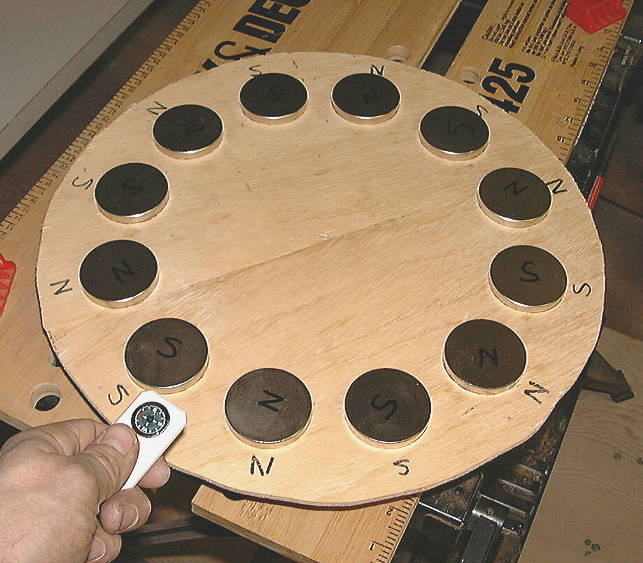
As some of you recall, I decided to use 13" front disk brake rotors from a Mustang Cobra. I also used 2" x .5" disk magnets, since they had a bit more power than the 2 x 1 x .5 mags, though I hope it won't hinder my performance due to my selected coil shape. Anyhow, I set my mags with a simple plywood template that fit into the cavity of the brake rotor, via a "step" glued on to it. Seen here:

Once set, and before gluing them down, I double checked their orientation with a cheap compass.
Then it was time to cast the magnets to the rotors, and I chose to use West System epoxy. I made my mold up a bit different than most folks here, and used some aluminum flashing. I carefully cut it to length, and used a clear packing tape to hold the ends together. I then put on layers of packing tape until the flashing fit over the rotors nice and tight. This was done on both the inside and outsides of the magnets with great results. I used a caulking gun to apply the epoxy without mess or air bubbles. Here's the form after pouring:

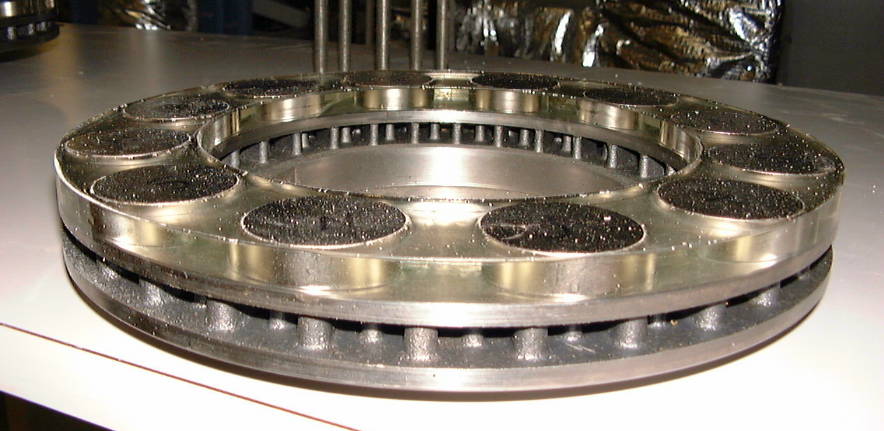
And here it is fresh out of the forms. The packing tape made for an excellent realease film and left a beautiful edge. (sorry, this pic is a bit wide to show it's "purtyness" :-)
I kind of wish I had added some aluminum trihydrate to the epoxy after reading DanB's post about resins, but I guess I really don't need to worry much about impact resistance, do I?
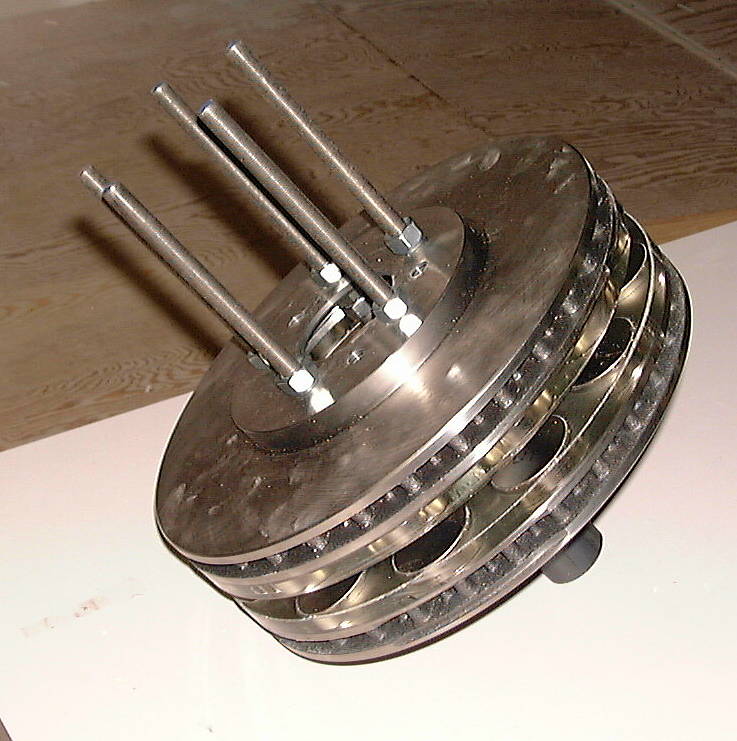
So these rotors are going onto a standard 1750 lbs, 4.5 x 5 trailer hub assembly. I decided to mount the back rotor behind the wheel flange after seeing it done with a Volvo mill story here. Using 1/2-20 SS threaded rods, 1/2 lug nuts, and 1/2 connector nuts, this is what I came up with:
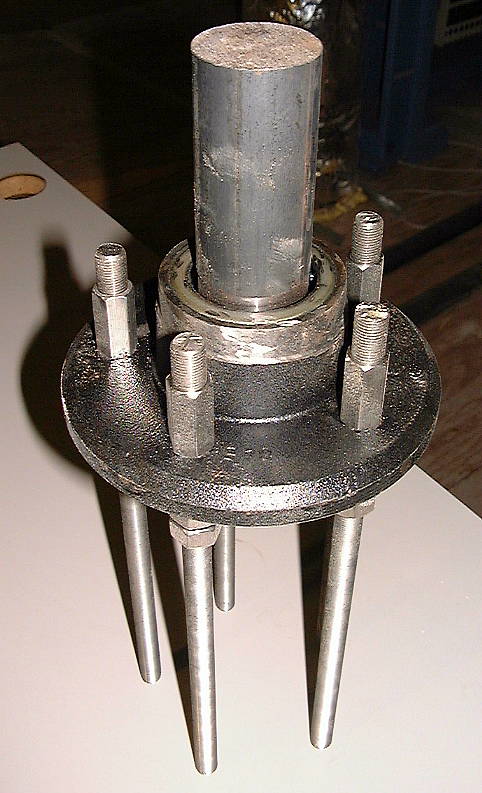
Those connector nuts set the backspacing perfectly, though, I did have to trim a few thousandths off one that was a smidgen longer than the rest. Anyhow, that completes the rotor assembly.
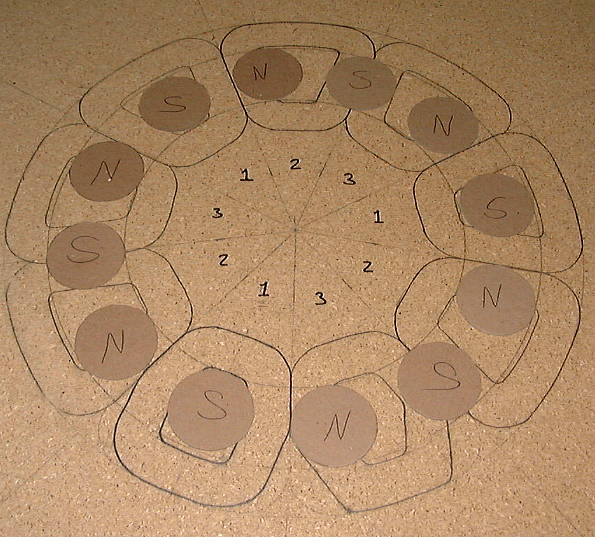
Now, on to the stator. I drew out my layout on a piece of particle board. As you can see, I played with all kinds of shapes before settling on one.
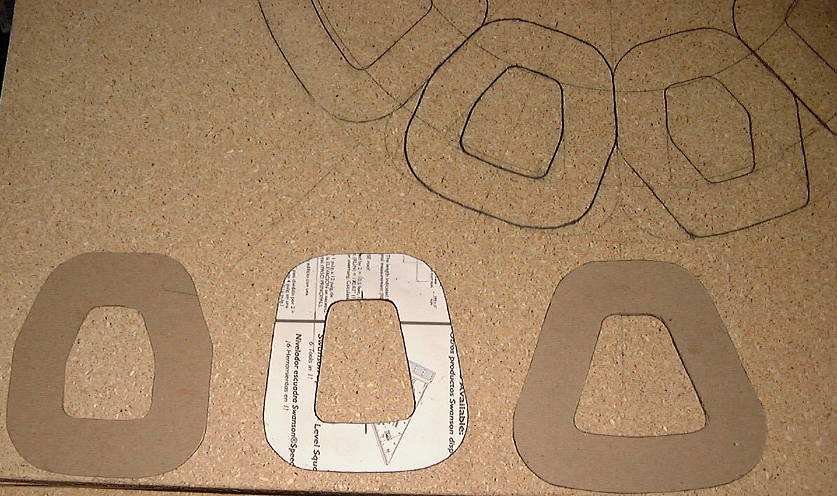
Once I made my choice, it was time to make the mold. I laminated up a couple layers of particle board and I chose to make the mold using a router and a 5 degree vertical raised panel bit. I made a homebuilt circle cutter and away I went filling the shop with sawdust:

I'm not sure what others do on here to get the start end of their coils out, but I planned to cut a small channel out to allow it to pass out without getting pinched in the mold. That idea quickly grew into removing all material from the area that the start end needs to pass under, to the outside edge. The thinking is, it will add more stiffness to the support connections further resisting the effects of torque from loading and short-stopping. It may not be such a good idea for cooling reasons, but we'll see. I did the same thing on the lid side too, and you might be able to see what I'm talking about here:

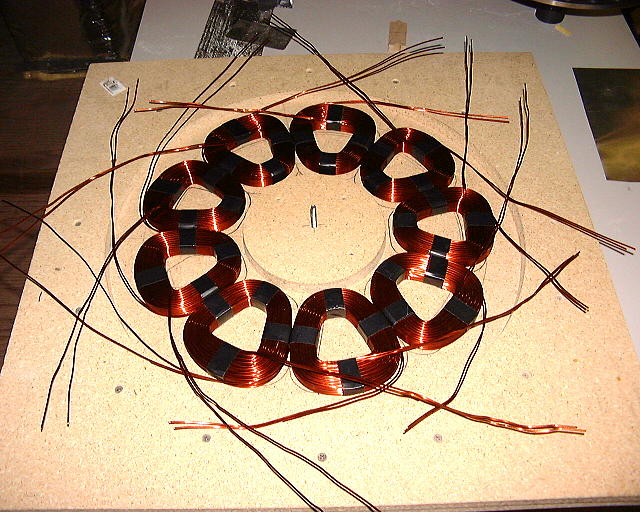
So here's nine of my "high density" parallel wound coils I talked about in an earlier post. For those who missed it, they are 14ga, two-in-hand, 71 turns.
So I got them all wired up using the ice maker line coupling idea learned here. I used a crimper that has a "finger" on one side of it's jaws (I believe they are meant for use on uninsulated connectors) That closed up the tubing beautifully. How good was it? Well, I had to take one apart because I forgot to slide the heat shrink over the connection first, and it was all I could do to separate the coils, even after cutting away most of the tubing. Anyhow, I silver soldered the connections and shrunk the shrink. Now this is another one of my ideas I haven't yet seen done here. I didn't want my wires leaving the mold. I wanted terminals. So I bought 5/16" solid brass toilet bolts, drilled them to accept the wires, and silver soldered the wires and a nut to them. Seen here:
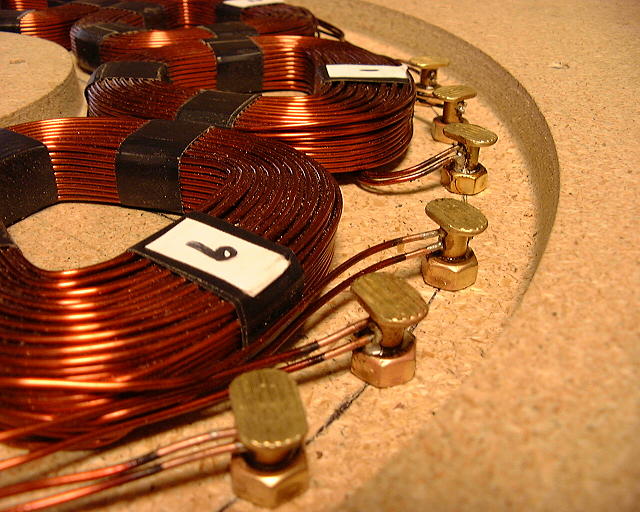
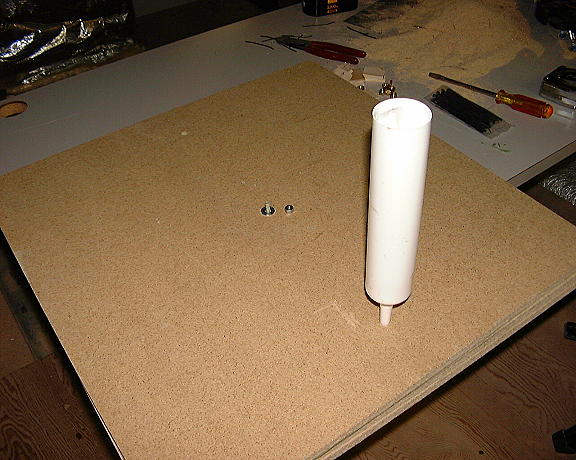
They were drilled into the bottom of the mold and secured with a nut underneath. I brought out all the starts and ends so I can make up any three phase configuration. You can see how nice that bevel bit mentioned earlier worked for my mold. One thing I was concerned about, as seen in an ealier picture, I domed my lid a bit and was concerned I might trap air in it. I decided to make up a injection style mold. Not for the whole thing, but just the last bit. This is what I did:
You can just see the hole on the far side, and the caulk tube for injecting resin. Then the mold got a good coat of wax. So now it's time to pour the casting. I used vinyl ester resin and aluminum trihydrate (ATH)for maximum heat stability. Attempting the thicken the resin, the ATH was mixed in at 75% by volume, but I never acheive any thickening. One problem I did run into was, I couldn't mix in the ATH into the resin. It didn't seem compatible, and would make lumps while I attempted to hand stir it in. Even introducing it slowly wasn't working. I had to think fast, as I was running out of daylight. So I grabbed some steel wire used for hanging drop ceilings and a piece of ice maker tubing. I wrapped a few coils of the wire, wrapped each end around the coils once, and twisted the ends up four inches. I stuck the twisted ends into the ice maker tubing as far as it would go, and trimmed the ends a half inch long and bent them over the edge of the tubing. I then bent the coils at different angles. Wa-la! Instant homebuilt wisk.
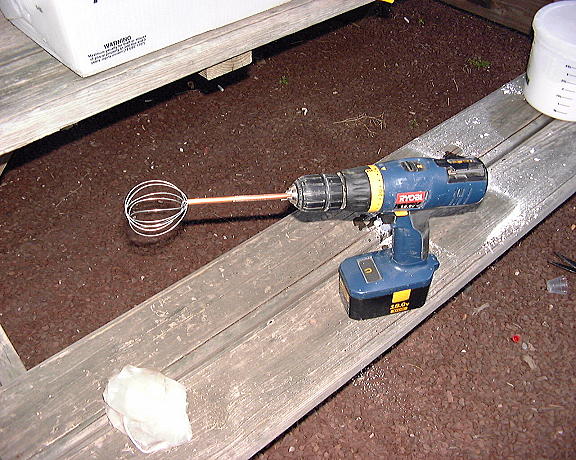
It saved the day too, as it mixed in the ATH quite easily then, not to mention it stirred the whole pot with great efficiency. I didn't have to worry about making sure the hardener was fully mixed with this rig. So with that problem solved, I began the pouring process. I brushed a coat of resin into the bottom of the mold and layed in the first fiberglass donut, careful not to get resin near my terminal holes in the bottom of the mold. More resin and another layer of glass. I set in my coils, carefully aligning the terminals into the holes, and tightened the back nuts real secure to prevent any resin from getting by. I poured up to the top of the mold and layed in two more layers of glass. On went the lid and clamps, I inserted the caulk tube, slightly tilting the mold so the caulk tube was the lowest spot, and the exit hole the highest spot, and added resin the the tube. I got lucky, and gravity was enough to force the resin in and air out of the mold. I vibrated the mold with a orbital sander to help things a long. Seen here is that set-up:

After a fairly restless night of pondering if everthing would work out OK, I was happy to see it had cured the next morning. It came out of the mold quite easily. And after a quick sanding, this is what it looked like:
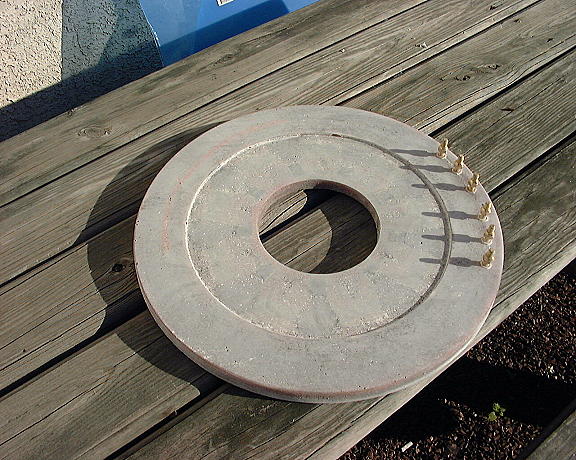
I did get a few air pockets, but nothing that would effect integrity, but me being anal, I filled them in and finished sanding it out. Final weight: 24 lbs!!!
So. . . . . that's as far as I am for now. I got to find some steel to weld up next.
