I've never liked the idea of letting a wire dangle directly from a wind generator, twisting as the wind shifts direction and requiring occasional untangling. A few weeks ago I purchased some old wincharger tower stubs at an auction ($5 each). These both had ring assemblys on them and one had the original (siezed) generator in place. They gave me an opportunity to seriously look into slip ring designs and how to get them to work in a homebrewed system.
The following is a quick look at how I used readily available plumbing parts to make a usable slip ring and brush assembly.
The parts:
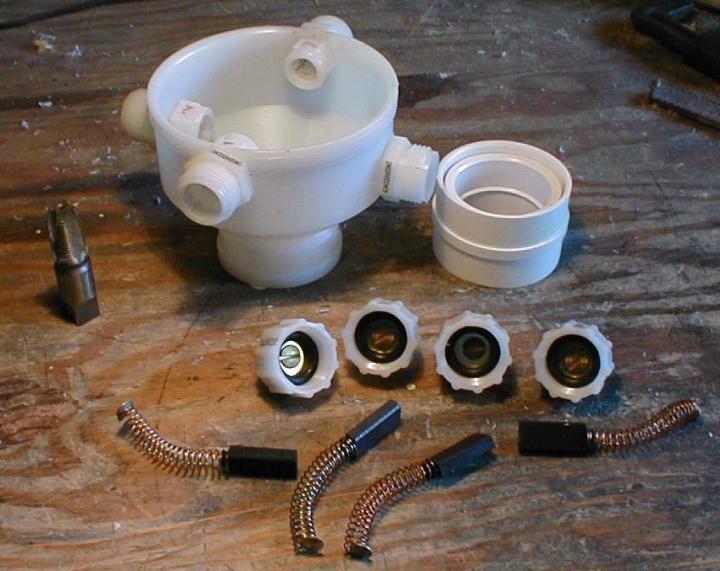
Most of the parts are shown above. All were purchased at a local hardware store. What is missing above, and shown in a photo further down, is a sheet of copper and some electrical connectors. Missing from all photos is a small brush spring holder made from a cardboard tampon inserter.
The Brush Assembly:
The largest part is a 1 1/4" (ID) to 3" (ID) plastic pipe adapter. This has holes drilled into it and threaded to accept four smaller threaded pipe adapters (not sure of the size right now, but I think it may be 3/8"ID by 3/4"ID) which are screwed into it. These are offset by ~3/4", in pairs, to match the placement of the rings.
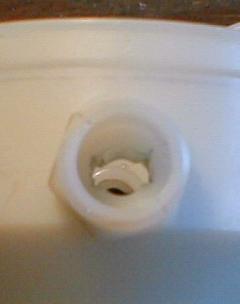
Each of these four adapters has a cap for each end. The inner cap is drilled out so as to fit the brush that will go through it. The larger, outside cap is drilled to size for a brass screw. Above you see the larger cap already assembled with brass screw, brass washer and rubber washer already in place.
The Brushes were the largest I could find at the hardware store. The smaller part of the 4 adapters is chiseled out (1/4" chisel) to fit the brush size and shape as shown below. This can be laborious, but using the brushes themselves to size the holes is a great help. The carbon on the brushes rubs of on the high spots of the slot showing you where to trim down more.
The following shows how the pieces fit together to hold the brushes against the ring assembly. It is preferable to have some kind of holder for the springs, which will flop about in the larger cap area. I used 5/8" sections of a super sized tampax applicator. These applicators consist of two concentric cardboard tubes. Using both extended allows the rather long springs to be easily placed in the caps and they slide together as the cap is tightened. The larger tube also fits snugly in the rubber washer and guides the spring end of the brush into strong, direct contact with the brass washer and screw end for a good connection. Without the spring holders, the brushes don't have a secure and consistant push against the rings.
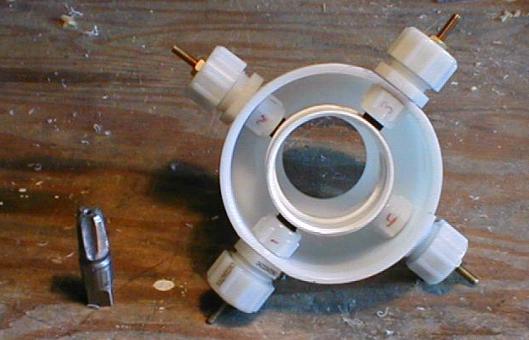
The alternator/generator leads attach to the screws on the brush assembly. The opposing brushes should be linked together so two brushes carry each side of the circuit. For a 3 phase assembly, you would need to add a ring and offset another set of brushes.

The ring assembly:
The ring assembly starts out with a plastic plumbing joint. I used a 2" ID piece and eventually glued a smaller joint inside it to reduce the inside diameter to closer fit my tower mast.
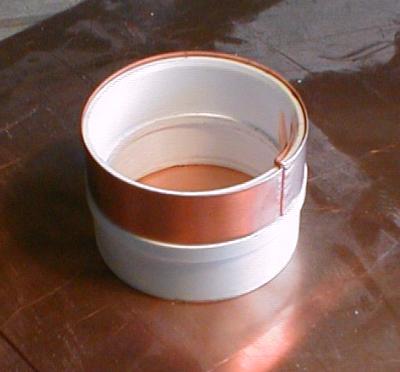
It's not necessary, but I turned slots into the outside of the joint piece so there would be a plastic ridge between the two rings. These slots and the smaller inside joint are visible in the top photo.
For the rings themselves I cut 3/4" strips of copper sheet which I wrapped around the joint piece and then glued to the joint. I used a hand saw to cut a slot in each side to accept the ends of the copper sheet. I left about an inch extra length on each side of the copper strip after pulling it tight through the slots. I then cut shorter copper strips and bent them in half fitting them over the existing extra lengths of ring inside the joint piece. These become the attachment points for the wire going down the tower. The upper attachment strips are longer and to the full length of the joint plus an inch or two. I filed down the inner ridge of the joint where this longer strip goes through. Inserting the smaller joint exerts a clamping force on these strips and some epoxy makes it permanent.
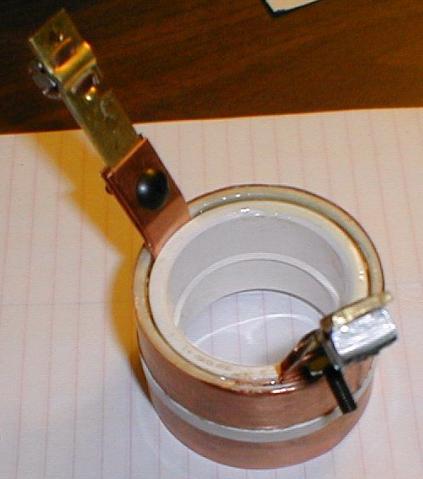
On the ends of these strips I attached some brass electrical connectors. This adds rigidity to the strips so they don't short out against the tower or an opposing ring. I angled these out for the same reason.

This whole excersize was to to get a good connection for my peculiar wind turbine setup. The top (smaller) end of the brush assembly attaches to my wind generator. The ring assembly attaches to the mast of my tower, a Rohn 25G. I think this basic concept can be used all sorts of places for an inexpensive rotating power takeoff with just enough modification to fit the existing application.
