One drawback to some of the best plans available for wind generators is a requirement for welding. I agree that this is a great way to build a sturdy platform, but many of us don't have the required tools or skills to pull it off. I've puzzled over the problem for a while now and this weekend I put some form to some of my ideas.
The idea is to create a side furling mechanism using readily available parts without having to resort to welding. Furthermore, I wanted something adjustable since I wanted to experiment with getting the right angles. The readily available parts are 1 1/4" black water pipe 45 degree and 90 degree elbows, two "T" joints, some reducers (1 1/4" to 1/2"), a 3/8"x6" black pipe with caps and a few 1/4" bolts. The tail boom is 4 feet of 3/4" square tube and there is some 1/8"x3/4" flat galvanized bar stock.
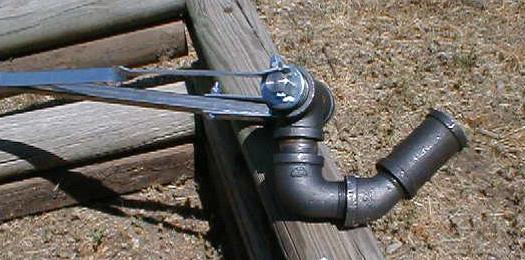
The first view shows how it looks from above. This shows the positions of the 45 and 90 degree elbows. Note that none of these photos show the 1/4" bolts inserted through the joints required to keep them from unscrewing from the weight of the tail.
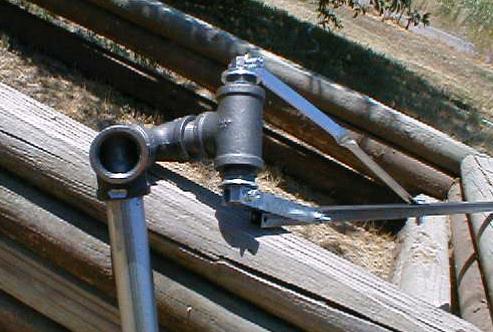
The next view is from the side where the generator attaches to the hole on the left of the photo. I use a floor flange for this... I'll try later to get some photos of the whole assembly. My camera was low on batteries this weekend.
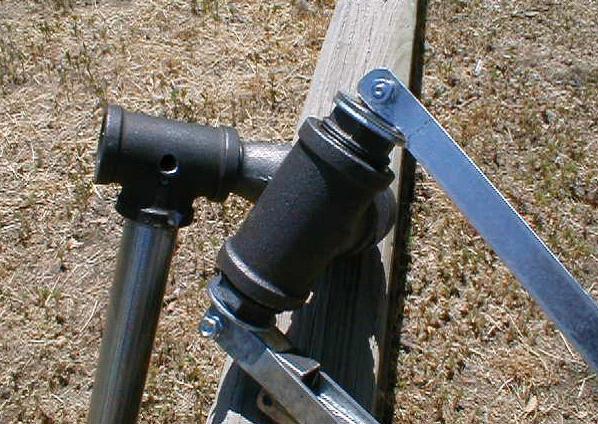
Here is a close up of the bearing assembly. It's a 1 1/4" T pipe with reducers at each end to reduce the opening for a 1/2" pipe. This fits a 3/8" pipe quite nicely. A few 5/8" washers give it a larger bearing surface and reduces slop. Holes drilled through the caps allow 1/4" bolt connections to bar stock which holds the tail boom. The bar stock is twisted to give the tail it's vertical orientation. The hole drilled in the main "T" is intended for a thin nylon rope which can be used to pull the tail in a locked furled position. The smooth bearing surface isn't in place in the photo.
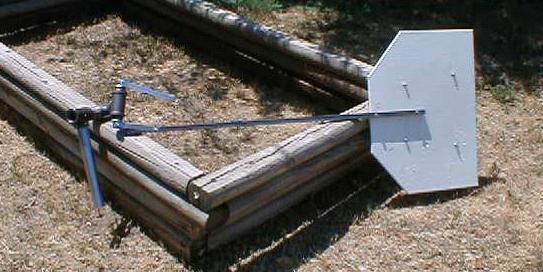
And finally the whole thing showing the tail. The bolts locking the joints into position are not shown on any of these photos. I did that after the camera batteries gave out. It's easy to envision though. Each joint has a 1/4" hole drilled completely through the large collar and a 1/4" bolt is inserted through it with a lock washer and bolt. Super glue or locktite finishes the locking of the joints. I didn't get a chance to raise the unit yet as the new blades haven't been balanced yet and I wanted to beef up my tower raising gear first. More to follow...
