Having finally got the workshop into some sort of order ready for starting work on the usual never ending list of projects, it was time to think about winding some coils for the small induction motor conversion I had started.
The original idea was to wind the coils for a battery voltage of 12 to suit the system I am running at the moment. However, after Xmas I will finally be able to afford the 24 volt battery bank that I have been working towards and so now the coils will be wound for a cut-in voltage of 26 volts at 200 rpm with the coils connected in 'star'. I thought that if this genny actually gets in the air before the new batteries arrive, I could still use it with the 12 volt system by connecting the coils in 'delta' which will give a lower voltage output at higher current.
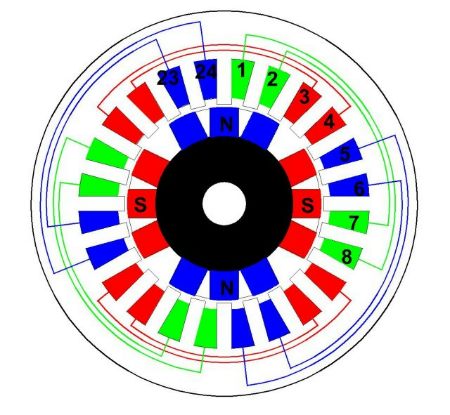
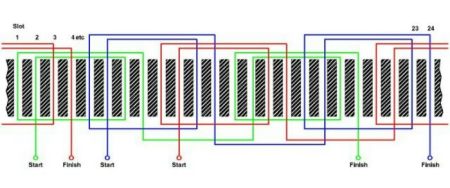
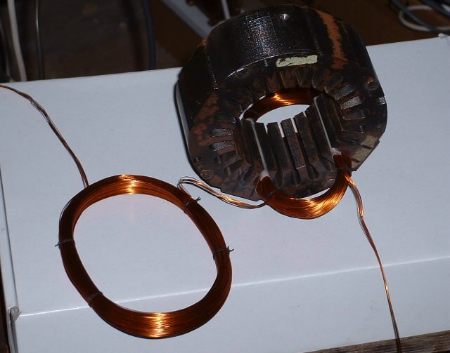
The stator of the motor has 24 slots and the rotor has 4 magnet poles. This gives a coil arrangement of two coil sets per phase, each coil set consisting of two concentric coils. All 4 coils connected in series:
I had already done a volts per turn test with a test winding. This gave an output of 0.00045 volts per turn per rpm (DC in star). So for 26 volts at 200 rpm the total turns per phase should be 26 divided by (0.00045 times 200) = 289. There will be a total of 4 coils per phase so each coil should have 72.2 turns. I rounded this up to 75 turns per coil to be on the safe side.
I then had to choose some suitable wire. I had a couple of reels of 0.8mm wire but this would have been too big to get the required number of turns in the stator slots. I had one reel of 0.71mm which would have been about right but there wasn't enough to make all the coils and I did not want to buy any more at this time. However, I did have a large quantity of 0.315mm wire that I had 'acquired' so I decided to use this. I worked out that if I used 6 wires in parallel this would have about the same resistance as 0.8mm. I also thought that the coils would be more flexible which might help getting them into the stator slots.
It was decided to make a former for the coils based on the pictures posted by Zubbly which would enable both coils of each coil set to be wound at once.
I did not intend to make this coil former 're-usable' as it would be very easy to make similar formers for other projects. The wood used was cheap pine which did not cut very cleanly but the finished result was perfectly adequate.
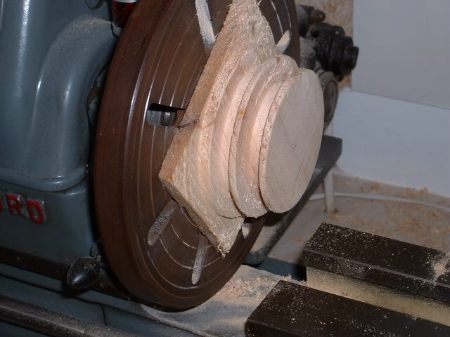
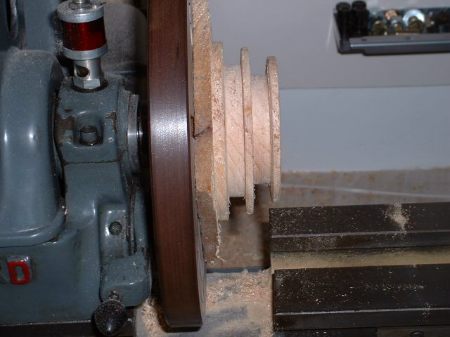
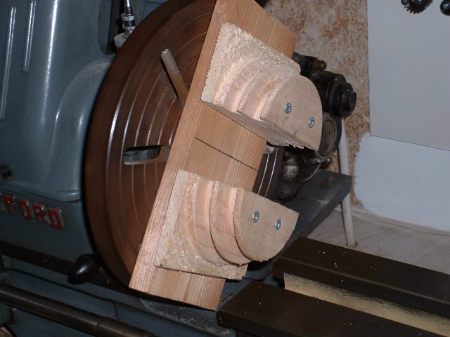
A suitable square blank was screwed to the lathe faceplate and turned down to give two grooves side by side, the diameter of the grooves being equal to the span of the coils:
The former was then cut in half and the two pieces screwed to a backing strip which was again fastened to the faceplate ready for winding the coils. The 'ends' were spaced apart to give the straight part of the coil to go in the stator slots.
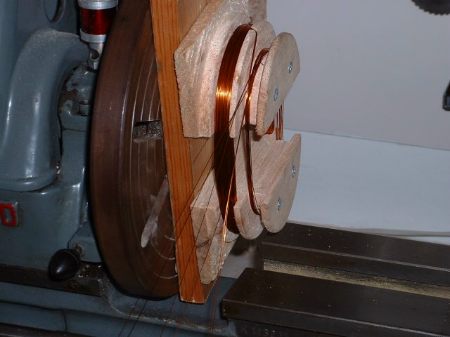
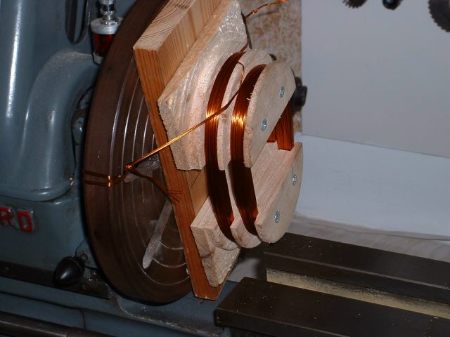
A bit of time was then spent winding some of the 0.315mm wire onto separate spools so that all six wires could be wound on the former at the same time. 75 turns were then wound onto the larger former and another 75 on the smaller. The former was turned by hand rather than use the lathe motor but even so it did not take long at all to wind both coils.
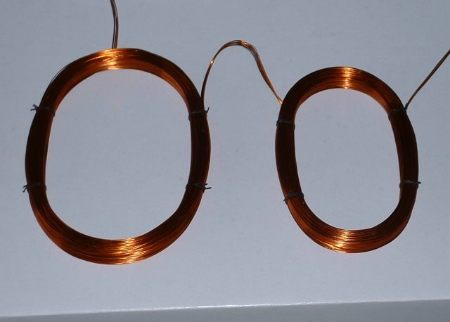
The sides of the coils were tied with waxed cotton to hold them together and the coils removed by unscrewing one of the former ends.
The next stage was to fit the new coils into the stator. The original slot insulation had been damaged by excess heat so new insulation was cut from OHP film which is quite thin and surprisingly tough. This was fitted into the slots. Then the fun started. I found it really difficult to get the windings through the small gap at the top of the stator slots. Eventually I cut two strips of the same OHP film, put these either side of the slot and used these to guide the thin wire into the slot. They also protected the wire from damage on the slot edges. Probably it didn't help having so many thin windings but after much muttering and cursing I finally got the first coil into place. The original coil wedges were still usable and these were refitted to hold the new coil in place.
The second coil was a little easier as it is a bit larger and eventually this was in place and secured with with wedges.

I am sure this process is a lot easier with larger motors due to the wider slots and bigger diameter stators. Perhaps I'm doing something wrong?
Anyway, that's it for now. The other 5 coil sets have been wound and await fitting into the stator. Have to wait for my patience to return first though!
John
