Author Topic: A mini motor for a mini mill  (Read 914 times)

0 Members and 1 Guest are viewing this topic.

maker of toys

  • Full Member
  • ***
  • Posts: 221
A mini motor for a mini mill
« on: November 29, 2005, 02:09:29 AM »
So I got to thinking about ghurd and Zubbly when this crossed my bench at work;  seems like an ideal candidate for a conversion sized to about a 2' diameter prop.


P/N: C25CHY-1 (yes, that's a penny there in the photo.)


they're rated for 115V, 1 ph, 60 cycle, 1000 RPM, 0.07 A  (thats not a typo) They're made by 'Eastern Air Devices', and run quite happily on 1 phase with a 1uF cap on the third leg. As far as I can tell, the windings are actually 3 phase, despite what the nameplate says.


the bearings are a couple of 608Z units; the rotor isn't much bigger in diameter.  The windings look like about #36 wire; I wasn't patient enough to try and count the turns.  The case is finned aluminum TENV, but I wouldn't call them completely weathertight; some good tape would probably fix that.  I can't wait for one to eat itself so i can do some experiments. . . <G>


 I checked the website: http://www.eadmotors.com


and this jewel is about the middle of the line; a 'size 25'.  they sell them all the way down to size 10.  (you won't find this exact unit in the catalog; it's had some special treatment. . .)


-Dan

« Last Edit: November 29, 2005, 02:09:29 AM by (unknown) »

ghurd

  • Super Hero Member Plus
  • *******
  • Posts: 8059
Re: A mini motor for a mini mill
« Reply #1 on: November 29, 2005, 08:08:42 AM »
Too easy!

Big fun!


The ones about like that I did have 2 sets of windings, start and run.

The wires are too small to seperate... for me.

I only seperated the starts from the runs.


Test the lead to lead ohms, say 50, 100, and 150 ohms.

The 150 ohm reading is from a single end of both sets (red to blue?)


The other (black probably?) goes to both windings, 50 ohms to one wire, 100 ohms to the other. About like a center tap.

Carefully snip string and paper to find the end of the end where it is connected to 2 wires. Cut only one. Add an output wire to the coil wire just cut loose.

Now there are 4 output wires, 2 seperate phases, to be rectified seperately.


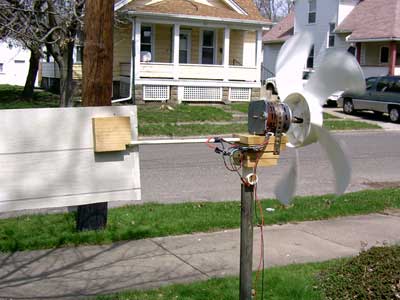
Turn or machine the armature for 6 magnets, N-S-N-S-N-S.

Do somekind of decogging measure, because it'll cog!

Don't glue the magnets down until the cogging is fixed.


A 2 liter bottle cut flat and twisted like a funnel helps get the rotor in without damage.


Expect some extreme voltage (over 100VAC) at low RPMs, but a very low amps.


G-

« Last Edit: November 29, 2005, 08:08:42 AM by ghurd »
www.ghurd.info<<<-----Information on my Controller