Author Topic: Inexpensive wind mill  (Read 6776 times)

0 Members and 1 Guest are viewing this topic.

GeeMac

  • Full Member
  • ***
  • Posts: 230
Inexpensive wind mill
« on: November 07, 2007, 10:02:50 PM »
If you're on a pension and you like to tinker as I do, you might enjoy this story. The first thing I did was to set the goal: Make the cheapest windmill I could.

I used some PVC pipe, a can of diced tomatoes, a can of bondo, sixteen neodynam magnets, some glue, some magnet wire, a couple of half inch bearings from UFA and three pullies.


Right up front I want to say that this is not a powerful windmill that will power your house. It's just a good place to begin if you want to get into alternative energy.


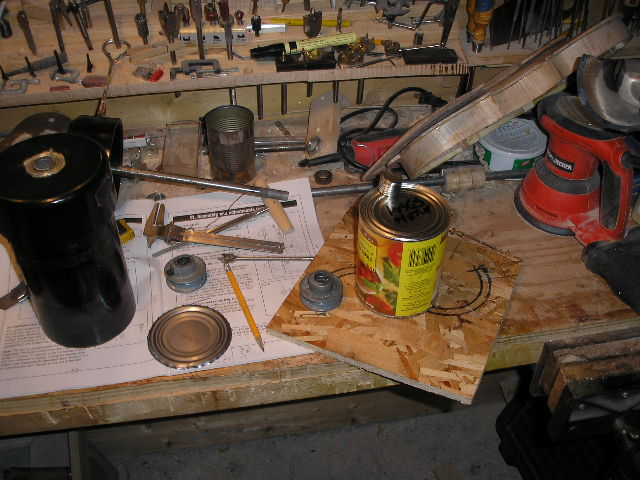
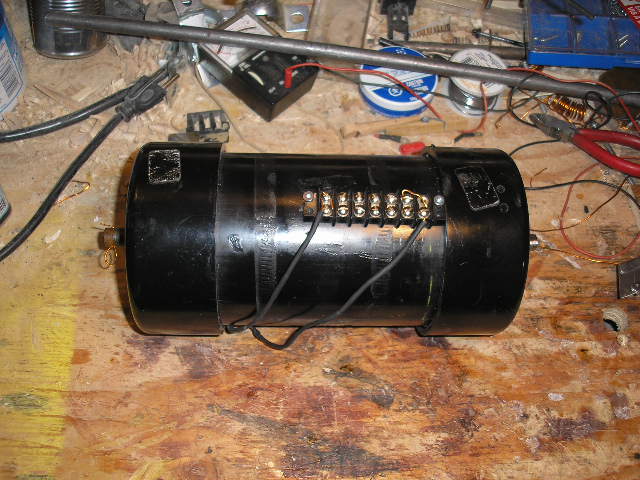
Above you can see the tomato can which by sheer luck I discovered was precicely the size needed to fit inside the capped 4 inch PVC pipe to the left. I have installed the bearings in the center of the caps. Some of the magnets used are on the tomato can.


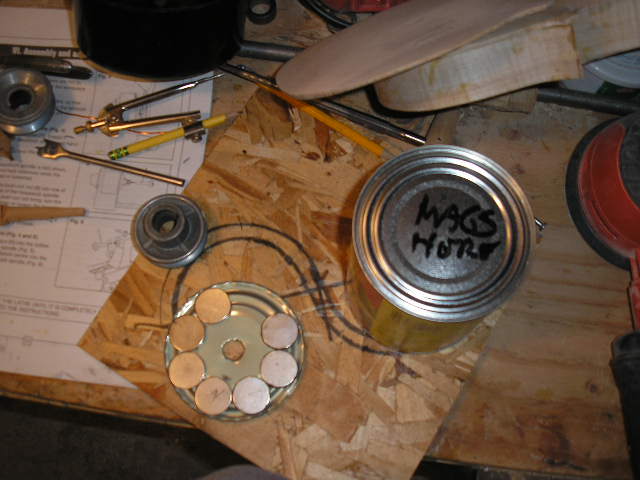
Above you can see the magnets are being positioned on the tomato can lid. Later they will be glued in place with silcone. The magnet orientation is NSNSNSNS on each lid


Above a small pulley is glued into place on the other side of the lid.


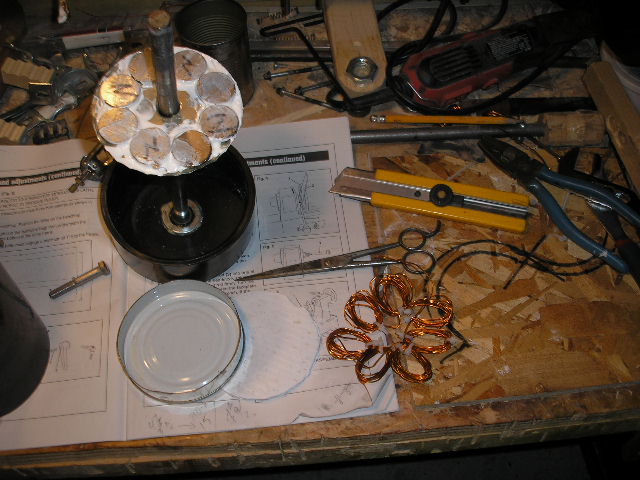
In this picture you can see the cound coils for the stater. We`ll use the bottom half inch of the tomato can for this. Also seen are the magnets glued to the can lid and placed onto the windmill`s propeller shaft.


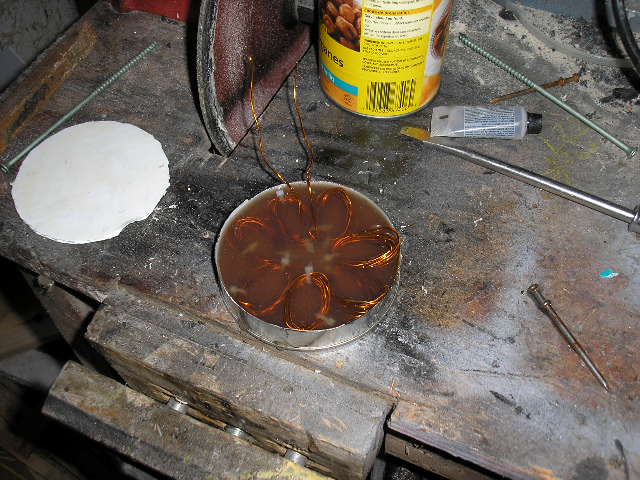
Above is the begining pour of the stater components in the bottom bit of the tomato can.


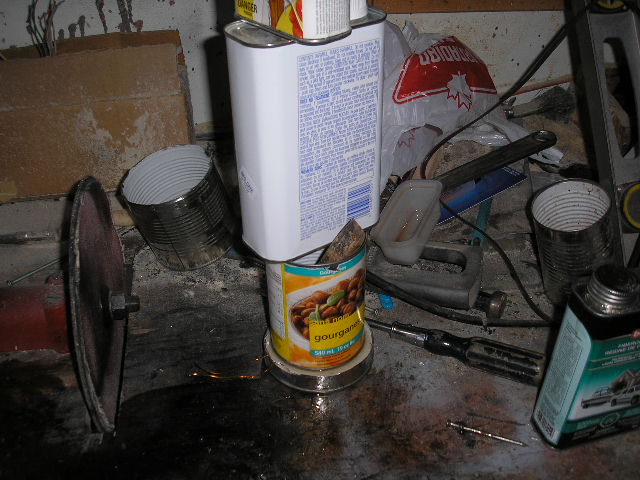
Above is the squeezing down of the stator and its coil while the bondo sets. After that the center of the stater gets drilled out and it is placed on the propeller shaft


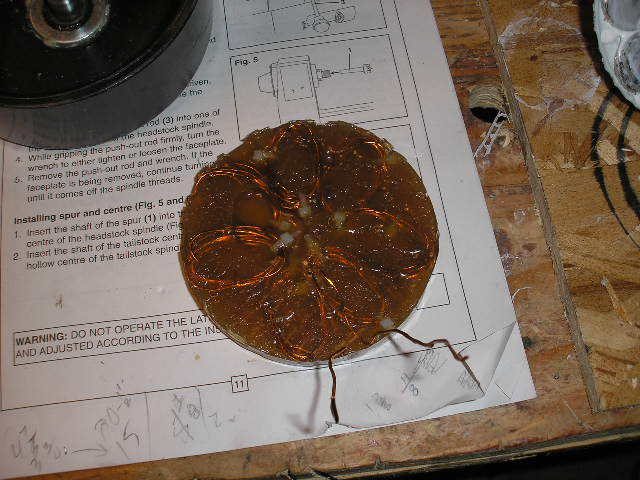
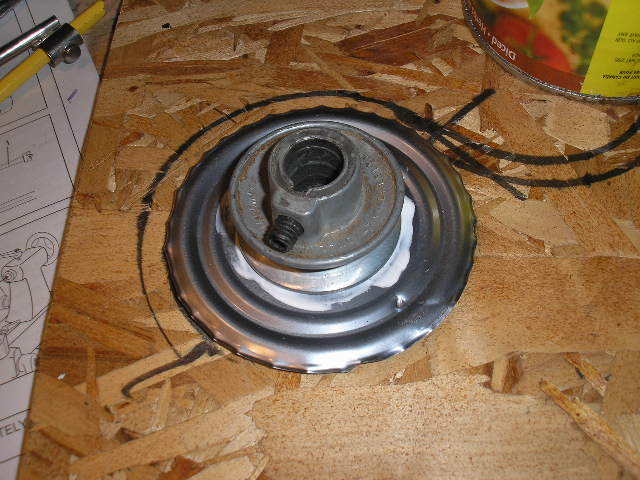
Here`s the stator. A bit of sanding and center hole and it`s ready.


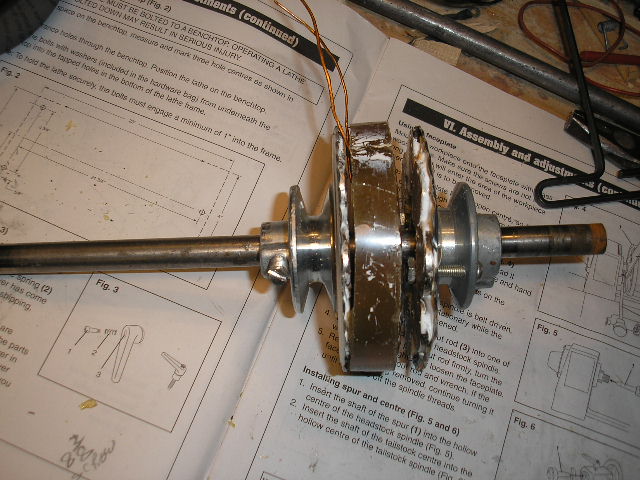
Above is the stator positioned between the two can lids with magnets attached.


The finished nacel ready to have the prop attached and to be mounted on the windmill base.


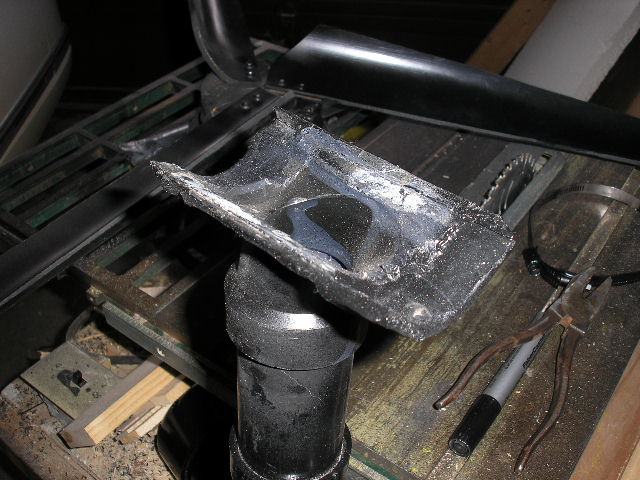
Here is the mount for the nacel. It was a pvc joint but I cut it in half, heated it and bent out the sides to fit the larger piece of pipe. Then is gets glued into place with PVC pipe glue and then two hose clamps are added to make sure it`s solid.


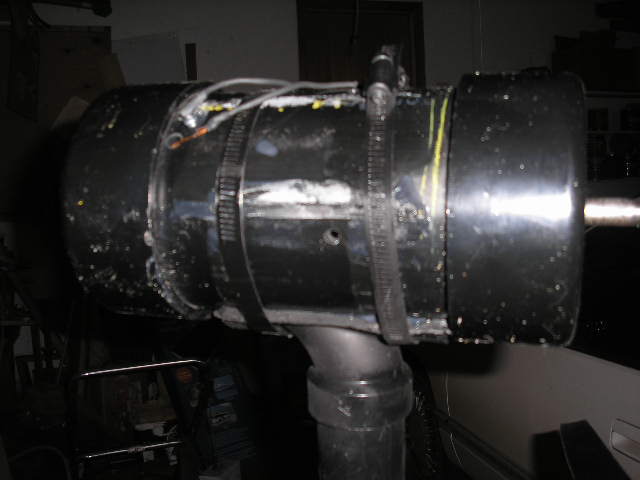
Here you can see the hose clamps, the leads etc.


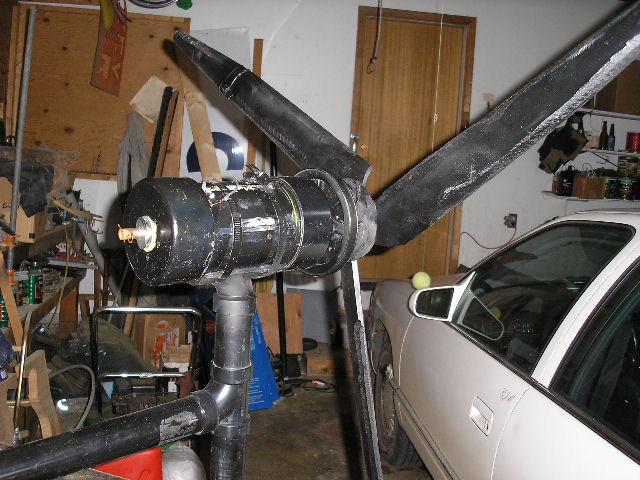
Above the prop is installed and the windmill is ready to raise up the pole. The pole is also PVC that is one size larger than the windmill PVC so that the windmill pipe will fit inside the pole.


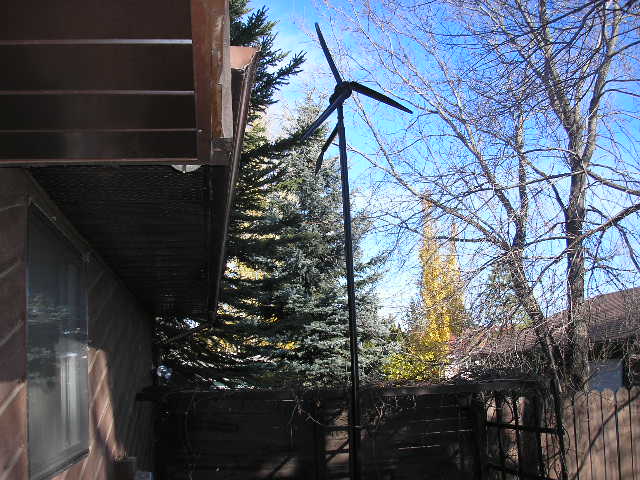
Here is the mill up the pole waiting for a gust of wind. I haven`t tested the output yet, but I don`t expect too much considering the size of the stator and magnet brackets.  But a lot of power is not my goal here. I just wanted to see how cheaply I could get one running here in the burbs. About sixty bucks is what I spent.


However, if one was to extend the nacel to three feet, a person could put several of the can lids and stators in the pipe and perhaps produce a repectable output. All in all, I had some enjoyment and I like that.

« Last Edit: November 07, 2007, 10:02:50 PM by (unknown) »

DanB

  • Global Moderator
  • SuperHero Member
  • *****
  • Posts: 2153
  • Country: us
    • otherpower.com
Re: Inexpensive wind mill
« Reply #1 on: November 07, 2007, 03:12:39 PM »
Fun stuff... thank you for sharing that neat little project.


lots of room for improvement.  You'd get more power for very little more cost if you:  - put a bit of space between the magnets and probably make the coils a touch larger. (maybe use the next size can lid and get a bit more diameter)


  • have much thicker steel than can lids behind the magnets.  The can lid is so thin it does almost nothing for you.  Perhaps stack about 10 can lids and you might almost double the flux through the coils
  • the stator looks really thick.  I try to keep it about the thickness of the magnet.
  • what you've got looks like it could actually make a bit of power, although I think your blades are much too large for the alternator.


Be fun to hear your next report when you measure its output.
« Last Edit: November 07, 2007, 03:12:39 PM by DanB »
If I ever figure out what's in the box then maybe I can think outside of it.

hiker

  • Hero Member
  • *****
  • Posts: 1661
  • BIG DOG
Re: Inexpensive wind mill
« Reply #2 on: November 07, 2007, 03:39:08 PM »
nice little mill...i only see 7 coils?--and 8mags..

if its single phase you should have 8 coils also...

or are there more coils buried in there in some kind of 3 phase set up ??  :}
« Last Edit: November 07, 2007, 03:39:08 PM by hiker »
WILD in ALASKA

GeeMac

  • Full Member
  • ***
  • Posts: 230
Re: Inexpensive wind mill
« Reply #3 on: November 07, 2007, 04:11:58 PM »
I guess I better eat more tomatoes. ;-)  Thanks for the ideas. I'll get to work on them as I only expect a few milliamps from this thing. I've got an idea for a vawt to try out too.
« Last Edit: November 07, 2007, 04:11:58 PM by GeeMac »

motoman465

  • Full Member
  • ***
  • Posts: 119
Re: Inexpensive wind mill
« Reply #4 on: November 07, 2007, 06:51:31 PM »
I love it!  That is really cool how you incorporated such ordinary items to build this.  Awesome job, looking forward to seeing more.


Todd

« Last Edit: November 07, 2007, 06:51:31 PM by motoman465 »

Woofer

  • Newbie
  • *
  • Posts: 5
Re: Inexpensive wind mill
« Reply #5 on: November 08, 2007, 12:27:15 AM »
It is 8 magnets and 7 coils

what design did you base that on? How did you Wire the stator?

I don't see how you will be able to wire it to produce power

unless it is 7 phase, It would do better I think that way but would need 7 Bridge Rectifiers. Good Luck . . .
« Last Edit: November 08, 2007, 12:27:15 AM by Woofer »

GeeMac

  • Full Member
  • ***
  • Posts: 230
Re: Inexpensive wind mill
« Reply #6 on: November 08, 2007, 10:15:35 AM »
Being a neophite, I'm not too worried about output yet. I'll bear down on the wiring in the next one. (Can you tell that I like building these things?)
« Last Edit: November 08, 2007, 10:15:35 AM by GeeMac »

GeeMac

  • Full Member
  • ***
  • Posts: 230
Re: Inexpensive wind mill
« Reply #7 on: November 08, 2007, 10:21:40 AM »
Here is an idea I have been thinking about.  It'll be fun seeing what I can get out of it.


In the drawing, the number of coils and magnets are only randomly drawn to fit the idea. As they say, 'not exactly as shown'

« Last Edit: November 08, 2007, 10:21:40 AM by GeeMac »

Bruce S

  • Global Moderator
  • Super Hero Member Plus
  • *****
  • Posts: 5422
  • Country: us
  • USA
Re: Inexpensive wind mill
« Reply #8 on: November 08, 2007, 11:05:16 AM »
GeeMac;

  This too is something I would like to try, but since I have more than 200 ceramic mags to play with.... I am planning on trying out a #10 can size, along with using it as a VAWT, since the city doesn't allow 'mills up where they will do real work.


The one you posted is really cool.

Is it still up and pushing electrons around:-)?


Cheers and keep up the pretty work.


Bruce S


« Last Edit: November 08, 2007, 11:05:16 AM by Bruce S »
A kind word often goes unsaid BUT never goes unheard

GeeMac

  • Full Member
  • ***
  • Posts: 230
Re: Inexpensive wind mill
« Reply #9 on: November 09, 2007, 02:05:56 PM »
After some good advice from the masters of wind and sun, I have reworked and re-poured the stator for a 3 phase operation. Here's a picture of it.


Next I'll go to work on the magnet holder thingies. A.K.A. Doodads.


Carry on having fun.

« Last Edit: November 09, 2007, 02:05:56 PM by GeeMac »

TheCasualTraveler

  • Sr. Member
  • ****
  • Posts: 404
Re: Inexpensive wind mill
« Reply #10 on: November 09, 2007, 03:10:28 PM »
Neat. I like it. I want to make one also for the first time and putting the cart in front of the horse, I bought the magnets first and plan to design the gen around them. So if I could borrow your masters of the wind and sun for some more advice...

Using 8 NdFeB Block, 1 in. x 1/2 in. x 1/4 in. magnets, what setup would you guru's use for a? Would I use the same coil setup as GeeMac? I also don't plan to go off grid with it but want it more for the practice.
« Last Edit: November 09, 2007, 03:10:28 PM by TheCasualTraveler »

GeeMac

  • Full Member
  • ***
  • Posts: 230
Re: Inexpensive wind mill
« Reply #11 on: November 09, 2007, 04:17:55 PM »
I have learned that 8 is not a good number for a 3 phase set up. I have added a couple of coils to my latest stator, pictured above. The coils are now 9. I wound them around a felt tip pen instead of a broom handle, which I used the first time. Doing that geve me the room for 9.


Next I'll take down the wind mill and add one more magnet to the mix so that I have 9 magnets for 9 coils. If that gives me trouble, I'll back off to six magnets punching on then 9 coils.  


I'll also discard the can lids and grind down some thicker steel plate to use instead. The reasons for making these adjustments is in the comments above.

« Last Edit: November 09, 2007, 04:17:55 PM by GeeMac »

hiker

  • Hero Member
  • *****
  • Posts: 1661
  • BIG DOG
Re: Inexpensive wind mill
« Reply #12 on: November 11, 2007, 07:52:24 PM »
geemac..

now you need 12 mags to go with your 9 coils for 3 phase--3 coils per phase...

might want to search the board a bit..

or just drop a email if you need some help.........................
« Last Edit: November 11, 2007, 07:52:24 PM by hiker »
WILD in ALASKA

GeeMac

  • Full Member
  • ***
  • Posts: 230
Re: Inexpensive wind mill
« Reply #13 on: November 14, 2007, 07:26:52 AM »
14 November 2007 - Wind milling in the suburbs continues. I have reduced the number of magnets to 6, got rid of the tin can lids and replaced them with a thicker piece of steel.  It was easier for me to remove the front of the nacel and, using my table saw, carefully cut a slot on each side of the front of the unit. Doing that made installing the generator parts much easier as the wires now can be slid into position instead of threaded through a predrilled hole. Once it was assembled I put a meter on it and gave it a spin. The needle jumped. I grinned. I managed to come up with the two required bridge rectifiers and checking and rechecking, I soldered the wiring together and installed it in a small waterproof electronics box. Also, while the mill was down, I used the opportunity to make a larger tail piece. Then I raised the windmill again. It was a blustery day with winds from the south east at fifty kmh (about 30 mph). The unit snapped around and began to spin. I could hardly go fast enough so I could put a meter on to see what the output would be . . . but this is where fate's fickle finger entered the picture. Not five minutes had passed, after putting up the mill, and the wind died down to practically nothing.  The forecast for today calls for thirty kmh winds. Well, maybe there will be a few gusts to help me see what she'll do.


                                     [30]

« Last Edit: November 14, 2007, 07:26:52 AM by GeeMac »

GeeMac

  • Full Member
  • ***
  • Posts: 230
Re: Inexpensive wind mill
« Reply #14 on: November 14, 2007, 03:27:19 PM »
I think I had better mention that if you decide to cast(mold) a stator in the bottom of a tin can lid, it's a good idea to rub a drop or two of extra virgin olive oil into the mold before you pour in the resin.
« Last Edit: November 14, 2007, 03:27:19 PM by GeeMac »

GeeMac

  • Full Member
  • ***
  • Posts: 230
Re: Inexpensive wind mill
« Reply #15 on: November 18, 2007, 07:18:16 AM »
Three days have passed and still no wind.  This morning there is snow.
« Last Edit: November 18, 2007, 07:18:16 AM by GeeMac »

hayfarmer

  • Guest
Re: Inexpensive wind mill
« Reply #16 on: February 16, 2011, 09:19:44 AM »
I think I had better mention that if you decide to cast(mold) a stator in the bottom of a tin can lid, it's a good idea to rub a drop or two of extra virgin olive oil into the mold before you pour in the resin.

emeril would add jalapeno pepper "BAM" kick it up a notch!  ;) very cool,nice starter system to tinker with,what is the final design and results?is there a starter kit a kid could

experiment building a mill? recipe book maybe?   ;D

I bet this guy's mill undercut your cost:


hayfarmer
« Last Edit: February 16, 2011, 09:22:38 AM by hayfarmer »