First of all the basic package:
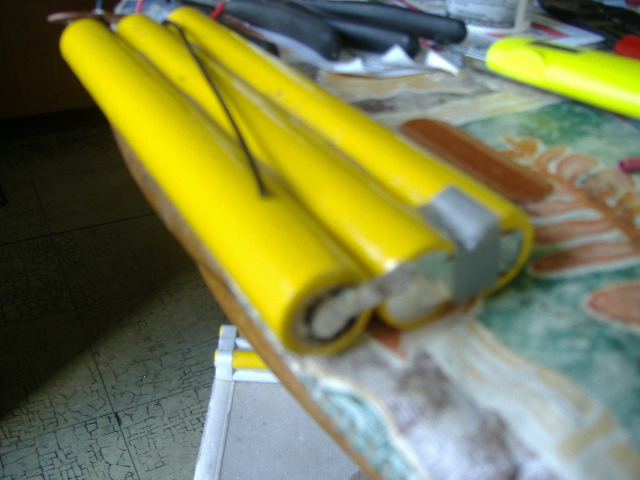
taking the yellow wrapper off, then cutting
everything loose you're left with these three
sticks and the spot welded tabs that the wires
were attached to.
Each stick is 6 volts, the two sticks to your
right are in series makig 12 volts at the other
end. The one to your left is to be removed....
The easiest way to do this is to stick it in
freezer for about an hour. It will seperate from
the others quite easily and taking a table knife
will strip the excess glue strips.
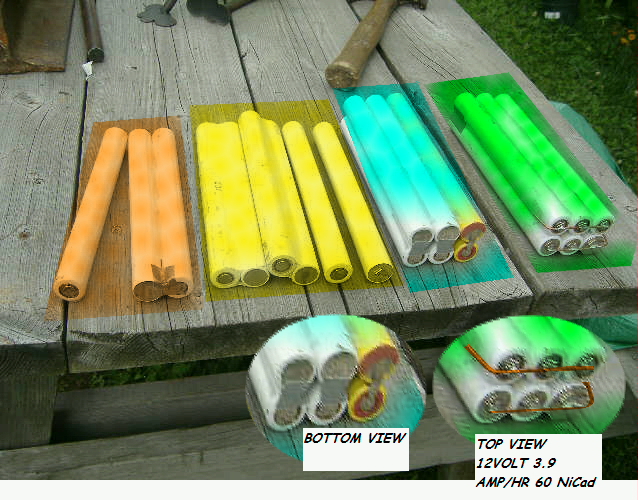
Leaving you with like in the orange hi-lighted,
after you have done another one like this,
you will have 2 double sticks and 2 single sticks,
Now if you work it right the tabs on a positve
terminal and the negative shell will be long
enough to overlap and be soldered making this
also a 12volt.
The bottom view of the soldered tabs will look
like the 2 yellow sticks in bottom view.
Now you have 3 double sticks...arange them so
they look like bottom view (positive at bottom
negative at top) and glue them all together with
hot glue...not guaranteed that they will stay
together so we wrap strapping tape around...top
and bottom....the tape holds them together and
the glue keeps them from shifting.
Flipping them so we have top view, they then
have soldered 14 guage wire soldered to the tabs
....paralleling the 3 12 volt sticks making a
12 volt 3.9 amp/hr unit.
Leaving a little wire sticking over like in
hi-lighted green view....then you stack a few of
these units with the positive wires on one side
and the negative wires on the other side, you
can then solder a buss-wire onto them to parallel
the units......maybe 12 guage will be heavy enough.
Making a box with 1/2 inch plywood for ends and
bottom of the box and clipboard or 1/4 inch
plywood for the sides....I used clipboards cause
they were easier to get at Walmarts than plywood
at Lowes....
....a nice carrying strap glued and screwed to
the ends and I wound up with this....
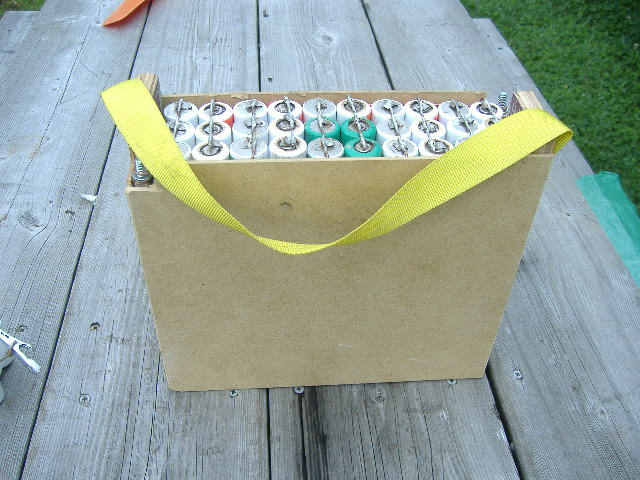
(Oh Yes and notched ends at diagonal opposite
corners for the terminal bolts)
