Lofty, since you did not mention solar power, I do not believe you require a MPPT or a multi-stage charge controller incorporating PWM. The unfiltered rectified AC produces a nice pulsing-DC required for proper charging of lead-acid batteries.
If you wish to dual charge the existing battery bank, you should ensure the hydro system was designed for the same charge voltage as the wind system ( i.e. 12v, 24v, 48v... battery bank) and that the existing charge controller can handle the combined maximum current produced by the wind and hydro alternators. Also, integration of multiple systems is made after the rectification stage. i.e The DC side of the two systems are connected in parallel.
You can build a relatively simple charge controller for the near-constant power delivered from the proposed hydro system to charge a separate battery bank, or the existing wind turbine battery bank.
For the hydro system, you will need a rectification stage before the simple charge controller. There is plenty if information on this board if this stage is not already completed.
Keep in mind, for longevity, the battery banks will require periodic maintenance including equalizing and de-sulfating. There is lots of info on these subjects found on this board, as well.
Your assumptions are correct; you need to have some way of shunting power to a dump load after the battery bank is fully charged. Also, the 240v charger mentioned will not work with the variable AC produced from the turbine.
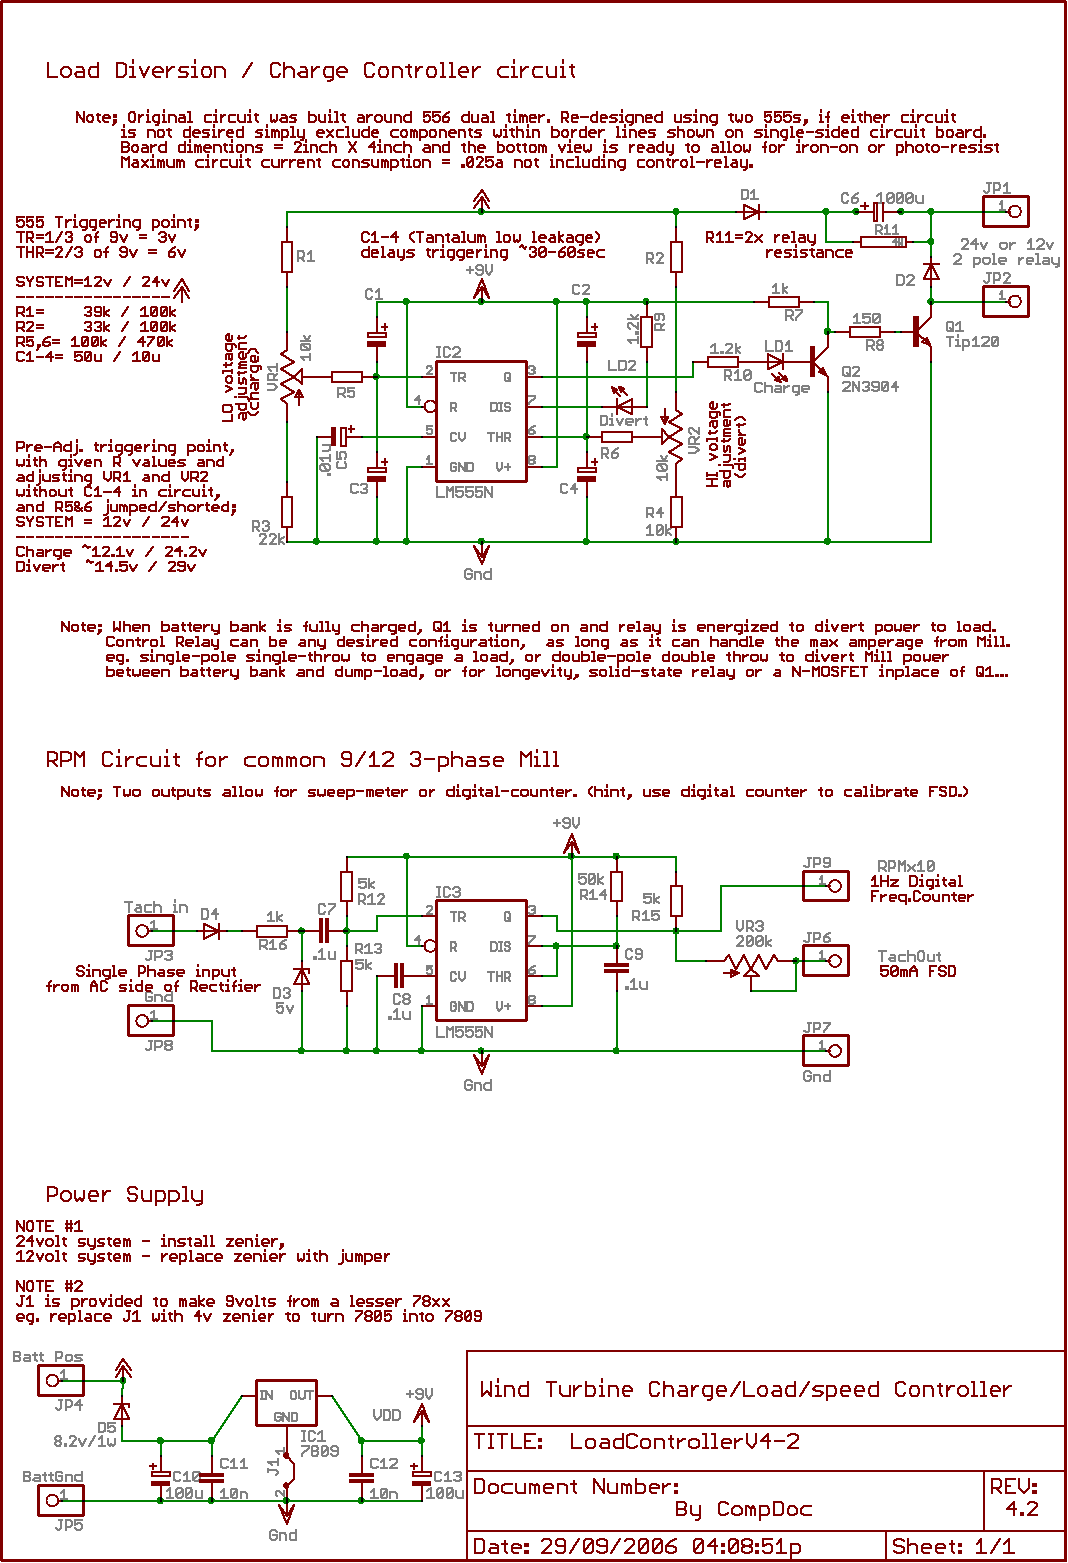
In my files you will find the simplest charge controller (that has excellent stability and reliability) that you can build for just a few dollars. The controller also includes an optional circuit for reporting RPM/speed of the alternator.
If you decide to build this controller, you will need a suitable dump load, or preferably, a diversion circuit to a water heater... the hydro system should produce a fairly constant supply of power that would be a shame to waste.
This controller is designed to fit on a 2x4inch single sided PCB with only two jumpers, designated by square pads. This makes it easy for beginners and DIYSers.
Hint's for adjusting the Charge-voltage and Divert-voltage (dump). When assembling the controller, do not install C1-4 until after initial adjustments. Make initial adjustments with trim potentiometers to desired triggering voltages at the timer pins 2 and 6 with R5 and 6 shorted with a jumper. This will get you close to target voltages without the triggering-delay introduced by C1-4 and R5-6. Use a good digital volt meter when making measurements. Remove jumpers from R5 and 6 and then install capacitors to make final adjustments, pausing to allow time for the trigger-delays to expire.
Place a momentary push-button switch between Pin2 of the Controllers 555 and ground. This will allow you to force the circuit into `charge mode' on demand.
Cheers!