Thanks for the comments and compliments friends! You gave me alot of Info. to chew on. Yes this is a down-sized single phase dual rotor axial flux PMA copied in principle from the big boys. I thought I better make a small one first to learn things and then make a bigger one. And I HAVE learned ALOT. I am already working on the bigger one- hopes it will do up to 500watts and 8ft rotor.(I got about 6 lbs N40 mags compared to the 7oz. of mags on this little Pete Prototype)
Nevertheless, I was incorrect on a figure last night. As Ghurd pointed out the voltage did drop more than I thought when testing on the treadmill motor. I failed to take both measurements at same time. Today i did, and the more pressure I put on the shaft of the treadmill the more the amps when up, but the more the voltage went down. As flux said, when I stopped the treadmill completely with my foot, I got about 1.2 amps but only 6 volts. The voltage dropped from 18 to 6. It is just so very difficult to believe that only 8 or 10 watts is causing that much torque in the treadmill motor! It feels like about 50 watts! I apologise for the mistake.
When I tested into the batteries last night my batts were fully charged. I don't know if this makes a difference. I believe I only got 8 watts @500rpm. I took some energy out of the batteries (about 5-10%)- and then did test--The alternator was putting 8.5 watts back in them. I will try to discharge more and do more tests.
I will do what Flux said with making the 3 blades (4ft) at about 7tsr and see what happens soon. I already got the pole up. I will make it furl at about 20 or 30 watts , if it'll go that high. Wait and see. Your comments have helped me at this point. I really wanted to get this little prototype in the air cause my bigger dual rotor alternator may not be ready for a couple of months and the wind has been AWESOME around here in Ohio this winter. (but almost nothing in summer!)
Anyway, here are a few more pics of this tiny prototype. I took many pictures of the whole process. These are just a few. Later I will display them all and the processes, including my bigger downwind alternator, to possibly help others and give some ideas. -Thanks guys
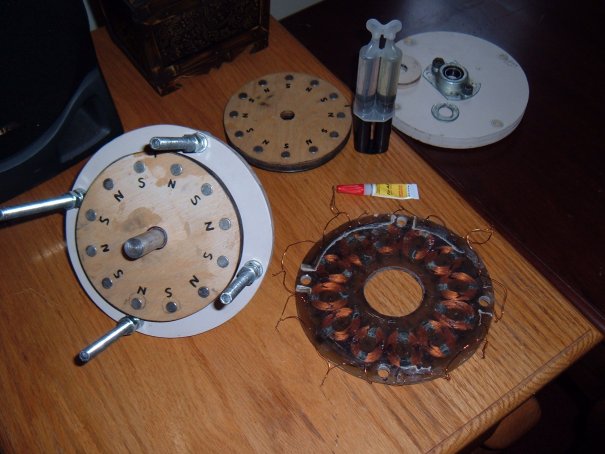
The Stator was pretty easy to make. I simply used plywood-cut out the radius, and used wax paper inbetween. It is perfectly flat and is 1/4th in thick. Overall magnet to magnet air gap is about 5/16".
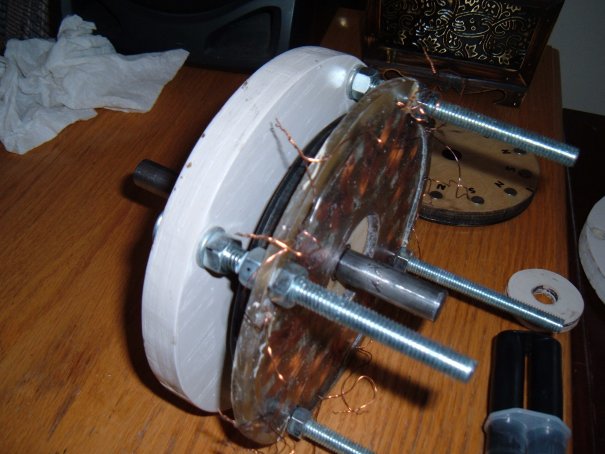
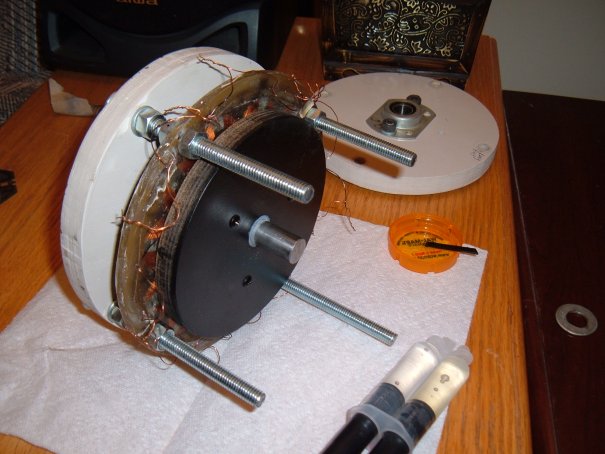
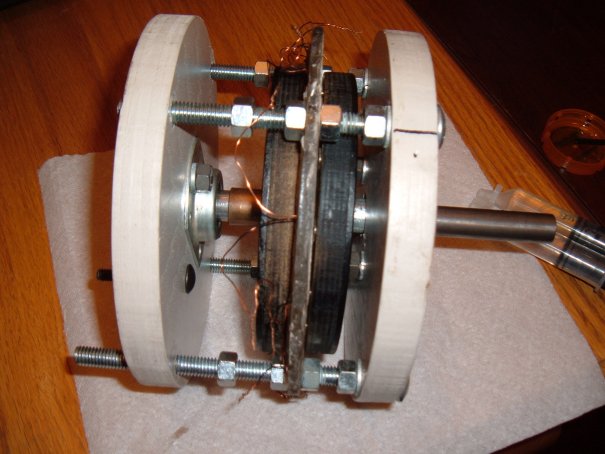
The construction is very simple. The front and back is 3/4in. plywood painted w/2 coated exterior paint (will be 3), 5/8" ball bearings and rod. I used a piece of metal (electrical) conduit about 1.25" to go over the rod to the front bearing. I then ground out a couple of 7/16" washers with my dremel tool to fit tightly over the 5/8" rod.
I actually don't know which photo I'm commenting on. Anyway the magnet rotors are about 6" dia. -made with 1/2" baltic birch plywood and a 1/8" think steel back.(painted black) You could probably up size a bit and use a couple of 7.25" circular saw blades (plywood type-NOT carbide) for this. Just grind the sharp HHS tips off with your grinder.(of course you would have to heat treat the metal with your propane torch where you want to drill any holes thru- but thats easy and quick to do)
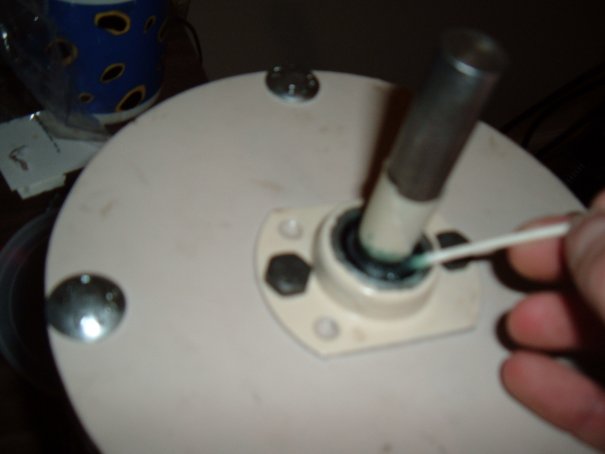
Lastly, I sealed the front bearing with 5min. epoxy to make it waterproof. First, I used silicon caulk to seal behind the bearings and bolts. Before I poured the epoxy, I put grease very carefully on the shaft and on the crease that goes around and around near the shaft. It starts setting in just a few minutes, so i took the masking tape off before it set - but be careful not to turn the shaft. Obviously, if epoxy goes down into the bearing, it is ruined and you've got a quick headache. But it worked for me like a charm. The shaft 'broke free' from the hardened epoxy very easily.

Oh -I forgot to mention that I EPOXY the magnet rotors to the shaft. Believe it or not, If you use a 5/8" fortsner brill bit, this makes a VERY strong bond. You would have to break it off with a hammer- and it would break the wood not the bond. (i know cause i had to do this earlier to redo the rotor mag set up)
So, to make a short story long, I'm going to use silicon caulk and wrap sheet metal around the front and back and screw it at bottom, and epoxy the 4' (3 pine 2x4 blades) to the shaft and i'm good to go! I will publish the results soon. Thanks again.
