
Here's what it looked like when I woke up Monday morning, the day after Xmas. Beautiful start to the day.
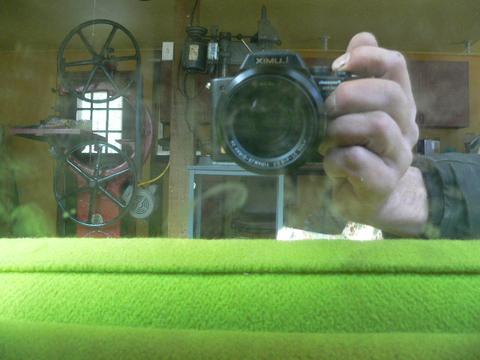
My old Sony camera (thats been dropped several times) has been getting worse and worse - losing pictures, so I treated myself to a new Panasonic DMC FZ-20, which is very nice for my needs.
Over the last week the stove in my shop has been very smokey, on windy days I couldn't light a fire. First thing we did was remove the screen on Monday morning - completely plugged up after only a couple months. The stove draws very nicely now.
It got up a bit over 50 deg on Monday, so I was able to paint 'old #37' outside. This machine is completely finished except for assembly and testing.
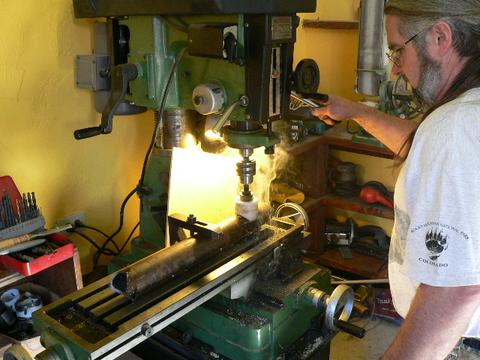
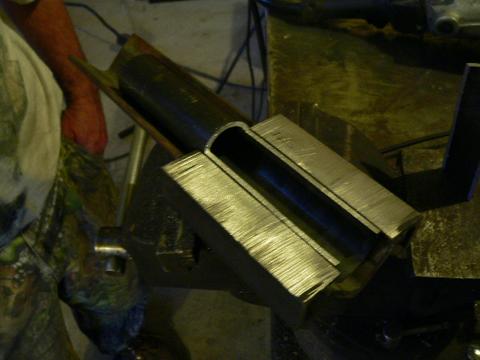
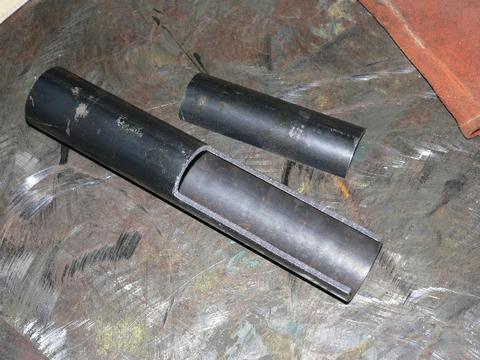
We did lots of metal work for the rest of the day. The next bunch of pictures details how we do some of that. Redundant I know - but Im working on a more detailed webpage about making this machine and some of this posting will be used there. Here George is coping some 2" pipe to make the piece which attaches the alternator to the yaw bearing. We're using a 2 1/2" hole saw here. We usually clamp a long piece of 2" pipe to the table and with 3 holes we can parts for 6 wind turbines.
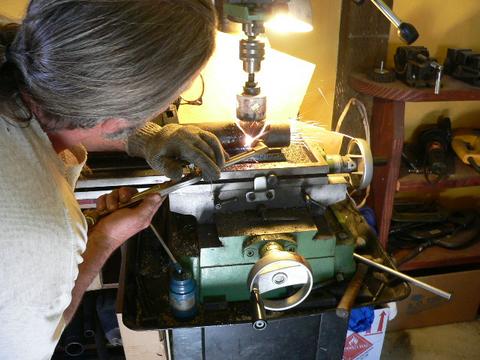
The hole saw won't go clear to the bottom of 2" pipe. Seems kind of abusive and nasty - but the easiest way seems to be, go half way through, then pull the hole saw back and cut off the top scrap with the torch. Then we can finish the cut.
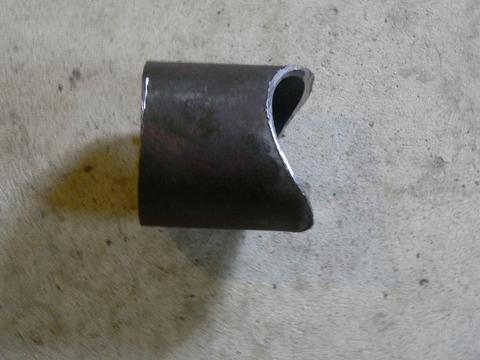
This is the finished part. This holds the alternator to the yaw bearing. When we cut this, the edge of the part is 3" from the center of the hole saw. This gives us an overall offset of 5".
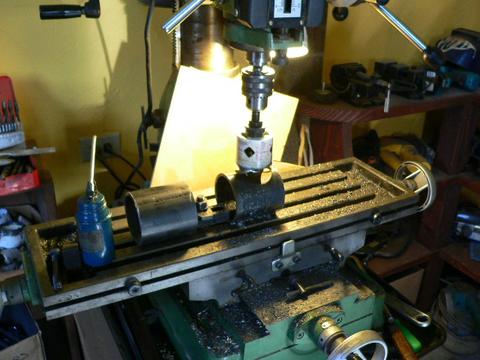
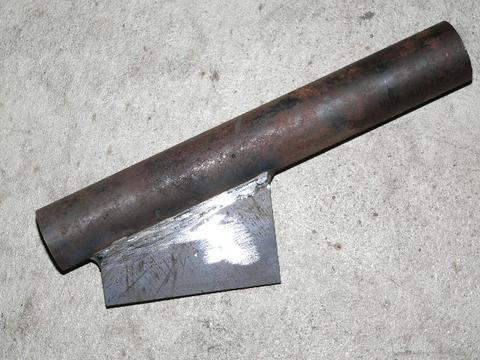
Here we use the same hole saw to make a hole in 3" pipe. The spindle for the hub goes through the center of this 3" pipe and it's suspended in there by the stator bracket, and a steel 'doughnut' on the back side. The 2.5" hole we make with the hole saw accepts the last piece we made - this way we don't need to cope both sides of the 2" pipe which we worked with before - one end is coped to fit the yaw bearing, the other end slips inside the hole in the 3" pipe. This 3" pipe we're working with here is 3 5/8" long.
The spindle is a common trailer spindle, part #R104BT8 (I believe that is a Dexter part number but Im not positive). It fits Dexter hub # 81-9A, a common hub. I like that hub because it's machine (has true surfaces) both on the front, and on the back. I've found slightly cheaper parts, but they are not usually machined on both sides. I also think Dexter is probably the #1 manufacturer of trailer hubs out there, so it's nice to use a common part that we'll always be able to find bearings for. I get these at etrailer.com. Click Here to find the spindles, Click Here to find the wheel hub.
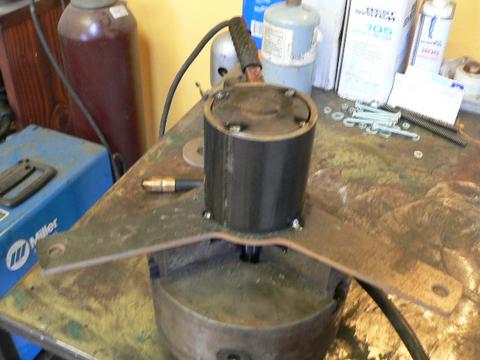
So in the picture above I secure the spindle in an old 3 jaw lathe chuck and put the stator bracket over it. This is an easy setup that keeps things nice and square. The backside of the spindle needs to stick up 3 5/8" (because this is the height of the 3" pipe we cut that will hold it all together.
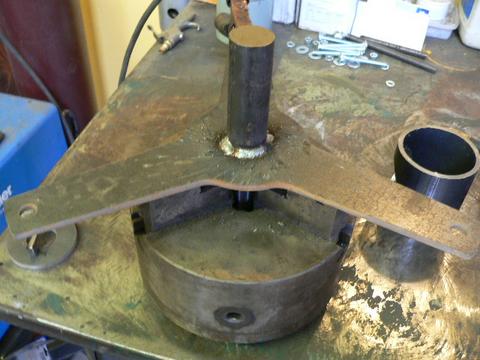
Once the spindle/stator bracket are setup in the chuck, we weld them together.
Then we center the 3" diameter x 3 5/8" long pipe on the stator bracket.
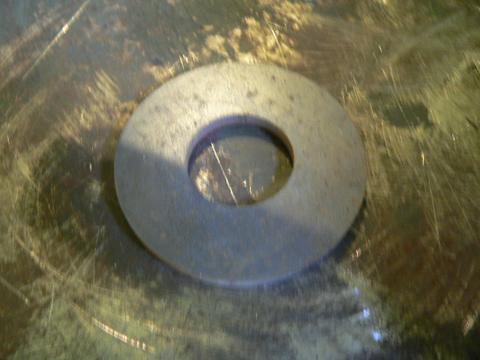
This is the steel doughnut that will support the backside of the spindle. The outer diameter is just under 3" (so it fits in the 3" pipe) and the ID is 1.25" so it's a nice fit over the back of the spindle.
I use a magnet to hold the doughnut in the right spot.
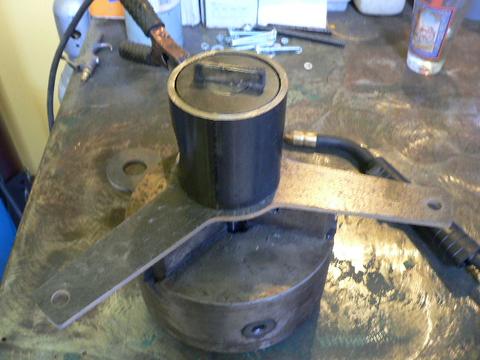
When we weld, and it cools - it really pulls the metal around. So we do little spot welds and 'tack' the thing together. Then we can remove the magnet. It's hard (impossible) to weld close to strong magnets, it makes things splatter real bad. Plus the heat kills these magnets, so I tack things together and then get the magnets out of there.
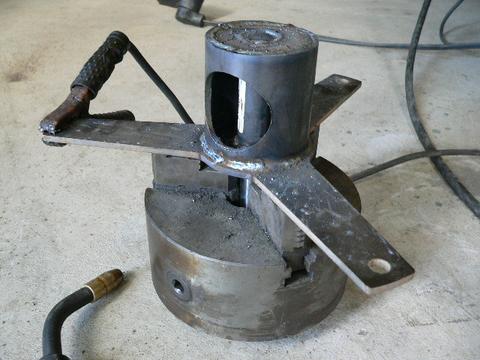
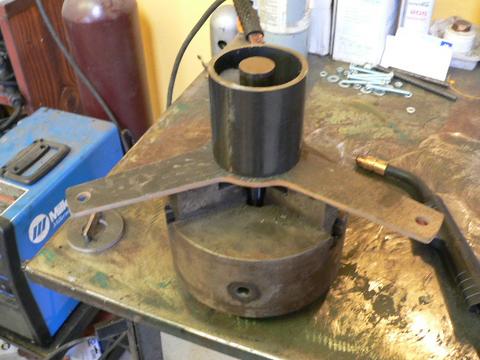
Here we've welded the whole lot together.
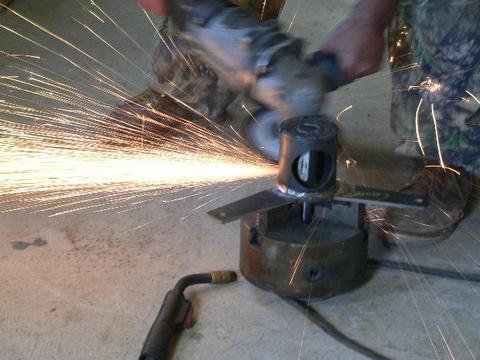
Then we grind it/make it look a bit better.
This is a simple jig we made that holds the tail bearing so we can neatly cut the notch in it. I make the tail pivot, and the tail bearing 9" long. The pivot (inside part that welded to the rest of the machine) is of 1" pipe, and the bearing (the part that moves - welded to the tail with the notch in it) is of 1.25" pipe. The notch we cut takes about 160 deg out of the pipe, and it's 4.5" long. The jig shown above works nicely with the 'porta-band saw' (a hand held bandsaw which is great for cutting pipe quickly).
Here is the bearing as it comes out of the jig. We save the 'scrap' and hammer it a bit flatter, and then weld it back onto the tail bearing to increase it's strength.
The jig isn't shown, but we have one that centers the tail pivot bracket (this is the 3" long angled (20 deg) piece of 1/4" steel that holds the tail pivot to the yaw bearing) onto the tail pivot. We weld this part (and grind it) before we put the rest of the machine together.
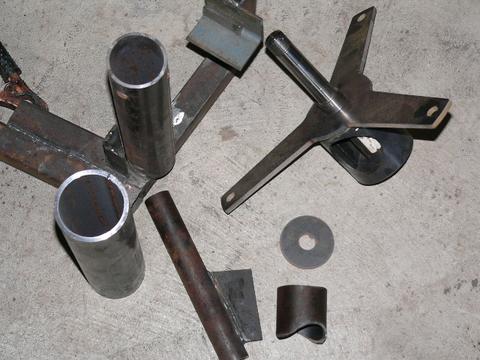
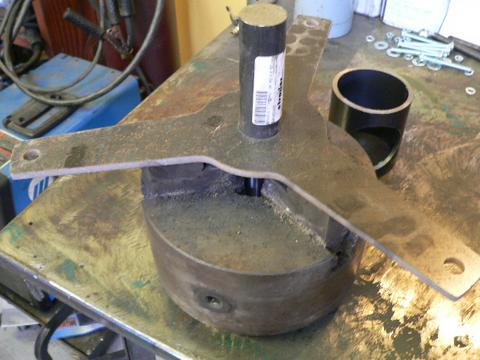
Here are all the parts laying near the jig that holds them all together. The next step is to lay all the parts in the jig - spot weld them, then take the wind turbine out and finish welding. I quit taking pictures at this point yesterday - but we did actually get all the metal work done for two more machines (#38 and #39).

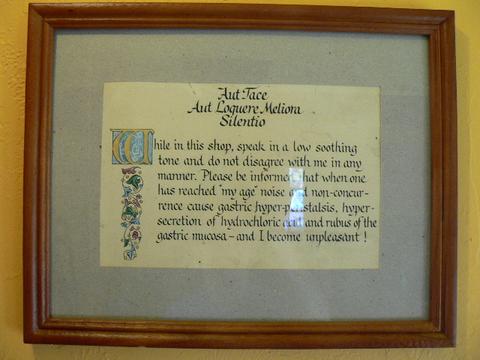
On the lighter side... MattB and Daphne gave us this for Xmas - very clever I thought.
You can see the dawg which is represented in the artwork above.
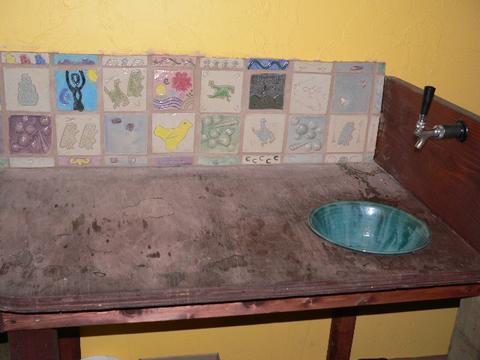
This is an ongoing project in the shop (our kitchen area). Checkout Bonnies custom tiles (she made all these tiles) and custom sink. Shes planning to do the whole counter top!
I also got this for the new shop on Xmas! Lots of fun as usual. Hopefully next week we'll find time to move foward on the new/larger wind turbine project.
