
Pictured above is a beautiful sunset (I shot the picture from the window of our van while driving). Look carefully and you can see Mick Sagrillo's 3 wind turbines (where we put on this work shop) and then a utility wind farm in the very back ground. Wisconsin is beautiful.
These next couple pages contain photographs and commentary about the 'homebrew wind turbine' workshop we taught for MREA at Mick Sagrillo's shop near Algoma Wisconsin in May 2008. It was a 6 day long workshop, with 18 students. The goals were ambitious: cover a bit of wind power theory, discuss a bit about wind turbine design, and build 3 wind turbines. Details about the 3 wind turbines planned:
A 10' diameter machine basically from a 'kit'. All the flat steel parts were cut on a water jet table but past that we planned to do all the metal work (cutting, welding, grinding), fabricate the magnet rotors, the stator, carve the blades etc.
A 12' turbine, very much along Hugh Piggott's 12' design but with a different frame, slightly smaller stator, larger magnets and a much lower resistance stator. This turbine we planned to build completely from scratch and much of the final design was figured out during the workshop. It's very close to one that we built in February 2008 for the Blue Energy Group in Bluefields Nicaragua.
A 17' diameter turbine. This one had a customer who was willing to pay for materials and willing to let students build the machine. We did all the metal work on this machine here in our shop before the work shop and had it powder coated so we had to carve blades, fabricate a stator and magnet rotors. We ran into other problems with the assembly of that machine that will be discussed later.
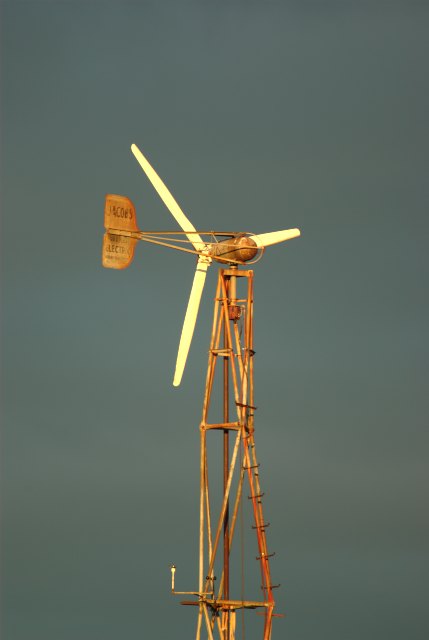
Nice to teach a workshop like this surrounded by wind turbines! Pictured above is Mick's old Jacobs turbine. Currently it's shut down needing new brushes and maintenance. Nice old machine though.
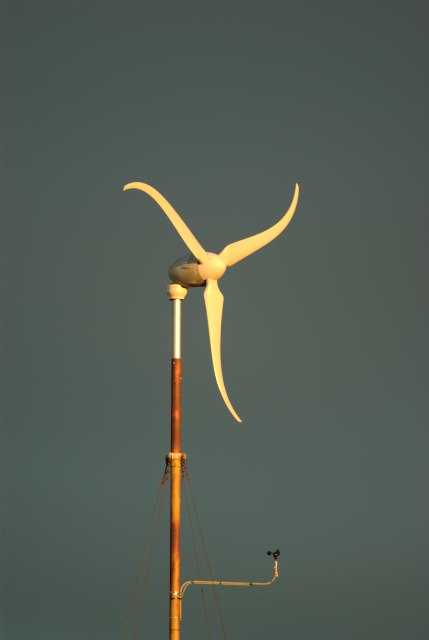
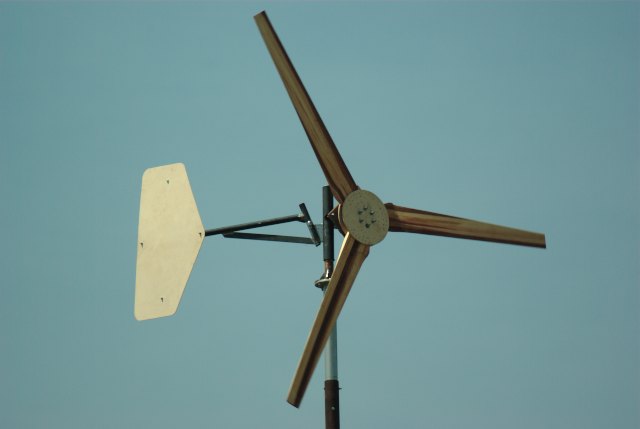
Mick also has a new South West Windpower 'skystream'. Its a 12 foot diameter turbine with a built in grid tie inverter rated at 1800 Watts. It's a down wind turbine. The blades are funny looking, the idea (from our understanding) is that they are shaped the way they are to minimize the 'thumping' sound that happens in some down wind machines when the blades pass through the 'shadow' behind the tower. This machine was also broken down when we arrived, the built in inverter is likely the problem but nobody was sure. Mick said that when it is running, it's rather loud. He said the alternator makes quite a fair bit of noise and the blades also still make too much noise as they pass through the wind shadow behind the tower. We never got to hear it.
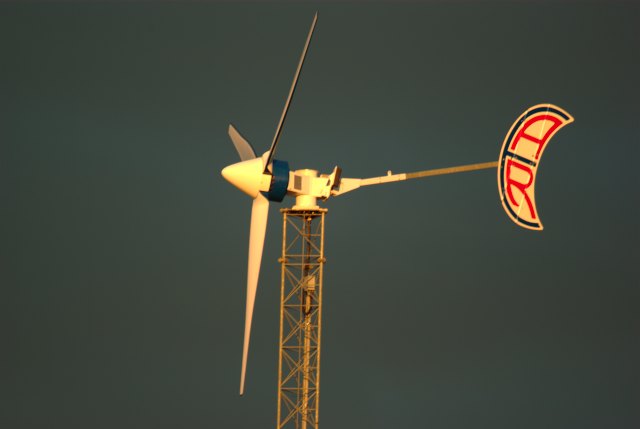
Mick also has a very impressive ARE (Abundant Renewable Energy) 442. This is basically a very much scaled up (23 foot diameter I think - 10kW rated output) version of the old African Wind Power turbine. Very nicely made (and expensive) machines. Unfortunately though this one was also broken down when we got there. They did fix it while we were at the workshop. It was terribly noisy when running though. It is a new design and I expect the company will solve that problem.
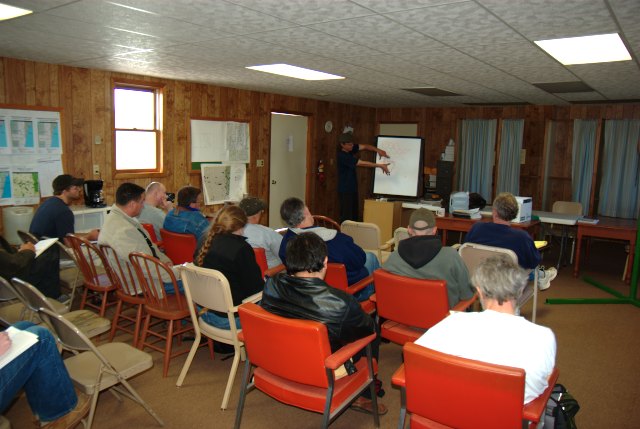
The first day started out at a local 'town hall' that we used for a bit of classroom time, to go over some basics about wind power theory and wind turbine design. Then we had lunch and got started with work in the shop.
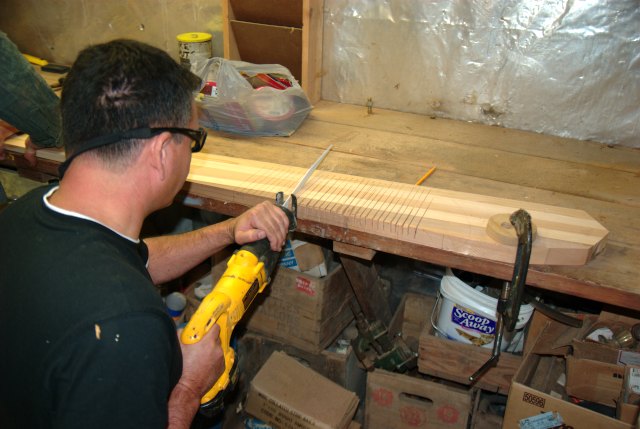
John did great work and he gets the award (there really is no award) for traveling the greatest distance to our work shop. He came all the way from Australia! Pictured above he's cutting slots on the front of a blade so that it can be carved more easily with a draw knife.
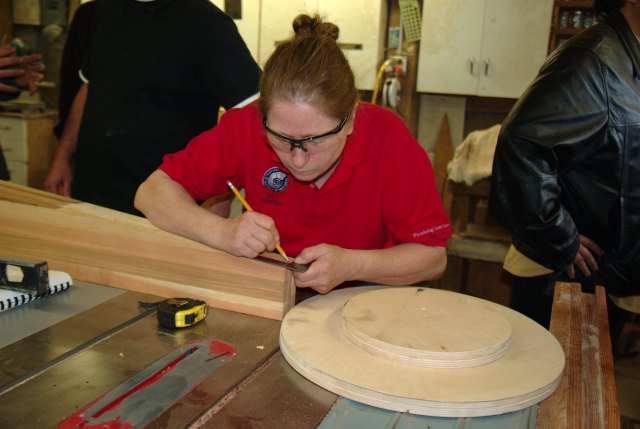
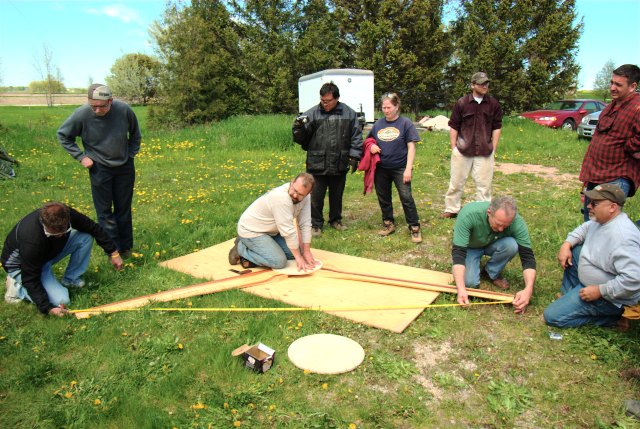
Jody laying out the blades. Lots of work to carve all these blades. We needed to have between 4 and 6 folks working on blades for almost the whole work shop. 10 foot diameter blades are not so bad, but the 17 foot diameter set is quite a lot of work.
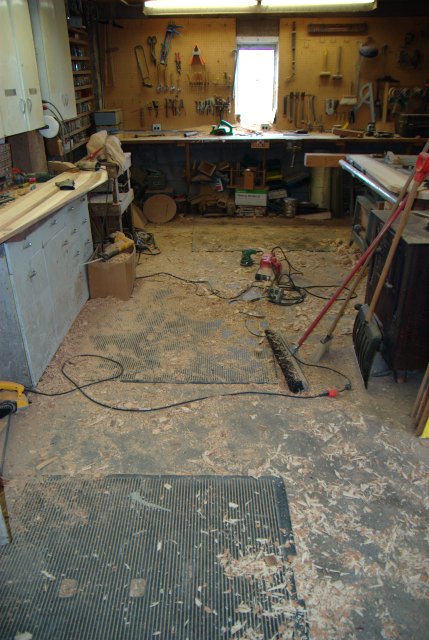
Mick offered us a nice shop to work in. It's basically divided into two rooms - a wood working area and a metal working area. Pictured above is how the wood room looked at the end of most days. At first, the hours of the workshop were 9am to 6 pm after which we'd clean up shop and put tools away. The last couple days had me worried that we might not get everything done so most folks started at 8 am and we often went into the evening on some projects.
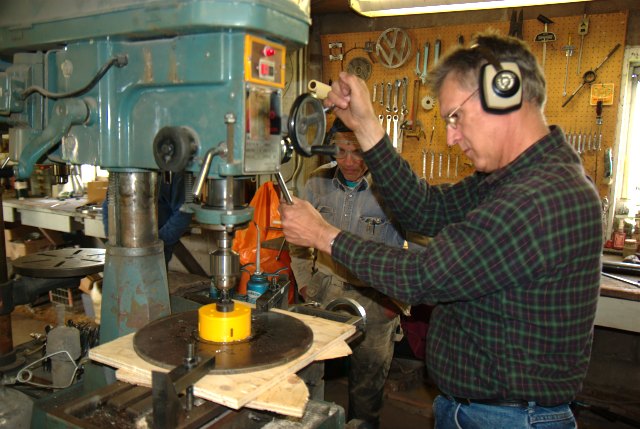
Forrest cutting out the centers of the magnet rotors for the 12 foot turbine with a hole saw. Again, the 12 foot machine was totally from scratch. The magnet rotors are 14 inches in diameter, cut with a torch out of flat 3/8 inch steel.
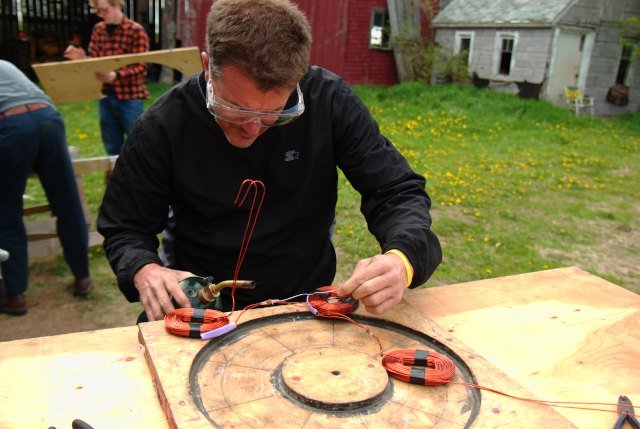
Pictured above: Cliff soldering connections between coils for one phase of the 10 foot diameter wind turbine.

Pedro placing the large 3 inch x 1.5 inch x .75 inch thick magnets on the rotors for the 17 foot dia turbine. These magnets are very strong and difficult to handle.
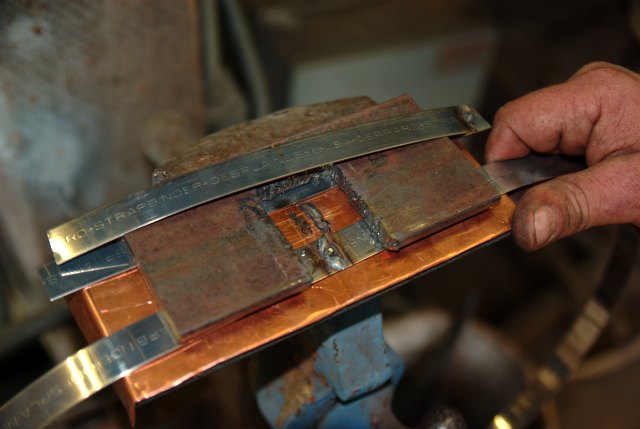
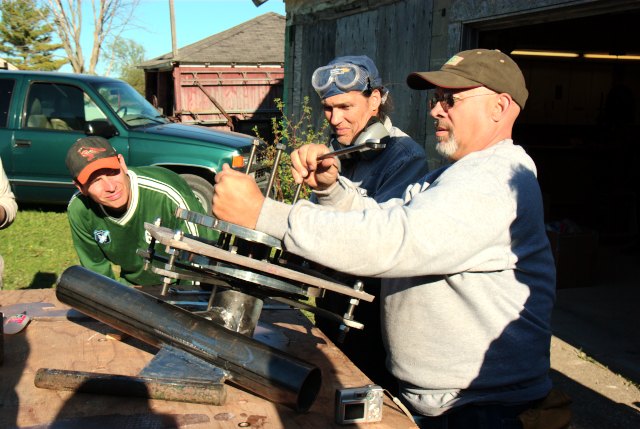
I made this jig for welding the stainless steel bands that we shrink around the magnet rotors together. It worked well. The bottom is lined with copper so we don't weld the stainless to the jig itself.

Ken using the torch to heat one of the stainless steel bands for the 17 foot diameter machine. When we make the band, we cut it about 3/16 inch shorter than the circumference of the magnet rotor and weld it together. Then we heat it with the torch until it just starts to turn slightly yellow in color.
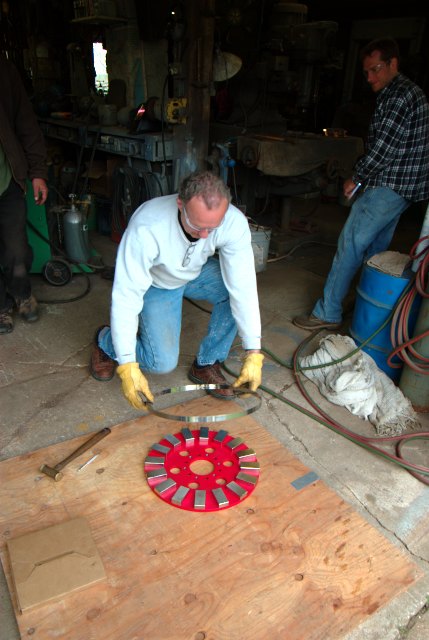
Once the band is hot enough, somebody (Paul, in this case) wearing leather gloves grabs it and quickly drops it around the magnet rotor. It shrinks to be a very tight fit after it cools.
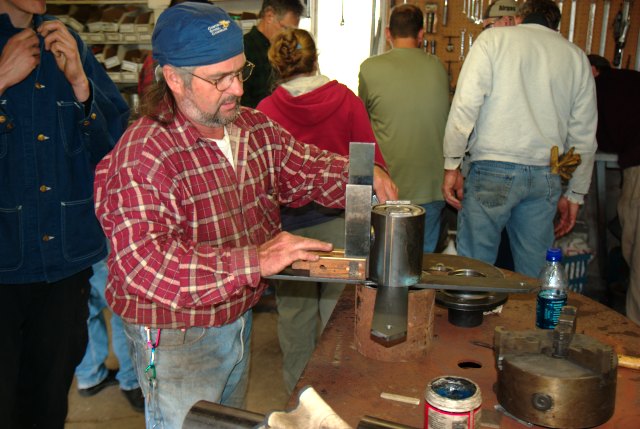
George was with us to give instruction on metal work. Pictured above he's pondering the frame for the 12 foot turbine.
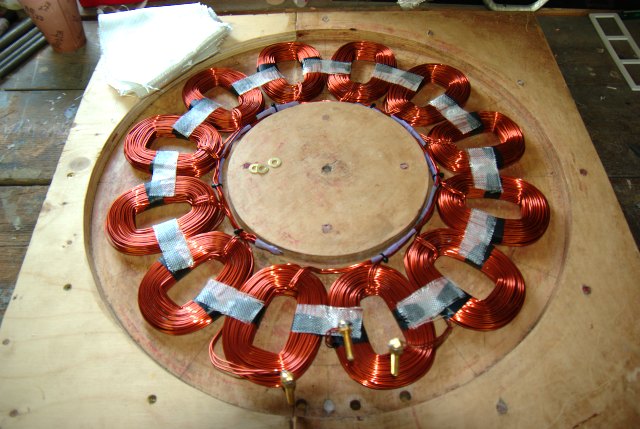
There's the nearly finished stator for the 17 foot turbine! All the coils wound, not much left to do except for casting.
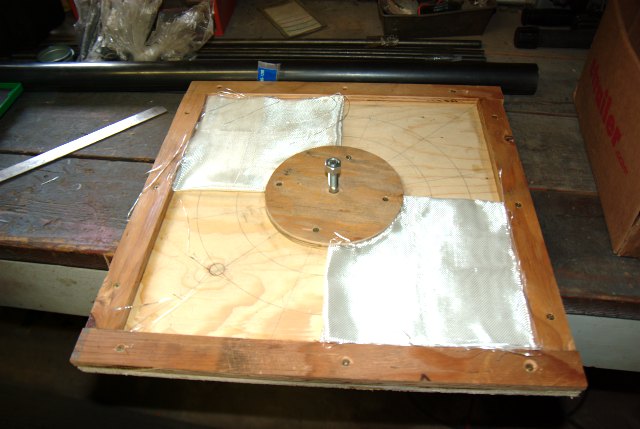
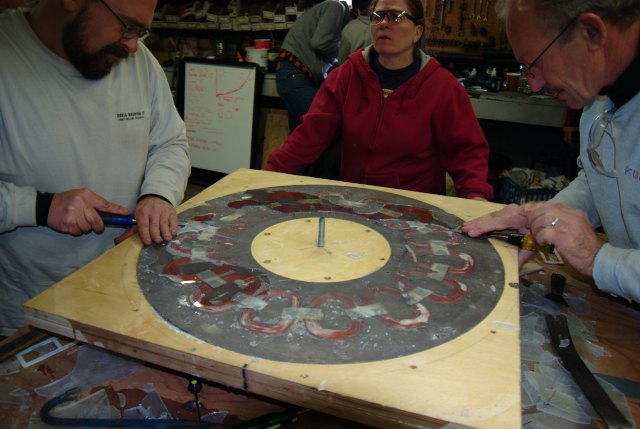
The stator mold for the 12 foot turbine is square, 17 inches on each side. In the picture above they've cut the fiberglass for the stator, folded it up and put it in the corners.

Cliff seems quite please with the stator for the 10 foot turbine! It came out perfectly, no air bubbles or imperfections of any kind.
On Thursday the 10 foot turbine was about ready to go, folks follow the instructions in the book to assemble the alternator.

Pictured above the alternator for the 10 foot diameter wind turbine is finished.
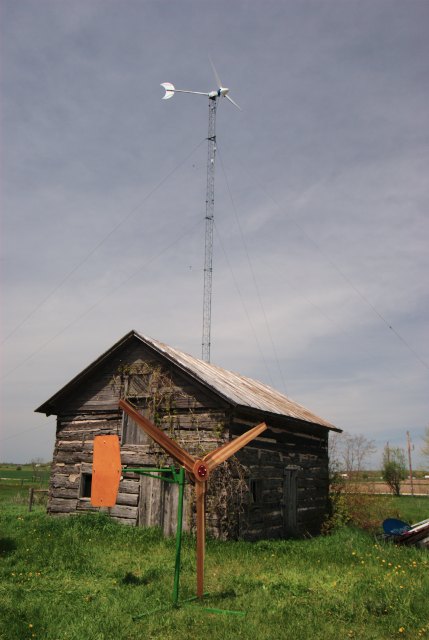
Again, the SW Windpower Skystream was broken down. It was up on a 80 foot tilt down tower, so we figured we'd lower it - remove it from the tower for repairs and adapt the tower top to fit our own 12 foot diameter wind turbine. Before lowering the tower Mick gave a good talk about towers, the geometry of tilt up towers, and tower safety.
Down goes the skystream!
One of the students was building his own 20 foot diameter wind turbine just like ours. He had built the stator mold at home but wanted to wind and cast the stator during the workshop. We mostly did this after hours. Paul decided to use plexi-glass for the bottom, and the top of his mold. Bad idea as we all learned, the vinyl ester adhered to the plexi-glass (actually seemed to melt it some). We got lucky, it did finally come out of the mold but only after hours of chipping bits of plexiglass off the stator with chisels and hammers.
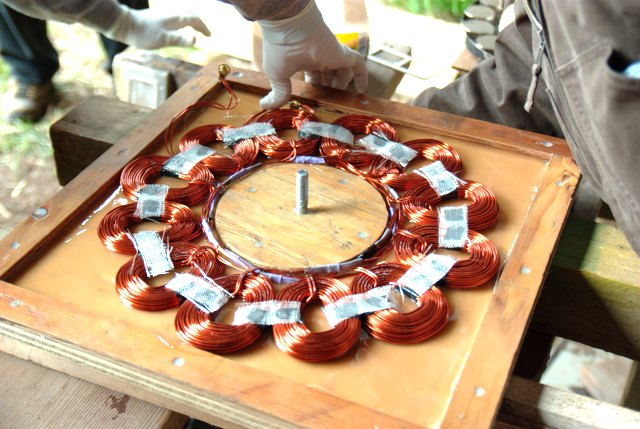
The stator for the 12 foot turbine ready for casting. We wound these coils with two strands of 13 gage wire in hand and 33 turns per coil. It's for a 24 Volt system.
Fitting the stator to the 17 foot wind turbine! This one got a bit frustrating - we assembled the whole machine and noticed the back magnet rotor wobbled rather badly, so much that we could not get the airgap adjusted within reason. So we took it back apart to figure out the problem. On this machine, the back magnet rotor comes right up against back surface of a 6000 pound wheel hub. We always choose a hub that has the back surface machined (it's a lathed surface). Turns out the hub was about .040 out of true.
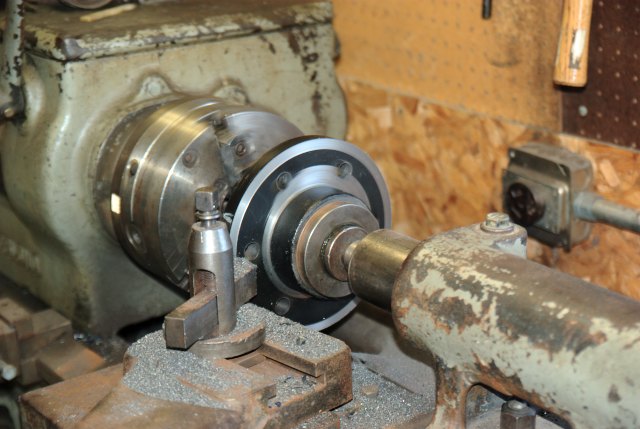
Fortunately we had a lathe available. John C. turned the back surface of the hub so that it was within .001 inch. After that the alternator for the 17 foot turbine went together smoothly.
Rich explains how to assemble the blades for the 12 foot turbine.
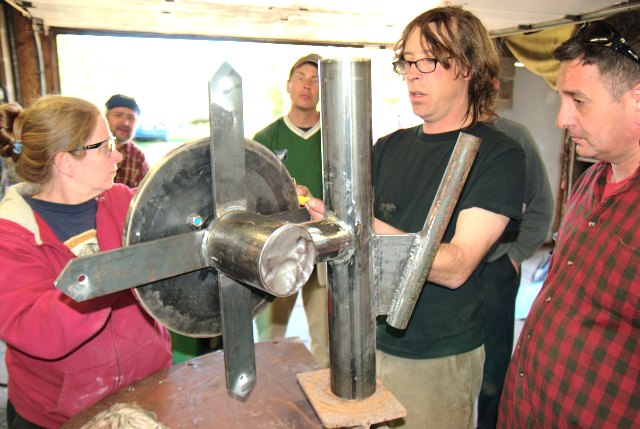
I try to figure out how to assemble the 12 foot turbine - since we'd never built one just like this before. It's a neat machine, and very robust with a very strong spindle/bearing. I think there is lots of safety factor in this one with regard to the strength of the frame, the size of the bearings, and the resistance in the stator.
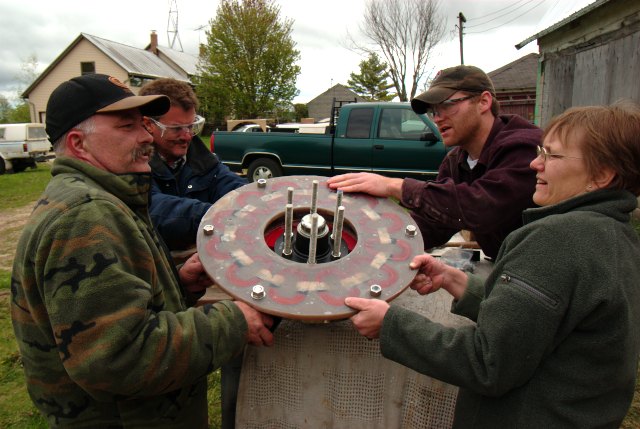
Larry lowers the front magnet rotor onto the 12 foot turbine while John and Alex watch.

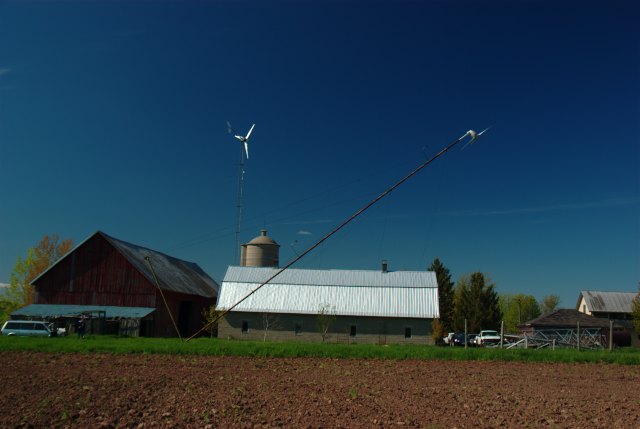
An interesting picture of the 12 foot wind turbine on the work bench with bush, silo, and large wind turbine in the back ground. DanF got most of these pictures - nice job!

Pictured above I'm wiring up the 12 foot turbine on the end of the 80 foot tower. At this point it's Saturday just before lunch - last day of the workshop. We have a few hours left!
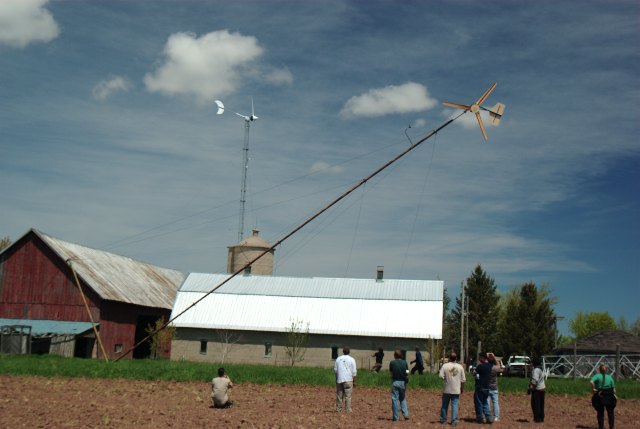
Up goes the 12 foot turbine! Pretty interesting erection really. The gin pole for this tower is about 25% the tower height, Mick pulls it up with a tractor but the weight of the tractor and the traction is marginal - he needs to push off with the bucket to get started moving! We also had a block and tackle to help - without that it'd be impossible.
The 12 foot machine seemed to work fine at least in the low winds we did have. I wouldn't be surprised if the alternator stalled the blades a bit in higher winds, in which case we would add a bit of resistance to the line. As it was though, winds were between 8-12mph and we were seeing output averaging around 200W.
There is the 10 foot wind turbine finished up. It came out nicely.

So there's the whole crew! We got everything done (and nicely done) with about 1 hour to spare it seemed. Great bunch of folks - we had fun. Not shown here in pictures are all the fun nights we had at the local restaurant/bar eating fish and all the fun nights around the camp fire!
