This is the fabrication technique that has evolved out of my trials and errors. I'm sure there are many different ways to build solar panels that would work just fine.
I have tried to keep mine as simple as possible.
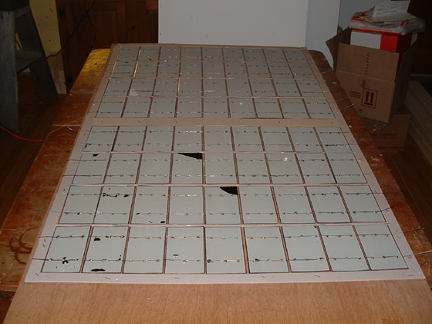
This shows the cells upside down in a jig made from strips of mat board stapled onto a piece of 1/4 inch plywood. At this point, the tabs can be soldered to the cells. I found a 30 watt iron to be the minimum acceptable and a low temperature solder to be the best.
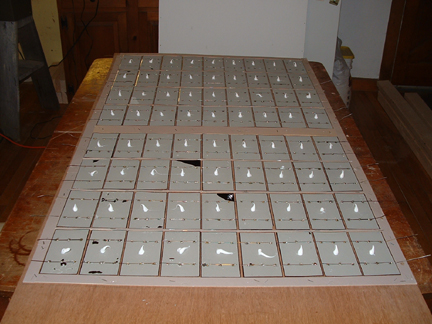
Here the cells are all soldered and a dab of silicone caulk is placed on each one.
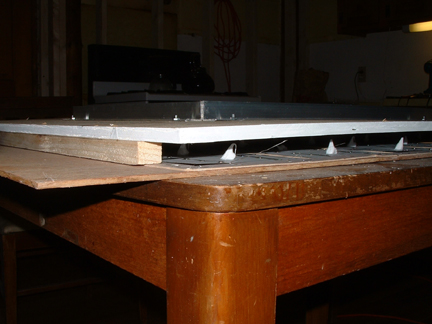
I used 1/2 inch plywood for my backing. It sits atop spacers as I align it with marks on my jig. When it is in the right position I remove the spacers and let it press into the silicone. You may be able to make out the 1 x 1 x 1/16 inch aluminum angle stock that's bolted to the upper face of the plywood. The angle stock is bent into an 'L' shape and two of them are set to form a rectangular shape and bolted down. The metal adds a great deal of stiffness to the plywood.
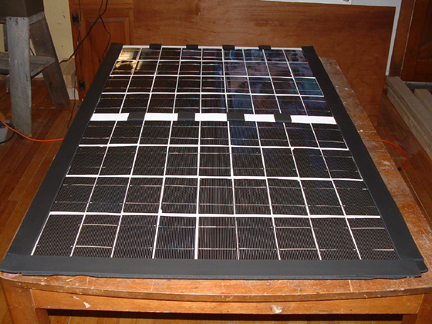
The next step is to flip the rig over. This can be tricky, but I find using two small C-clamps opposite each other holds the backing and the jig together just enough to let me flip it over without any of the cells moving on me. Here is the new panel with the jig removed.

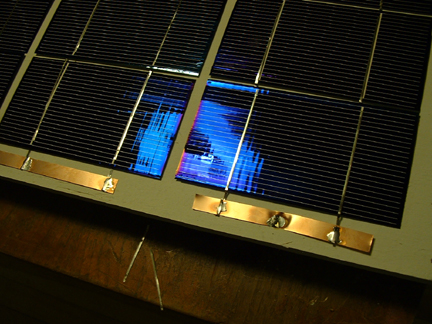
Power is brought to the back of the panel using bolts counter sunk into the plywood. The copper strip is .015 copper sheet purchased on-line and cut up into strips.
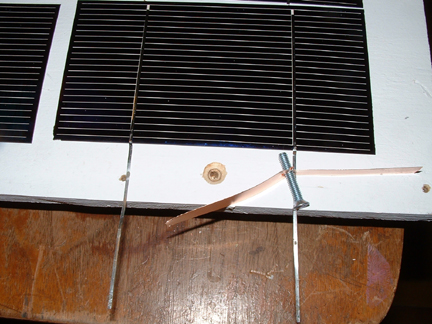
The terminal bolts are soldered to the copper strip to ensure a good connection. The copper is also used to string the rows of cells together at the ends.
A double layer (total thickness about 1/4 inch) of foam tape pipe insulation (purchased at Home Depot) is layed around the perimeter of three sides and in spots across the middle and what will be the bottom edge of the panel. The space between the spots will allow ventilation.
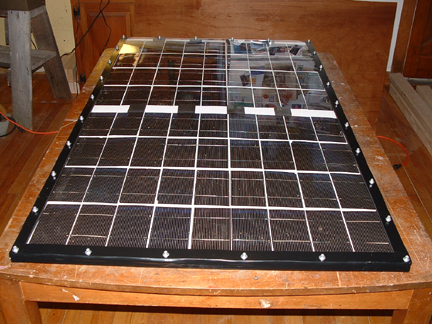
The finished panel has plexiglas screwed down into the foam tape every six inches. I used one inch metal roofing screws that have a rubber washer on them. There is also a layer of vinyl electrical tape (3M 88T) around three sides of the perimeter. This is experimental. I'm hoping the tape will protect the foam from UV radiation and make it last a little longer. It is important to predrill the screw holes in the plexiglas and plywood, and to do so on a solid surface. If you try to do it after the foam tape is in place, you will crack the plexiglas for sure.
--Tom
