Author Topic: Vacuum laminator  (Read 2237 times)

0 Members and 1 Guest are viewing this topic.

amiklic1

  • Full Member
  • ***
  • Posts: 177
Vacuum laminator
« on: January 04, 2006, 11:18:23 PM »
At first I'll mention that me and my friend are trying to construct the device that costs around 100 k$ on the market. We'll spend around 1k.

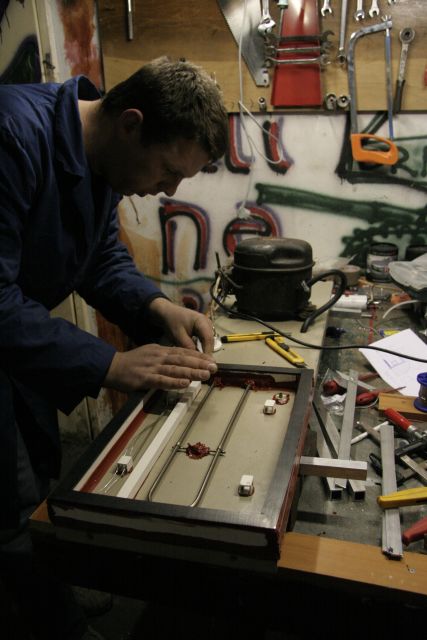
The following is a serie of pics of our first attempt. Before any serious work we built small scaled laminator just for the purpose of learning, choosing the right materials and experimenting, without any expenses (just 30 $).


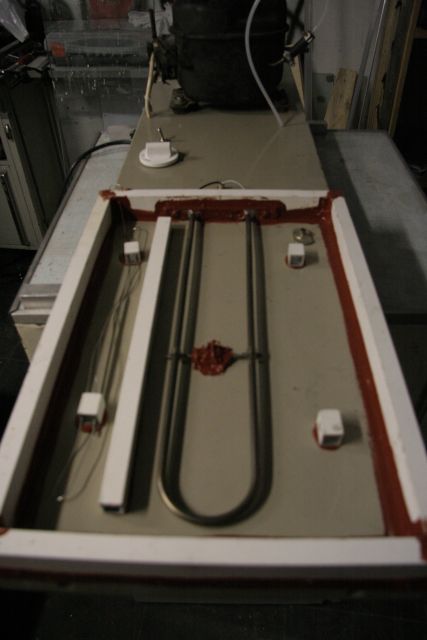
This is our construction yesterday, when we assembled it. We got to quit the work for one day because silicone needs some time to become harder.


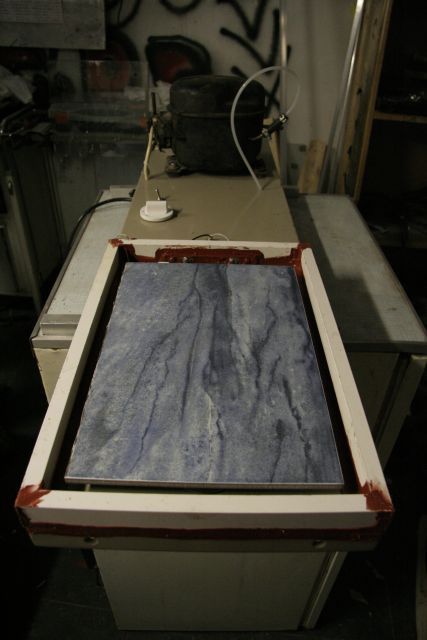
We are using ceramic tile in this model instead of copper plate. Hope it'll work.


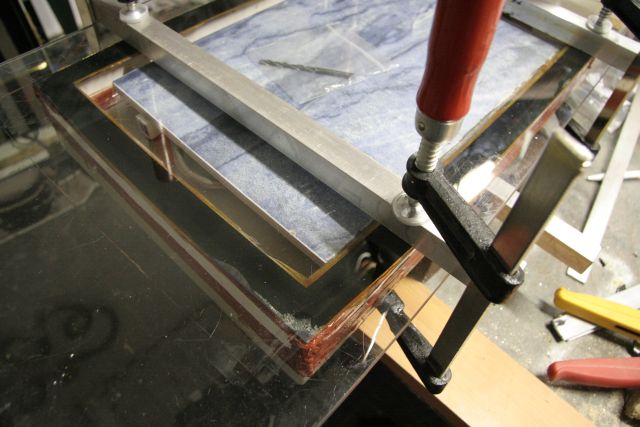
First try of closing the lid. We put tempered glass instead of top chamber, just to see what's happening in there.

Before this I try to put EVA and TEDLAR sheets in my kitchen oven, to see what's happening. Lot of air was captured between the EVA layers, and that is going to be solved with vacuum pump. Hopefully.


Yesterday, before we quit the job, something goes wrong. Holly smoke was released from the heater. I know it's hard work to put it back inside. I think that was because the silicone was wet, and make contact (shortcut) between heater contacts.


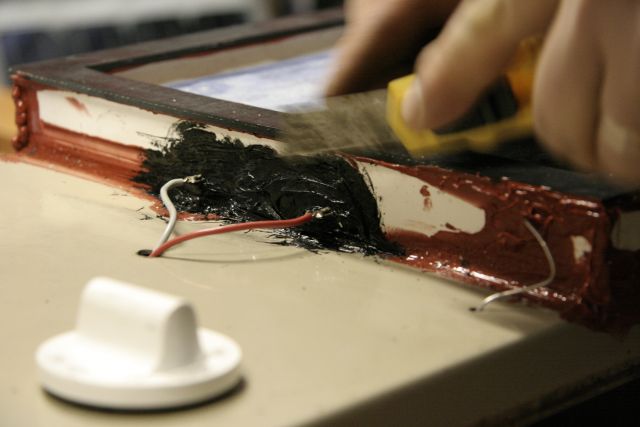
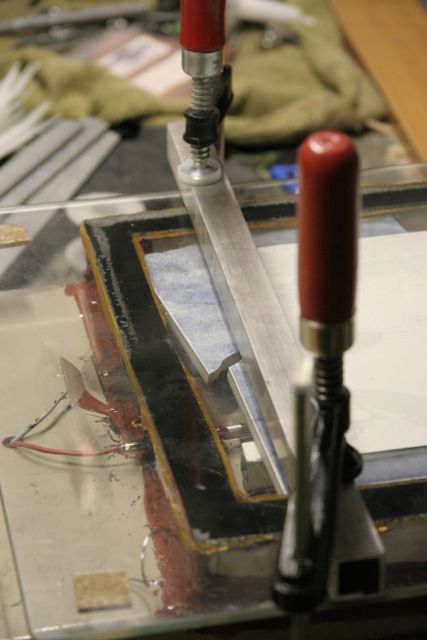
This is me putting some grease on the rubber sheet used for sealing the upper glass. The grease is some 30 years old military grease used for cannons. Still good, it seems.

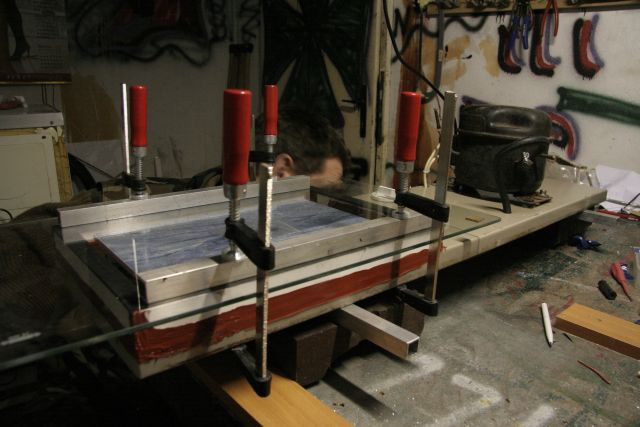
When we tried to put the inside space under vacuum, we realize lot of leakage between the glass and the rubber seal. With grease that was solved.


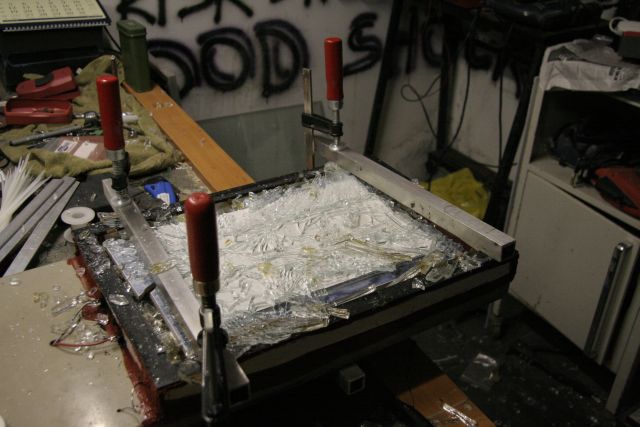
This is machine under work, with plastic bag inside. Inside the bag is a drill bit, to test vacuum it. We hope it will work.


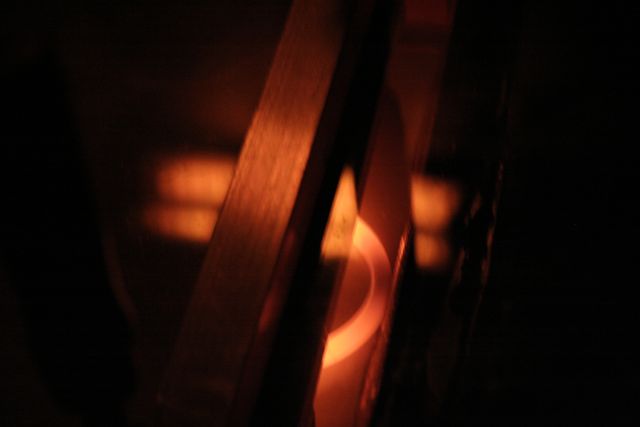
The heater on the run. We set the thermostat on 180 degrees, but it's ordinary household type. Not sure how accurate it is.


After about 5 minutes and 100 degrees achieved we heard the crack, and the tile was broken. As the inside test glass with sheets was totaly up with the upper glass, we let it all that way, hopint it would laminate.


Another 5 minutes , and just after I said we should terminate the process, we heard large BANG! The glass goes apart. We're lucky it's vacuum inside, so it really implodes, not explodes. Now to se what we have in there.


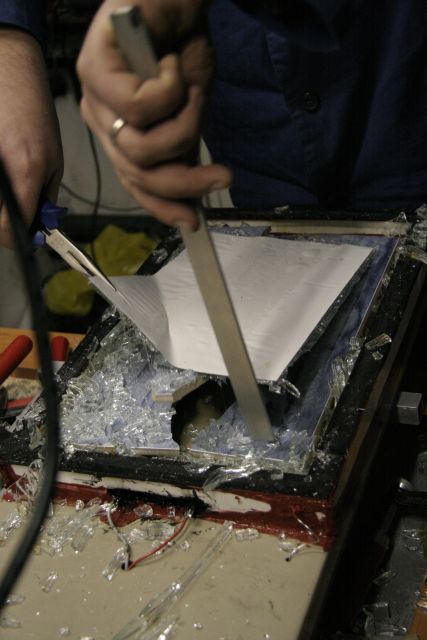
Taking the laminate out. Before this we had to remove all glass parts. maybe it was better idea to set the laminate layers opposite direction, so we could see the entire process thru the glass. TEDLAR (upper sheet) is non clear.


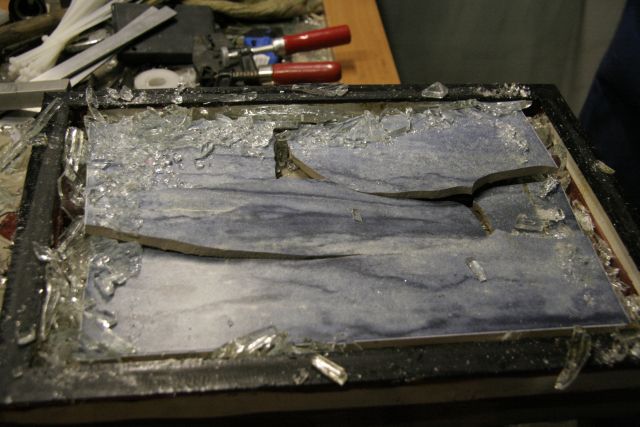
This is the ceramic tile. We thought only one crack was happen. It seems more was on the scene.


This is other (true) side of the laminate. It can be seen that wacuum even pulled the tin from the cell (two pieces of broken cell). It seems that temperature was too high. Also, we can see too much cured EVA film above the heater. They just were too close.


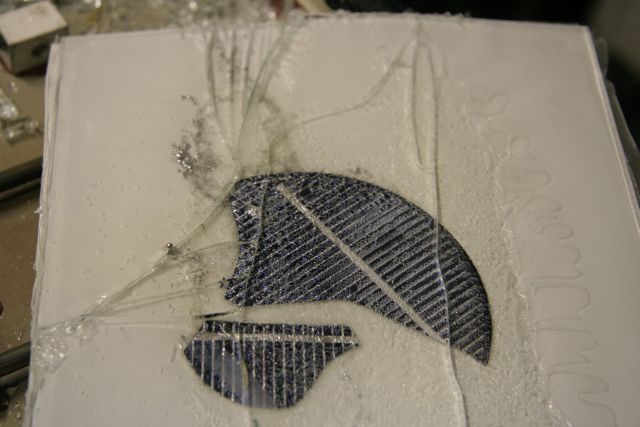
On the right, near the edges is visible how good it was laminated. Unfortunately, as the glass breaks, air comes between the laminates and spoiled the thing.

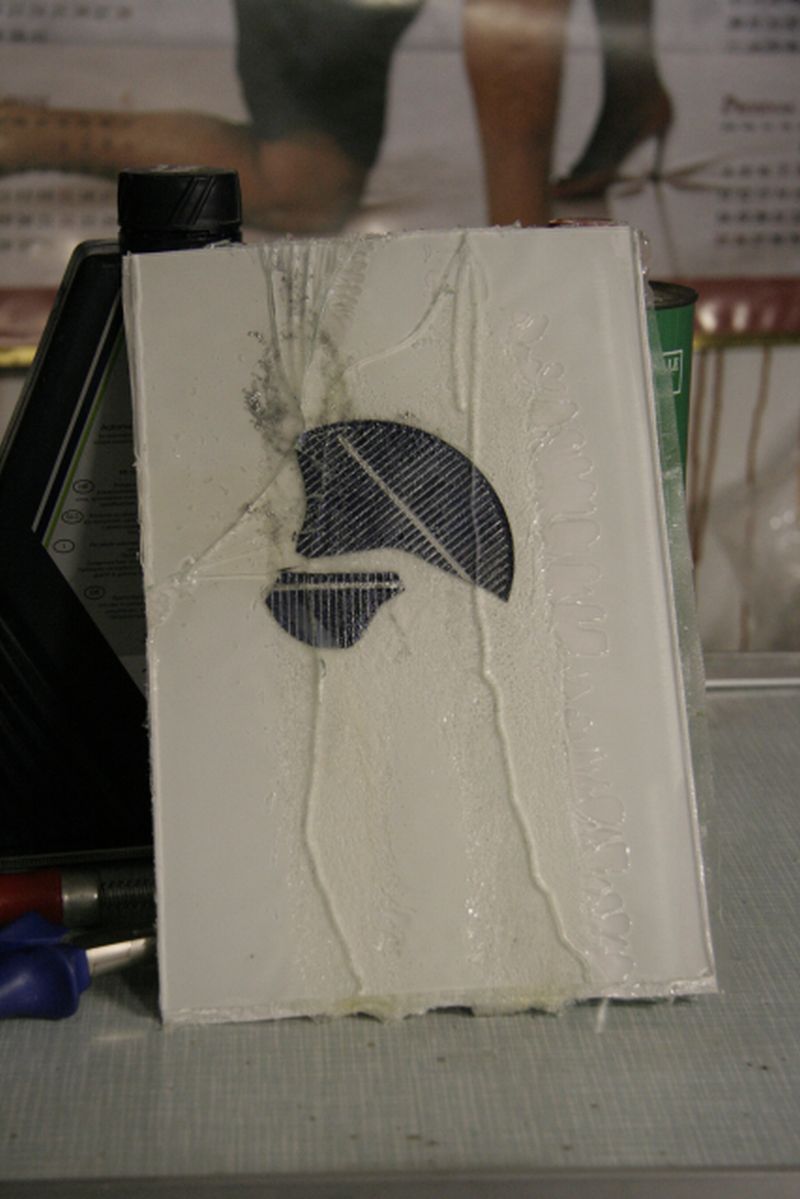
But we stated it was sucess. We're alive, and it seems things are working this way.

Tomorrow we'll try one more laminating process, with opposite layers.


Hard work to achieve industrial-type solar panels. But worthy. No condensation issues, no back-sheet troubles....


I'll continue as fast as we get other results.

« Last Edit: January 04, 2006, 11:18:23 PM by (unknown) »

richhagen

  • Hero Member
  • *****
  • Posts: 1597
  • Country: us
Re: Vacuum laminator
« Reply #1 on: January 04, 2006, 05:08:24 PM »
Neat project, I know that with kilns, you have to cure the ceramic at a lower temperature to remove any moisture prior to heating it super hot to remove any moisture that may have accumulated in the material.  Since your ceramic was close to the heating element, the bottom probably experienced extreme heat which could have caused any tiny amount of moisture trapped inside to vaporize and build up pressure.  This would be amplified by the fact that the chamber was under vacuum.  Also, all of this would be in excess of the stresses induced by uneven heating and resultant expansion of the material.  


My thoughts would be:


  • cure the ceramic at a lower temperature and slowly heat
  • if possible add distance between the element and the ceramic
  • I might try a metal lid with a small peice of glass, like the high temperature glass fitted to the windows on old space heaters here, or pyrex.  fitted as a window, and thick enough to handle the vacuum forces for the area of the window.  A large flat panel of glass would have to be much thicker to handle the same forces as a smaller window.


-a more accurate way of measuring the temperature of the chamber may be needed, and heating more slowly/evenly is likely required. If even part of the chamber gets to the point of melting the solder from the front of the cells, the whole panel will be ruined.


Even thought the particular experiment did not get the results you wanted, it seem to have showed that with a few minor modifications it is most likely possible, and that is a great thing.  Rich

« Last Edit: January 04, 2006, 05:08:24 PM by richhagen »
A Joule saved is a Joule made!

wdyasq

  • Hero Member
  • *****
  • Posts: 1324
Re: Vacuum laminator
« Reply #2 on: January 04, 2006, 07:05:41 PM »
First - vacuum can exert over 2100 pounds pressure per square foot. Nylon bags can stand quite a bit of heat.  I 'might' try an aluminum plate with the heat source on the outside of the plate and some good insulation outside of the element.  The glass/cell/backing would be placed on the 'plate' and then placed in the nylon bag and  then heated.  It might take a PWM (Pluse Width Modulation) controller to slowly heat the parts.


Once warm, I would apply vacuum.  It might require a top "platten" also to smooth the backing.


Please let us know your successes and especially your failures.  I hate to repeat others mistakes due to ignorance.


HTH,

Ron

« Last Edit: January 04, 2006, 07:05:41 PM by wdyasq »
"I like the Honey, but kill the bees"

amiklic1

  • Full Member
  • ***
  • Posts: 177
Re: Vacuum laminator
« Reply #3 on: January 05, 2006, 01:23:03 AM »
I forgot to mention that we used ordinary green-glass for testing the laminate. I just wish I ordered some tempered glass pieces for this purpose. Maybe all would go better. But we have some learned lessons, and on the wall of my workshop is written: No risk, no fun!.


Today I'll try to find some steel plate (at least 6 mm (1/4") thich to put under the laminate, and find the way to support lower housing plate to keep it from getting upper. Vacuum bring it all the way up and pressed the heater to the tile, and than laminate to the upper glass.

« Last Edit: January 05, 2006, 01:23:03 AM by amiklic1 »

willib

  • SuperHero Member
  • ******
  • Posts: 2414
  • Country: us
Re: Vacuum laminator
« Reply #4 on: January 05, 2006, 09:17:50 AM »
amiklic1 , are you trying to laminate the cells to the glass ? or trying to sandwich/laminate the cells between two rigid surfaces?unless i am missing something here?


i would go with the first option..and use the glass as a support.and use some sort of flexable plastic for the backside.like polyethelene sheet and use less heat or none at all , and just use the vacuum and some silicon sealer.

any old automobile will have tempered glass on the side windows..

« Last Edit: January 05, 2006, 09:17:50 AM by willib »
Carpe Ventum (Seize the Wind)

Ungrounded Lightning Rod

  • SuperHero Member
  • ******
  • Posts: 2865
Re: Vacuum laminator
« Reply #5 on: January 05, 2006, 02:40:48 PM »
I'd do something to greatly reduce the power of the heater.  You don't need a giant red-glowing bar to achieve 180 degrees, especially if you're willing to spend more time on each lamination than a factory machine on a high-volume production line.
« Last Edit: January 05, 2006, 02:40:48 PM by Ungrounded Lightning Rod »

amiklic1

  • Full Member
  • ***
  • Posts: 177
Re: Vacuum laminator
« Reply #6 on: January 05, 2006, 02:53:48 PM »
Yes, we are laminating the cells to the glass. From the front of the panel, it goes like this: glass, EVA film, cells, EVA film, TEDLAR film.

I am thinking of using just the second EVA film, and to avoid the one in front of the cells. Wander what would I get.

« Last Edit: January 05, 2006, 02:53:48 PM by amiklic1 »

amiklic1

  • Full Member
  • ***
  • Posts: 177
Re: Vacuum laminator
« Reply #7 on: January 05, 2006, 02:55:57 PM »
Yes, we are thinkong of that, but if you look into the comercial laminators, they use 15-16 heaters in the 1mx2m area, in total of approx 8000W. I know time is important to them, but what type of heater to olook into and to get max temp (surface of the heater) of max 200 degrees?

« Last Edit: January 05, 2006, 02:55:57 PM by amiklic1 »

maker of toys

  • Full Member
  • ***
  • Posts: 221
Re: Vacuum laminator
« Reply #8 on: January 05, 2006, 04:57:39 PM »
it might would complicate things a bit from a sealing standpoint, but why not run heated water (through refrigeration tubing?) as your heat source. . . and as Ron says, use Aluminum or steel plates as your platens?  


then, the amount of heat you get is dependant on how much water flows. . . you can put a whale of a big heater in the water tank if you need lots of heat, but you'll never overtemp the laminator itself.  a cheap ($75?) brass water pump and a variable speed drill (or a throttling valve?) gives you control over the speed at which the platens heat.


you could even heat both platens with hot water.


if you heated the only the top platen, you wouldn't even have a vacuum sealing issue. some flexible automotive 'heater hose' (good for ~3 Bar at 125'C or so) would enable you to move the platen as you need to.


just a thought.


-dan

« Last Edit: January 05, 2006, 04:57:39 PM by maker of toys »

maker of toys

  • Full Member
  • ***
  • Posts: 221
Re: Vacuum laminator
« Reply #9 on: January 05, 2006, 05:04:30 PM »
oh, and a bit of rubber under the metal spreader bars  might be good, too.  ESPECIALLY with tempered glass. . . one scratch and there goes your temper.


-Dan

« Last Edit: January 05, 2006, 05:04:30 PM by maker of toys »

amiklic1

  • Full Member
  • ***
  • Posts: 177
Re: Vacuum laminator
« Reply #10 on: January 06, 2006, 12:31:18 AM »
It's not so complicated to seal the holes for entering and exiting the tubes, wires etc. I use simple temperature resistant silicone, just let it 24 hrs to work. About your solution: Can I heat the space to 180 degrees with heated water? I think that answer is negative. Beter of that, maybe commercial laminators use large number of heaters just to heat the space enough (170-180 deg), and the heater should not glow red because of that. (switches off before it glows red totaly because at max temp heater surface is cca 500-600 degrees) Just my thinking. Water may be used for first stage of process, to prepare the laminator (pre-heating to 50 degrees), but all above that means large expansion and possibly a break. Also, as in computer water cooling systems, leakage is veray danger thing to happen, so I'm probably going to avoid that.

But, it gives me some new ideas. Thank you.
« Last Edit: January 06, 2006, 12:31:18 AM by amiklic1 »

amiklic1

  • Full Member
  • ***
  • Posts: 177
Re: Vacuum laminator
« Reply #11 on: January 06, 2006, 12:33:26 AM »
Yes, you're right. I polish the underside of alu tubes, but it's better to do so. Yesterday we did our testing again, and forgot to put some rubber. Fortunately everything is ok. I'll post the pictures of that. Improvement happen, but we're not completely satisfied yet.
« Last Edit: January 06, 2006, 12:33:26 AM by amiklic1 »