This diary will be of notes and pictures of the building process of a 17'(blade diameter), dual rotor wind turbine, using #15 magnet wire coils, and 32 neodynium magnets. (16 on each rotor).
I will spend quite a bit of time on very minor details, as this post will be aimed at helping the new person learn and enjoy building turbines as much as i have. Much thanks is given to all those who have helped me to get a good understanding to build a very useful wind turbine. Many people on here have helped me over the years to build turbines, make solar panels and find solutions to all kinds of problems that would have been impossible to tackle alone.
This turbine is dedicated to Bob Noogle. His enthusiasm on this board helped many. He like many others on here, and IRC, from all over the world are what makes this hobby such an enjoyable experience. Bob passed away a short time ago, and i considered him a friend even though we had never met..His goodwill and caring nature made him well liked and his opinions respected.
Now to the building

Stator building
I try and encoorporate as many recycled materials as possible to build my turbines and this one was no different.
For this machine each coil was wound with 2 strands of #15 magnet wire.
There was 69 turns in each coil. One thing to note was that it turned out that each strand of wire was 68' long.
Keep in mind i had 2 strands in each coil so there was 68'x2. I measured one length of wire so that if i ever only had 1 coil to get wire off of, that i would know how long to cut the piece of wire needed.
I needed 2-6 pound rolls of wire to make the 12 coils. I had enough wire left over to make one extra coil so knowing how long they are is important. The finished stator weighed approximately 24 pounds. I purchased the wire from electrowind(near toronto). They are very fast and reasonable(if you are stuck on this side of the creek).
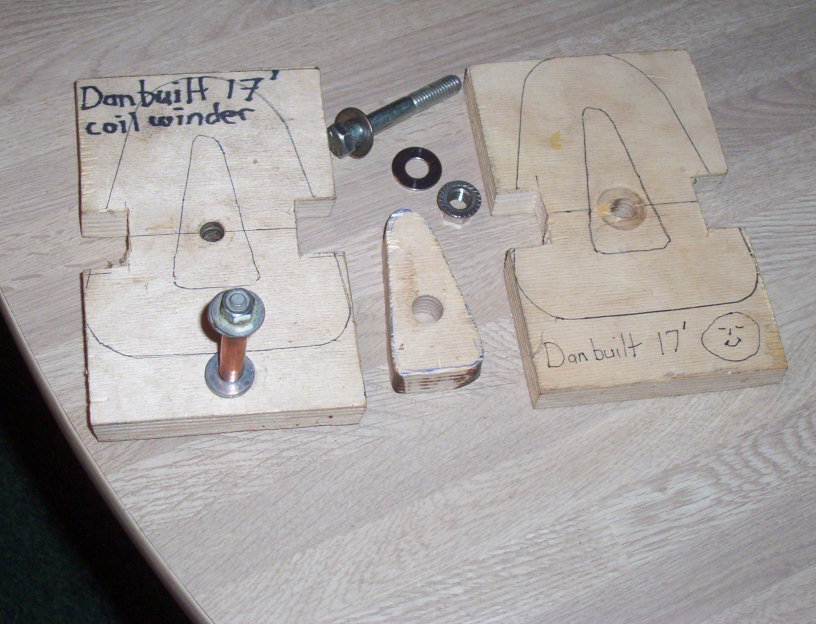
I would suggest that when you make a coil winder that you make the thing so it is universal. Meaning the center bolt hole should always be the same size so you dont have to make a whole new winder assembly each time you want to build a turbine. Make sure to wind all the coils the same way. For example i wound my coils in a clockwise manner. I found there was .8 ohms of resistance in each strand of wire. Too much resistance would rob you of your power.
I should say that i built this machine to be a 48 volt machine. Number of turns and wire thickness all play a part in the total output capabilities. If you are unsure of how many turns of wire you need, just ask and there is alot of folks around here with that knowledge. I remember my first stator, i built it with 200 turns thinking the more turns, the more power i would create, and it just doesnt work like that.
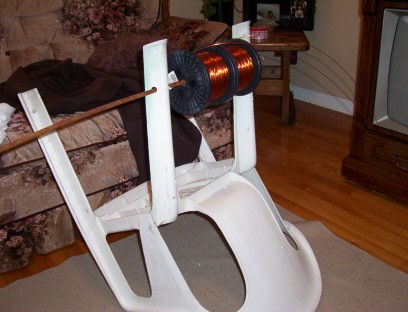
Below is a picture of a plastic patio chair that i drilled a couple holes in the legs to hold my 2 rolls of wire. What my wife doesnt know goes on in the house when she is gone to work; won't hurt her i think? O_O
>
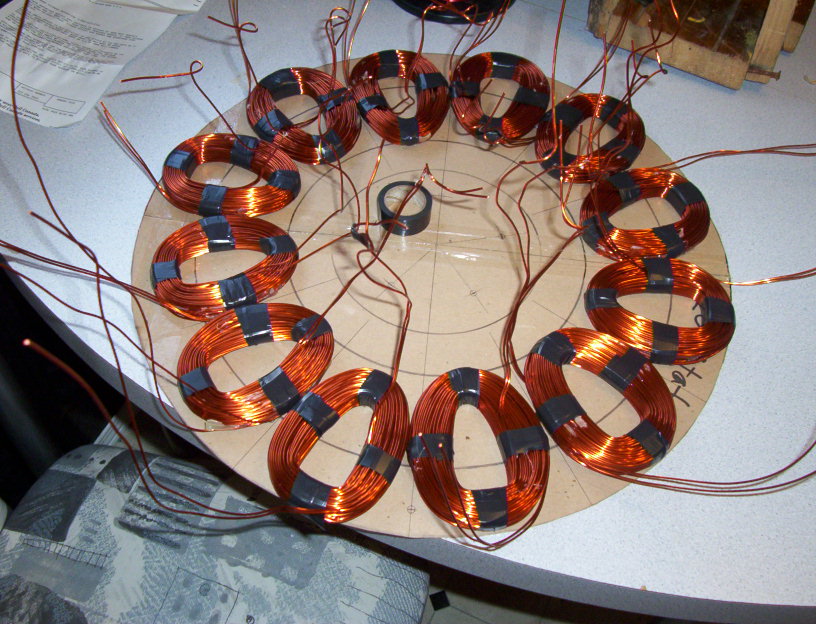
The picture below is a cardboard cutout of what the stator would look like when done, and the proper size coils i would need to fit into the mold i built. These coils weighed about a pound each, maybe more. Something i would like to say here also is that if you plan on building more than one turbine over time, i suggest you use the same spindle for all your projects. I buy my spindles at Princess auto in canada for about 50 bucks. The reason for using the same spindle is you always have the same bolt circle(the studs and holes the fill). This way you dont have to re calculate where the holes go in your steel plates that hold the magnets. Makes everything a little more manageable in my opinion.

Below is what the coils looked like when they are completed. The hole in the center of the coils should be about the same size as the magnets you are using. I actually put the coils in a vise with some wood on the jaws of the chuck to avoid scratching the coating off the wire, and i squeeze the coils so they fit into the stator mold better. I also use a glue gun while making the coils and put a drop or so on after every 8-10 rounds or so. I find it holds the coils nice and firm. I then put electrical tape on the coils in 4 different spots to make them hold tight.The picture below is taken before they are squeezed and as you can see, the coils would not fit into the stator very well at this point. I will be using magnets with dimensions of 3"x1-1/2"x3/4" thick. The shape of the coils will creat some cancellation at the top, but to make the coils fit, we had to have a trade off, and these magnets are huge, so it doesnt matter to us in this application. We should have power to spare.
As stated above, i used 69 turns of magnet wire, with 2 strands of wire in each of the 12 coils. The length of each wire used is 68' which means about 1' per turn(or round of wire). I used a hot glue gun every once in a while on the coils and i find it hold s the coils together nicer when removing them from the winder.
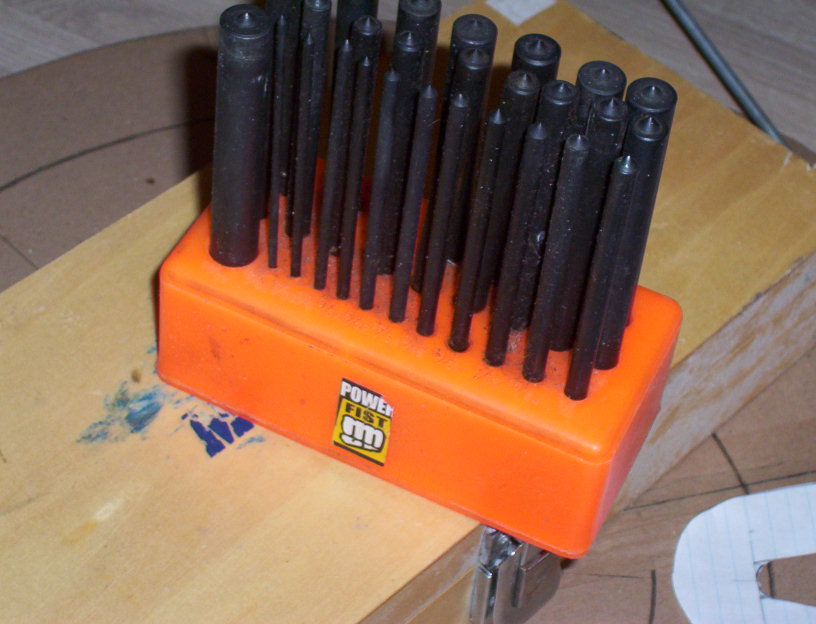
Below is a tool i use to duplicate holes. It is common in the tool and die industry. A set of these is called "transfer punches". And what they do is what the name implies, they transfer one location on an object to another. In this case we transfer holes, or location of holes. This can save you tons of time in locating a certain position to drill a hole, or locate a magnet or whatever. A set of these pucnches is real cheap and i got this set at princess auto in canada, but iam sure they are most anywhere like harbour freight in the states etc. These punches hae a point in the center of them and when you tap the punch with a hammer, it will leave a mark on the object you want to transfer to. It is great for locating holes and these punches come in a set that will fit any, hole size you may have..They are a very neat tool to use to locate clearance holes andin our case, the spindles bolt circle. I also used it to locate the drilled hole on my coil winder.
 <BR<p>
All of my figures and measurements are courtesy of danb, and this machine is almost identical. If you need any technical info on this machine. You can find it in his 17' posts. It is alot harder to put all the facts down here as you write your post, than it is to just do it. Later tonight, or tomorrow, i will post the pictures and facts of the soldering of the phases, the fiberglass, and the stator mold..hope this helps some folks.. pickster

