Author Topic: yet another vawt rotor in progress part one  (Read 2832 times)

0 Members and 1 Guest are viewing this topic.

Stonebrain

  • Sr. Member
  • ****
  • Posts: 342
yet another vawt rotor in progress part one
« on: April 16, 2008, 09:50:25 PM »
Where to start...The materials.


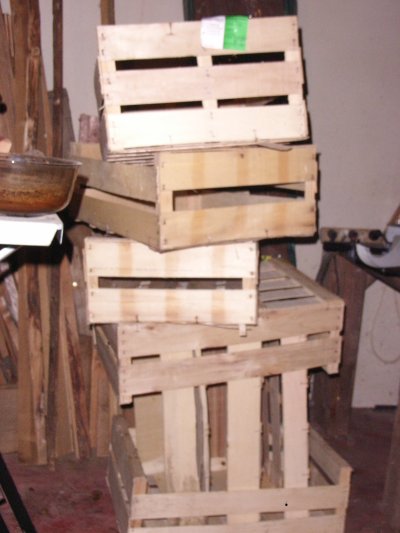
Yes,that's right,greengrocers crates.Absolutely FREE.

Maybe some of you reading this magic word are running to the greengrocer allready,but warning:this is a lot of work! No such thing as a free lunch.

Well never mind,this is great stuff for lighting the fire too.


Carefully taking off the planchettes,a knowhow by it's own.

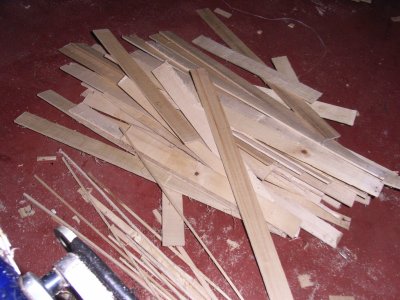
Then sawing them to uniform strips(I did it on my small bandsaw),mostly 35mm for me.

They are mostly with rusty holes of nails,cracks,and nots.

The planchettes are mostly 2mm(2/25") and 4mm(4/25").They are in poplar(majority)and pine.These details are for France and may depend on local conditions.

I only used the poplar allthough they are very warped compared to the pine.I think ppoplar is superiour for this purpose,there must be a reason poplar was widely used in early aircraft construction.Light,soft,but strong(and cheap).Used in lamination,the warping is not a point.


This is the yield of 3 or 4 crates.Great basic material.I didn't use much of the 2mm this is more work and cost more glue. A shame there is not much of 6mm or more available.


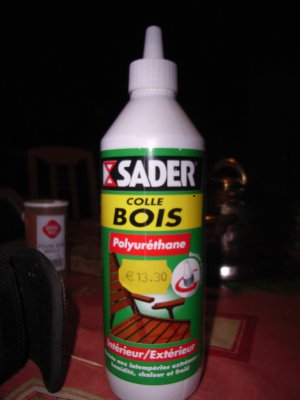
This is the expensif stuff.The 13.30 Euro is for 500 gram.I used about a half of these flacon for what you get in this diary.I have a love-hate relation with this stuff.By principle I hate chemical stuff,but I don't know about anything comparable for wood.It is very water resistant and strong with an axcellent adhesion.

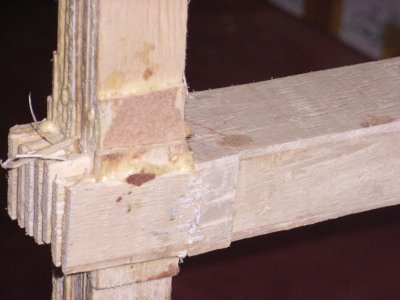
It's foaming and fills up small cavities and cracks.


Here you see the foam coming out of laminates.


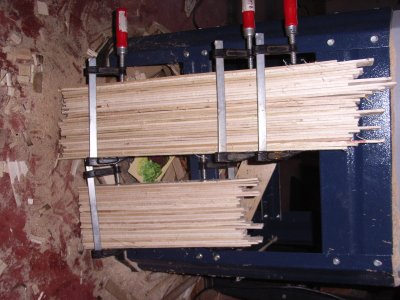
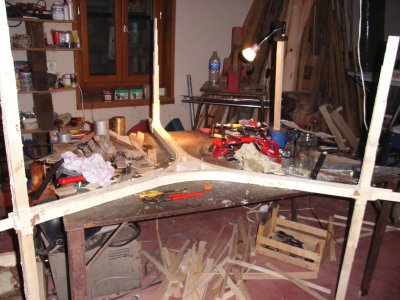
I started gluing together some,


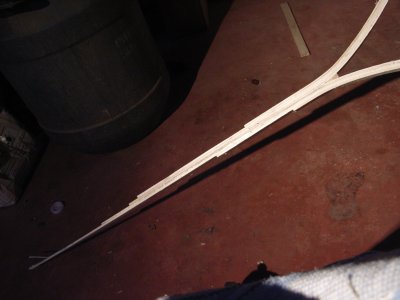
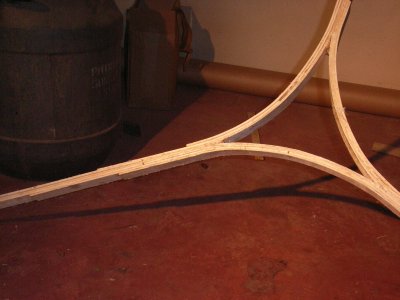
Then it started growing,layer by layer,a bit like a tree.


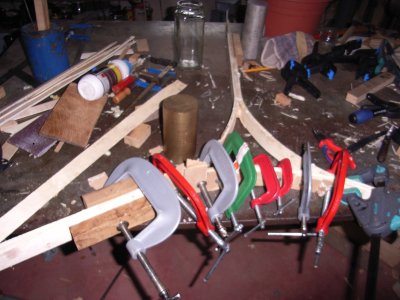
Allways lots of clamps


vertical arms for the future airfoils in progress


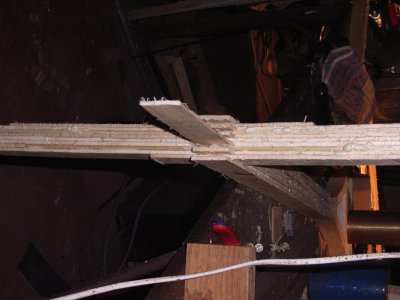
Then I realised I needed a hub

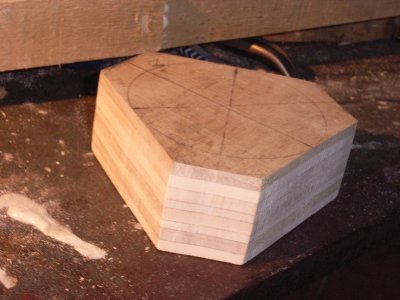
I made it fit in the center,then machined the two surfaces.

This was my first mistake.The hub was were I should have started˙Ishould have machined it on  the circonference,and then start the rotor fitted on the hub.

Never mind it is not that bad.
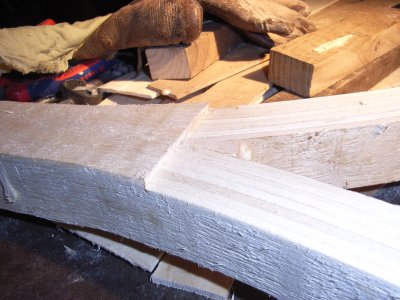


some finishing.


Well,sofar


cheers,

Jaap

« Last Edit: April 16, 2008, 09:50:25 PM by (unknown) »

tecker

  • SuperHero Member
  • ******
  • Posts: 2183
Re: yet another vawt rotor in progress part one
« Reply #1 on: April 16, 2008, 04:41:47 PM »
Impressive I can smell the urethane from here It kinda gets under your fingernails and gets looks at the dinner table.
« Last Edit: April 16, 2008, 04:41:47 PM by tecker »

vawtman

  • Hero Member
  • *****
  • Posts: 1425
Re: yet another vawt rotor in progress part one
« Reply #2 on: April 16, 2008, 05:19:38 PM »
Hi Stonebrain

 You got quite the project going on there.I used a product called Gorrila Ultimate in the US on my wooden test stator that the wife broke.It wasn't the glues fault i just had too many holes drilled in it. :)


 Does yours require a dampening with water to get going?Strong stuff indeed.

« Last Edit: April 16, 2008, 05:19:38 PM by vawtman »

WXYZCIENCE

  • Sr. Member
  • ****
  • Posts: 355
Re: yet another vawt rotor in progress part one
« Reply #3 on: April 16, 2008, 09:53:40 PM »
Stonebrain, the vawt artist at work again. Real good pictures also.
Joseph
« Last Edit: April 16, 2008, 09:53:40 PM by WXYZCIENCE »

ZooT

  • Full Member
  • ***
  • Posts: 187
Re: yet another vawt rotor in progress part one
« Reply #4 on: April 17, 2008, 12:35:42 AM »
I really like those laminations......seriously....structural plywood engineered for a specific purpose.....yeah....I "really" like that..........
« Last Edit: April 17, 2008, 12:35:42 AM by ZooT »

Capt Slog

  • Sr. Member
  • ****
  • Posts: 378
Re: yet another vawt rotor in progress part one
« Reply #5 on: April 17, 2008, 05:34:14 AM »
That looks great.  I too love those lamination and how they come togetehr in the centre.  I can't help thinking that this would be a good  (if tedious) way to build a HAWT prop to get good strength at the hub.


.

« Last Edit: April 17, 2008, 05:34:14 AM by Capt Slog »

Dave B

  • Hero Member
  • *****
  • Posts: 1014
  • Country: 00
    • DCB Energy Systems
Re: yet another vawt rotor in progress part one
« Reply #6 on: April 17, 2008, 10:52:31 AM »
This is really great work and in the true spirit of the board. Thanks for sharing and keep us updated.  Dave B.
« Last Edit: April 17, 2008, 10:52:31 AM by Dave B »
DCB Energy Systems
http://dcbenergy.com/

asheets

  • Sr. Member
  • ****
  • Posts: 368
Re: yet another vawt rotor in progress part one
« Reply #7 on: April 17, 2008, 02:06:16 PM »
I was thinking the same thing...
« Last Edit: April 17, 2008, 02:06:16 PM by asheets »

Stonebrain

  • Sr. Member
  • ****
  • Posts: 342
Re: yet another vawt rotor in progress part one
« Reply #8 on: April 17, 2008, 03:04:56 PM »
If the wood is really dry,some extra humidity can help to make it foam.

touching the wood with a slightly humid cloth is enough.
« Last Edit: April 17, 2008, 03:04:56 PM by Stonebrain »

Stonebrain

  • Sr. Member
  • ****
  • Posts: 342
Re: yet another vawt rotor in progress part one
« Reply #9 on: April 17, 2008, 03:07:17 PM »
Thanks for the encouragements everyone.


cheers,

Jaap

« Last Edit: April 17, 2008, 03:07:17 PM by Stonebrain »

Stonebrain

  • Sr. Member
  • ****
  • Posts: 342
Re: yet another vawt rotor in progress part one
« Reply #10 on: April 17, 2008, 03:09:48 PM »
I see,you've been through it too.
« Last Edit: April 17, 2008, 03:09:48 PM by Stonebrain »

jmk

  • Hero Member
  • *****
  • Posts: 603
Re: yet another vawt rotor in progress part one
« Reply #11 on: April 19, 2008, 08:39:33 PM »
 Wow! What a project. Your going to have some time rapped up in this one. It's looking good. Thanks for the pictures too. It reminds me of building the balsam wood airplanes. By the time you have them done you don't want to fly them.
« Last Edit: April 19, 2008, 08:39:33 PM by jmk »