Hey All,
It's been a long time since I last visited the forum but the old AC motor conversion, 2 phase PM Alternator is still in relatively good condition and finally getting some much needed attention. The PVC blades broke a long while back and poor Genny has been blade-less and sadly neglected ever since. The nice weather has inspired me to tilt the tower down, check things over and get some new blades on it.
A little history:
(Most of this is in my other diary but this is more up-to-date.)
My humble system consists of two 6V Glass-Mat 220Ah batteries (located outdoors in a semi-protected wooden shelter) along with eight 12V Glass-Mat 9Ah batteries mounted on my home-built electric mountain bike. (Here's the ebike project in case you're wondering) http://visforvoltage.org/book-page/996-mountain-bike-conversion-24v-3-4hp
The two 6V batts are wired in series and the eight 12V batts are hooked up in parallel for charging @ 12V (switched to series/ parallel for running @ 24VDC).
I've kept my 15A Iota 3 Stage charger running full time lately to insure that my storage stays in peak condition. I really like the Iota charger, it does an excellent job at maintaining Glass-Mats using Bulk, Absorption and Float at the prescribed voltages. If you ever consider getting an Iota, make sure that you get the IQ-4 12V 3 Stage Smart Controller that plugs right in and is a perfect match for Glass-Mats.
The PM Alternator is a conversion from a 120VAC motor with starter windings. I cut the rotor down (squared it off) to accommodate 4 poles. Each pole is a group of 7ea 1/2" x 1/2" cylindrical neodymium magnets epoxied to the squared-off sides of the rotor. Windings were star wired to put out the two phases of AC.
Currently the AC runs down two extension cords to two bridge rectifiers located outdoors in the wooden shed. From there the rectified DC current goes directly to my two 6V GM batts. in series (12V). My ebike batteries are charged using jumper cables from the two 220Ah batteries. Eventually I'll put a charge receptacle on the ebike and have a cord handy at my charge station.
In addition to the PM Alternator, I have two small solar panels. One is a nice little 5W mono crystalline solar panel and the other is a 32W amorphous panel that works surprisingly well here in the Pacific Northwest, steadily overcast weather. I run the DC from these panels to a Steca Solsum 6.6 charge controller and from there to the 220Ah batteries.
From my outdoor charging center I ran two heavy duty copper cables (#4 insulated) and a bare, solid #6 ground wire through 3/4" EMT and in through the wall of my house (about a 10 foot run overall). Panel boxes and equipment is grounded to an 8' copper clad ground rod next to my outdoor battery enclosure.
I placed a DC panel box indoors where the DC and ground enter the house. In the DC panel I've got positive and a negative DC buss bar for easy connects.
Next to the DC panel I have a 1250 W Aims inverter wired to the DC panel.
Below this I have a small AC breaker box with two 15A breakers for two 12Ga AC, auxiliary circuits to a total of four wall receptacles. (These receptacles are all marked as "Auxiliary Power Only".)
Now that I have the PM alternator/ wind turbine tilted down for maintenance, it seems like a good time to rewire a few things. Why not bring the two Alternator AC cords and the two DC Solar panel wires down to some weatherproof receptacles placed on the outside wall of the house and to the indoor DC Panel. Then I can place the bridge rectifiers and the Steca Solsum charge controller(s) inside and just connect them right to the buss bars. All that would remain outside would be the Wind Turbine, the solar panels and the storage batteries.
It only makes sense to bring the rest inside where I can easily monitor things.
I purchased a little Watts-Up meter for my ebike last year but never got around to hooking it up. I think I'll put some Deans connectors (like the ones used on RC batteries) on it so I can use it either on the ebike or to monitor what's going on with my charging system. The Watts-Up is a handy, universal little gadget that tells you quite a bit of information for such a small package. It's good to 100A peak, 50A continuous.
Some of you may have wondered why I don't have a charge controller* (yet) for the DC from the PM Alternator. I need one is the simple answer ... especially for Glass-Mat batteries that are so picky about their charge and voltage requirements.
This is where the Watts-Up meter will come in handy.
I just happen to have another Steca Solsum 6.6 charge controller in my travel trailer. If I can monitor my PM Alternator under a variety of conditions then I should be able to determine if I can get away with using the spare 6A charge controller for my wind genny.
I figure one of the best ways to check this out would be to pick a nice windy day, go for a good long ebike ride and discharge my bike batteries down to to the 11.8V to 12V range. I'll temporarily disconnect my two 220Ah batteries and my solar panels so that my only source will be my PM alt. and my only load will be the discharged ebike batteries.
Hopefully the wind will cooperate for this test ... (does it ever?)
Now I'm not really sure how to go about assuring myself that I can use the 6A charge controller other than recording my peak Wattage (Wp) and voltage (V) to determine my Amperage (A) under this scenario (Respectable load and windy day for semi- constant charging.) Actually, the Watts-Up meter will give me a direct readout of the Amperage so I won't even need to calculate it.
At any rate I'm sure open for suggestions as to how to best determine if I can get away with using my Steca Solsum 6.6 charge controller. I know it has a fuse on it and I think it has some built-in protections but I'd sure rather not let the blue smoke out of it right off the bat, if you know what I mean. I can't afford to get a higher rated charge controller now or I'd just buy one to be on the safe side.
When it boils right down to it, though, I think I'd rather risk of frying a relatively inexpensive charge controller than run the risk overcharging my spendy Glass-Mat batteries. Then again, if the controller is going to fry under the load and wind conditions mentioned for the above testing, it wouldn't make much sense to try and use it anyway.
Ok, I'm sure I've sufficiently bored you to near death with piddly system details, so I'll get on with with the, hopefully, good news of my new wind turbine blades. Just another quick note about the PM alternator, it has very little cogging so it starts pretty easily at low wind speeds. With my 4 blade, PVC setup it would start off spinning at around 4mph and seem to do well under load at around 12-15mph winds.
I decided to try an odd number of blades this time for obvious reasons, vibration, shadow effect etc, so it's basically just a matter of choosing a 3 or 5 blade configuration.
Conditions here are (very) far from optimal, trees, 100'x100' lot, houses, nearby hills etc. ... and did I mention trees ... lots of nice tall ones.
It's not a practical location for a wind generator at all, a tall tower is out of the question here... but this is what I've got. I caught the wind turbine fever years ago and, as you all know, it's chronic and totally incurable once you've got it.
This has been a wonderful learning experience and even under the most adverse conditions it's been a heck of a lot of fun. Surprisingly enough, with this humble little system, I've been able to maintain a stand-by UPS system, run my laptop and a couple of small fluorescent lights most of the day, every day, keep all of the household rechargeable batteries charged, keep the RV batteries (the two 220Ah GM batts.) and keep my ebike batteries in great shape and float charged nicely. There's a lot more I can do with what I've already got in place, it's just a matter of getting things monitored, tweaked and using the juice we've got more efficiently.
BLADES ... (finally ... I promise!)
I know there are a lot of folks who not only think PVC blades are a waste of time but there are those who actually cringe at the thought of using them.
I tried my first set of PVC blades and although they may not have been the most efficient blades, they worked well with my PM Alt. conversion for nearly two years before literally exploding during one cold, windy, winter afternoon. I finally found all four blades but they must have flown off with some force behind them since I found one of them out in the street at the opposite end of my house from the (pipe) tower.
Explosions aside, I think PVC blades have some merit and are at least worth considering for a small home-built wind generator or alternator.
Wood blades are, no doubt, superior in a great many ways and I'm not here to debate or promote the use of PVC over wood or any other material. I just happened to have made PVC blades for my first attempt and subsequent second more successful wind turbine project.
The material that I used for these earlier projects was 10" diameter white PVC pipe that had a wall thickness of about 5/16". It's pretty flimsy stuff, IMO, for any blades over about 26" length.
I made mine like the Zub-Woofer blades with a few minor modifications.
It's a brilliant design and they worked very well. Many thanks and remembrance to Zubbly and, of course to Wooferhound.
My blades broke at the root, as do most PVC blades. I painted them to protect them from harmful UV and tried to place as little stress at the hub where the two blades parts cross but they eventually gave out and I think it may have had a lot to do with the particular material I used for the project. I think the pipe that I got had been stored outdoors for while before I got it. This could easily account for them becoming extra brittle, not to mention the cold, gusty weather conditions at the time of the big bang.
I don't plan on using the same design or material again simply because I want to try something a bit different, something beefier, more durable but similar in the twist shape that worked so well with my setup.
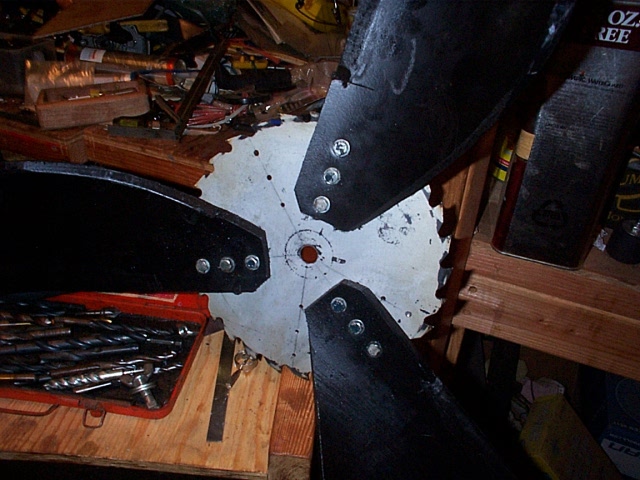
I've been keeping my eye out for different materials but still liked the idea of using the pipe shape to make use of the inherited twist when cut at a slight angle. I figured the tip should be somewhere in the neighborhood of a 2" chord set at around 5 deg, and a wide chord set at around 40 deg. at the root for that easy start.
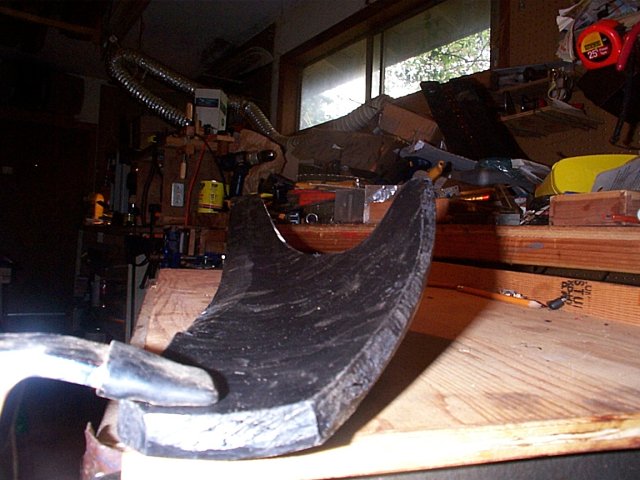
A quarter pipe is handy to work from and once shaped yields the twist I am looking for.
Maybe it was my lucky day but I think I found just what the Doc ordered. I ran into some 10" diameter black PolyPipe HDPE, EHMW PE 3408.
Extra High Molecular Weight (EHMW) High Density Polyethylene. The stuff is used in industrial applications such as underground fire mains, mining, landfill, water reclamation or sewer.
EGNW has some neat properties it's fairly flexible yet very durable, I don't think you could possibly break it unless you poured liquid nitrogen on it then hit it with a sledge hammer. The wall thickness of the piece I got is 1/2" so it's got plenty of bulk to it allowing it to be shaped nicely. It cuts, carves and drills like butter.
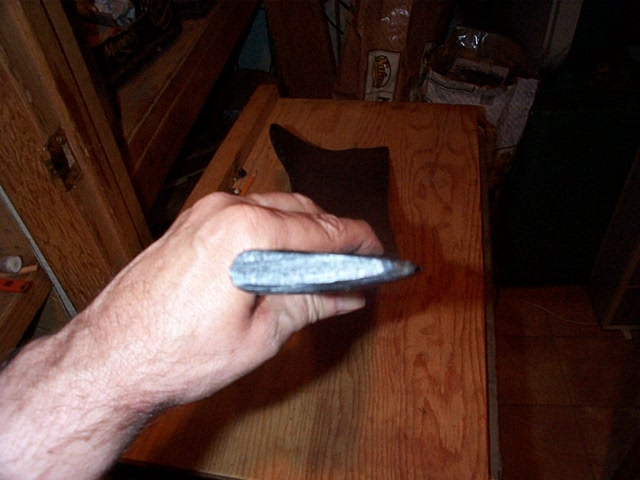
I cut the pipe into quarters with a skill saw. Curved lines cut nicely with a jig saw. I found it super easy to shape using a hand plane. The convex areas are easy to shave off but since the shape I was working with had just as many concave surfaces I just bent it back and was able to take care of a of these areas with the plane too. A wood rasp took care of the rest and I used a little cylindrical sander on a hand drill to smooth out the areas where I used the rasp. In other words it's pretty easy to use a number of tools to shape it.
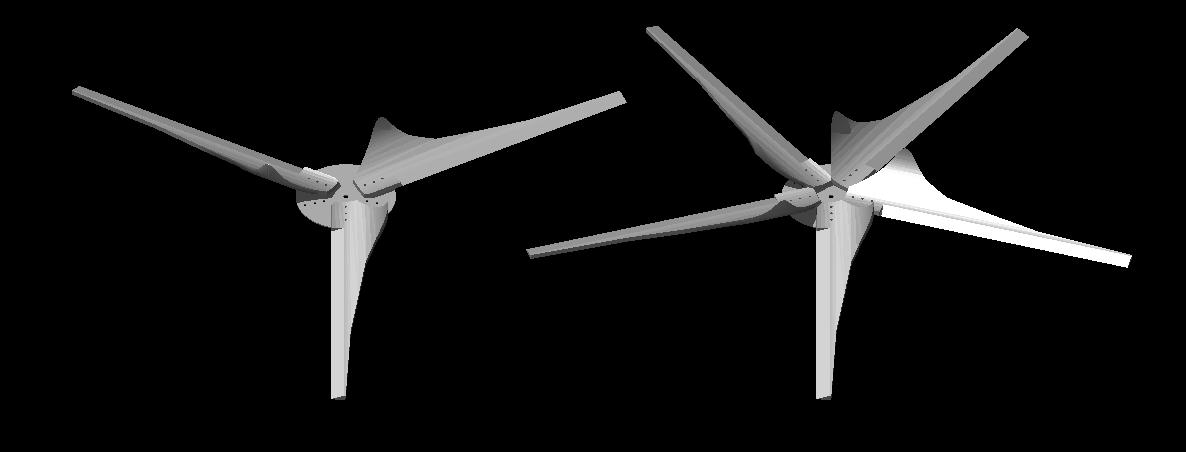
Before I dug in to do all this shaping I wanted to play around with several designs and overall shapes to see what I could come up with so I decided to visualize these in IntelliCAD, using solids modeling. The following is what I cam up with. There's nothing really new about the shape, I've seen very similar ones made by others here including Wooferhound, I think.
I had some particular design requirements in that I want these to make the best from the erratic, gusty, relatively low wind speed and changing directions here.
So, I wanted them as wide as possible at the root with the near 40 deg. twist and also figured that the more meat left near the root would also provide more reinforcement where so many of these blades tend to fatigue and break.
I also wanted the blade to quickly return to a narrower blade as I progressed away from the hub. This would, hopefully, provide some good lift and an apparent wind direction closer to perpendicular to the axis of the turbine.
I hope to make them as quiet as possible, although my last blades were extremely quiet, therefore the tapered rather sharp, trailing edge, smooth contours and round overs.
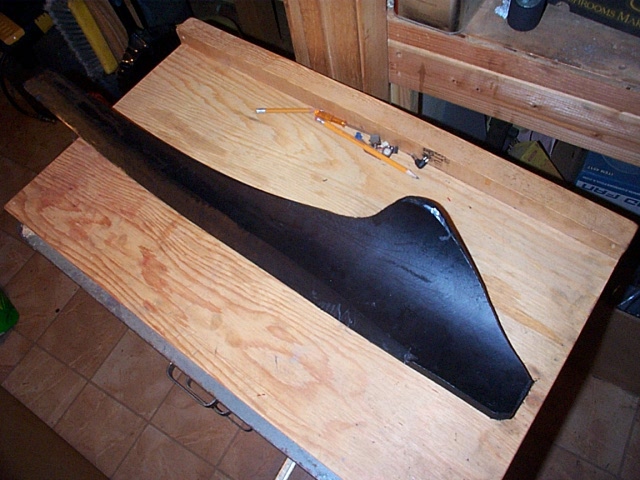
Now before I add any pics, I'll warn you that I had completely forgotten that many plastic materials tend to have a memory which wakes up when getting away from it's structurally sound, formed shape. In other words it warps or bows when you cut it.
When I cut the pipe in lengthwise quarters, no problem, the integrity of the cylindrical shape was not altered drastically enough to make a difference ... yet.
When I got out the jigsaw to cut the form, however the EHMW was silently grinning in the background, little did I know. As I began to cut, I was still none the wiser and proceeded to follow the penciled line on my paper masking. As I got toward the end of the cut, it was then quite apparent that the unpredicted antics of the EHMW had, indeed, gotten my goat.
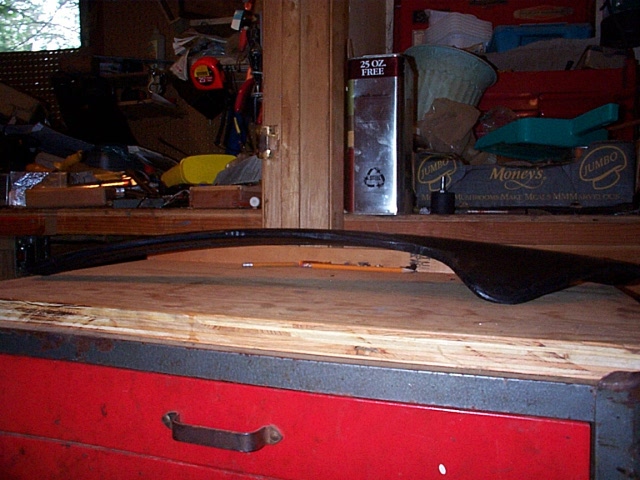
So, serendipitously, I hope, the blades have a very distinct bow toward the oncoming wind. There's not much I can do about it, so I look at it as a feature rather than a problem. Only time will tell if they work well like this or not.
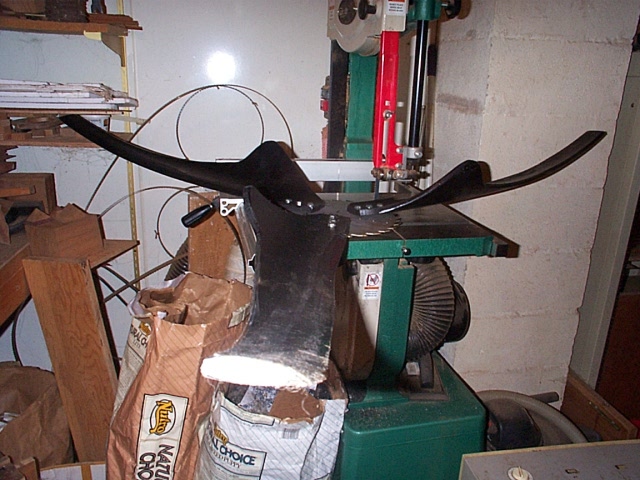
My biggest question was whether to go with 3 or 5 blades. I'm going with 3 for now but have the additional blades already cut and shaped should I want to try the 5 blade configuration.