Now the deed is done!

First, i cleaned the tap for dirty lead, and then drilled some 3mm holes at an angle at the top. The holes meet in the center about 1cm down; i hope the molten lead will flow into those holes and make a good grip/bond.

What i found of clay, was some porcelain clay; it was a bit soft right out of the bag, but i managed. I formed the clay around a long socket wrench which was 16mm in diameter, which are perfect for the negative round battery post.

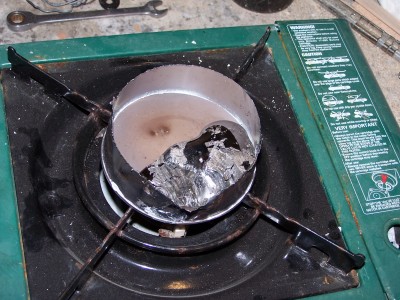
Melting the lead was done in a tin can over a camping gas cooker. I was almost out of gas, so i was a bit worried about the temperature, but it worked ok.

After the lead melted, i scraped off the slag on the top of the melted lead, and took it out to the battery quickly, and poured...

One can see that the clay cracked a little in one place, but not enough to leak any molten lead out. The molten lead made some crackling noise for a few seconds before solidified, due to the moist clay. Next time, i'll use more clay to make the sides a bit more robust.
I'm satisfied with the result.

The post sits firmly onto the old tap, and doesn't look to bad either. A thicker mold would probably have avoided that slight bulge in the middle, but it doesn't hurt, since i had enough lead, and the hole in the lid fits snuggly over the post.


All that needs to be done now, are to glue the lid back on, and put some sealant around the post.


(More and larger pics at my gallery:
http://mwlmf.net/gallery/brokenrolls )
And now; charging...

The only 6V charger i have are at 2A, and will take decades... I'll think of something i guess...
