On Saturday I spent the afternoon visiting Pierre Bolduc at his home southwest of Calgary, Alberta. More than a dozen of us had descended on his secluded house in a birchwood forest to look at a tremendous array of solar panels, and hear an interesting idea about repairing and reusing defective ones. I came as an interested "outsider" to the solar PV industry, but most people there are folks who are either solar users or solar installers in one way or another. The Solar Energy Society of Alberta was represented by Harleen Aujla and Don Darnell, and KCP Energy was represented by Calvin Ng and Geoff Domenico. I also met Richard Hall, who, like Pierre Bolduc, has solar panels installed at his house. Of course, Richard's solar array cannot compare to the expanse of silicon on display at Pierre's house!

Pierre Bolduc was an early adopter of solar energy, plastering the roof of both his house and his garage with solar panels many years ago. He was also a pioneer of grid tie, which in Alberta was unfamiliar to both homeowners and electric utility companies in the late 90's. Pierre tells stories of many misunderstandings and mistakes that introduced feedback loops in the lines from the utility pole that caused his inverters to shut down. Pierre believes that the utility company did not know how to incorporate a solar PV producer into its system, then, a theory borne out by the many complicated interconnection devices they have tried and replaced over the years.
After the tour of Pierre's system, he introduced us to the kinds of defects that he finds in solar panels. Having installed more than 100 on his house, he had plenty of experience in repairing modules. In his opinion, a high rate of manufacturer's defects still exists in solar panels that can usually be found in the interconnection box on the back. While many folks believe that the main vulnerability of a solar panel would be the shattering or flexing of the glass, Pierre contends that no amount of care in shipping and handling of the panels will prevent the defects that are built-in at the factory, or arise from errors in installation. When these happen, there are "weak spots" in the design of solar panels that he has found to be at fault so often that it's not worth looking elsewhere first.

Inside the junction box, the wires from the numerous cells are joined together. These cells are grouped together in both series and parallel. A series of 20 cells will produce 36 Volts, and when connected to deliver power they will deliver up to 3 amperes while the voltage drops to about 26 or 27 Volts, which is optimal for off-grid battery charging. On a typical panel, there may by two or three of these cell-series, and they will be wired in parallel so that together they all still deliver 26 volts, but now the currents combine to nearly 9 Amperes, in the full sun.
The series wire connections made from cell to cell can usually be seen through the translucent cells. The parallel connections are made inside the junction box. Thin wires that connect from cell to cell in series are more like tape, so you would think that they are the most vulnerable parts. Indeed these connections do fail from time to time, but it turns out that the fault can be traced to the junction box first, and then the wire-tape connections may fail later.
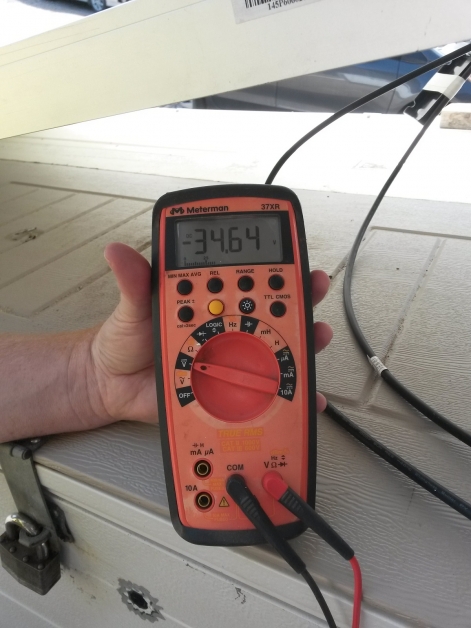
Pierre demonstrated the behaviour of a solar panel with failed connections in its junction box for us before diving in to attempt repairs. Discovering the defective panel was readily done - he connected a volt-meter to the power leads, pointed the panel at the sun, and showed us a disappointing 23 Volts from a panel that should have been delivering at least 35. To drive the point home, he then connected the panel to a large resistor bank, so that while the current flowed he could again measure the voltage and current at the same time. He showed us that the voltage had dropped below 22 Volts, well below the target 26 Volts, and the current was only 4 Amps - well below that 8.7 Ampere rating of the panel. Tuning the resistance of his resistor bank to find a better power setting proved fruitless. This panel could barely deliver 100 Watts when its name-plate rating says it should provide 250W.
Before taking the panel down to discuss repairing it, Pierre explained the series and parallel geometry of the cells in the panels. The one he was demonstrating with had 3 of these strings in parallel. He then challenged us to put some shade over some of the cells to see the effect. When we did this, we could easily see that by covering just a part of some cells, the output of this panel dropped. Even worse than it already was. Some cells could be shaded with no effect at all. At this point it dawned on us that whatever the fault was, a whole string would be knocked out, but other strings would still work. The working strings of cells could be identified by the ones affected by shading. When waving our arms over the string on the left-hand face of the panel, we saw no effect, therefore we could expect the left-hand string to be the defective one. This information proved to be useful when repairing the panel later.

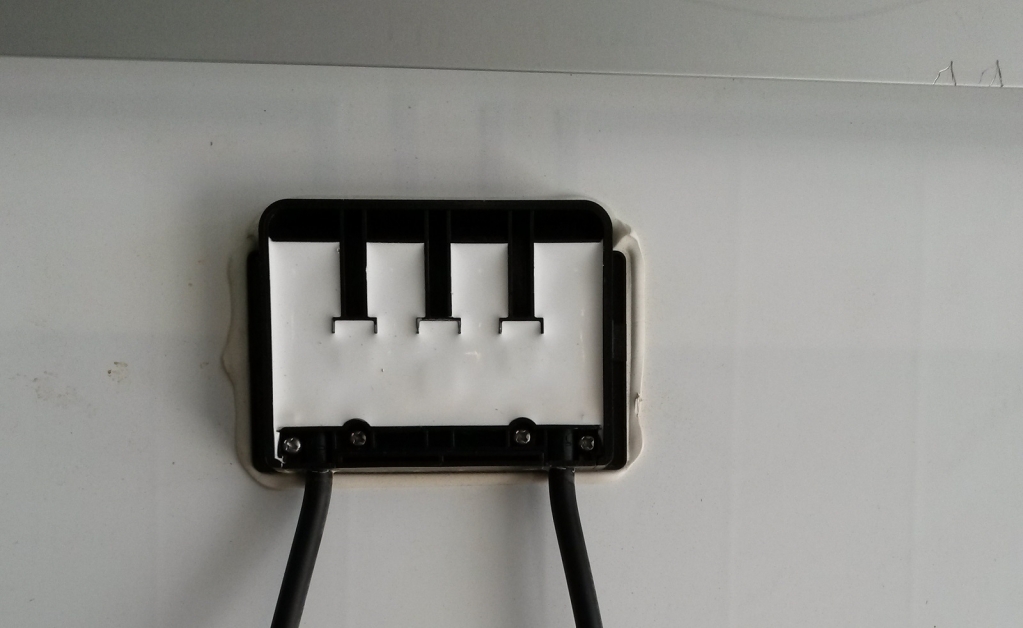
At this point, I was already eager to tear into the panel's junction box to find the culprit, but Pierre set the pace to make sure that everyone in the audience appreciated what needed to be done. We brought the panel into the garage, face down to work on the junction box. He had already opened it up to allow us to see where the problems lay. Pierre then explained how the parallel strings are separated by diodes, and that repair of the diodes and wire tab connections would be needed to repair this panel.
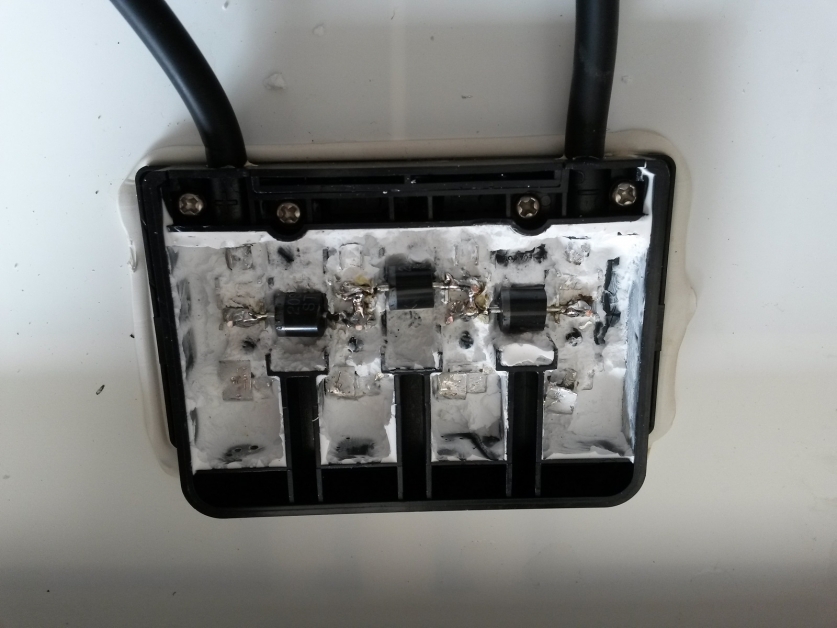
Inside the junction box, the separate strings of cells are joined in parallel through diodes. These are "bypass" diodes, which are normally there to permit one string of cells to be shaded without sacrificing the output of the other strings. When one of these bypass diodes fails, however, it prevents that string from working at all, and may prevent a neighbouring string from working, too.
The design and selection of the bypass diodes is not a mystery, and the PV manufacturers have opted for the cheapest and simplest solution. They typically install diodes of the Schottky design, which usually look like little black cylinders about the size of the tip of your little finger. Other panel designs may use diodes in the shape of a square, smaller than a Scrabble tile, but they're usually Schottky diodes, too.
Before you can get to them, however, you have to cut your way through a silicone seal known as "potting". De-potting electronics is a fact of life for electronic tinkerers like myself, but for the uninitiated it can be daunting. "What kind of damage will I do if I cut into it?" Well, rest assured that if the components inside are already defective, there's no great loss if you break something else while getting inside anyway. This is a case where breaking the case open is the right thing to do. It was a relief for me to finally start cutting into one, since I had been on tenter-hooks for almost an hour waiting to break in.

Pierre equipped us with an impressive array of dentist's tools to cut and poke our way through the silicone "brick". Luke and Nicole made their way through, exposing the diodes and connection wires that joined 3 of these parallel strings together, as well as the connections to the external leads. Since a failed diode looks just like a working diode, none of us expected to see any obvious signs of problems. Again, Pierre pointed us to something we hadn't yet noticed, and that was a wire-tape lead coming into the junction box that had peeled up from its connection. He assured us that this was not due to our picking and cleaning of the silicone, but that he had expected exactly this to be the cause of this panel's bad output, based on the test we did in the sun.
He brought out his solder iron and a few more tools to get us going, and we set the youngsters loose upon it, putting the connection back together. For good measure, Pierre also demonstrated to us the process of replacing a diode. He showed us where to cut the leads, and where to solder the leads of a new one back on. It is important to mind the orientation of a diode, since it works one-way.
With that done, we carried the panel back out into the sun and hooked it up again. To cheers and back-slaps the panel delivered 35.4 Volts right away, and when hooked up again to the resistors to pull some current they delivered 8.5 Amps. Accounting for voltage drop, it delivered 238 Watts, proving that it had been restored to its nameplate capacity, at only the cost of some silicone and a bit of solder.

Then everyone else got a turn, since Pierre had collected plenty more defective panels to repair. I settled down over a panel that would only deliver 24Volts in the sun. Without considering which of the diodes could be the problem, first, I set about excavating the silicone. Getting started was easy, but taking out the silicone from around the terminals and diodes became finer and finer work. I persisted with the dentist's tools, until Pierre invited me to carry it around the side of the house. With a twinkle in his eye, he started up his pressure washer and handed me the hose. Catching on to what he meant, I directed the spray into the junction box and discovered that he high-pressure water was very effective at removing the remaining silicone. It also make a lot of back-spray into my face! My glasses protected my eyes from impinging gobs of silicone, but this really should be done wearing safety goggles!
With the space inside the junction box all clear, I got trigger-happy with the solder iron and replaced all of the diodes first. Another guest named Calvin came over to help, and we carried the panel into the sun to test it. The open-circuit voltage was up to about 34 Volts but only 4 Amps were coming out, not 8. We brought it back in and it didn't take me long to remember that other connection tabs could be broken. Sure enough, one was easily peeled up and perhaps only had silicone holding it down, not solder. If I had not been so eager to chop out the diodes, I might have noticed this tab first. Once I soldered this back down, the panel performed well in the sun. By the time I was finished, the sun was passing into the trees and with all of the cells working and tilting the panel this way and that, I got nearly 7 amps. I was still convinced that all strings were working together, because Calvin could cause the output to drop by shading any of the cells.
With my panel done, I was able to offer a little help to others, where I met Nicole, who is in grade 10. Her first solder joints held up pretty well, so we carried her panel into the sun. It had a problem just like the one I had. We brought it back into the garage and I started by checking the wire tabs. They seemed to be fine in Nicole's panel, but when I "stress tested" the soldered leads of her diodes, I found a weak one. We wetted the solder from it to the tab, and after that the panel worked splendidly.
With four panels repaired, we noticed the Pierre had excused himself from the crowd of busy workers. Our noses picked up a delicious scent from the house. He had fired up his propane skillet and was cooking up an enormous stir-fry, on a wok at least 4 feet across. Chicken, peas and mushrooms, with cashews for crunch, simmered in a peanut sauce. Everyone's plate was heaped high, and nobody's plate was empty at the end. We traded stories and ideas for a while, and eventually came back to the subject of what do do about these defective solar panels. The experience of companies that install panels is that a large fraction are DOA, and they often replace panels that go bad. Statistics are not firm, but many guests shared the opinion that 1 in 100 panels could go bad in their lifetime, with most failures being found during the installation process. 99% could sound like a good success rate, but when a million panels are installed in Canada every year, that adds up to thousands of duds. The problem would have the same proportion but an even greater scale in the USA and Europe. Are all of these panels being scrapped? How many panels with defects remain installed and under-producing?
Pierre's desire is to repair panels and donate them to schools and educational programs which can give young people hands-on experience with electronics, energy, and using tools for themselves. Another goal was discussed by the group, wherein some panels could be used for aid and charitable donations to third-world countries for electrification where there is none. There are also citizen science uses where the panels could be used to power devices like weather stations, gardens, or water in streams.
Plenty of questions remain. If the solar installers are required by contracts to return defective panels to the manufacturer, then they don't have the right to donate them to anyone, not even schools or charities.