Is was one of those days where it was too windy/cold to venture outside and I decided to tidy up my boost experiment.
The ratsnest was spreading over onto the floor of the shed, and it was time to dust off the big computer and do a citcuit board for this converter.
After finding the disks for the Autotrax and loading them into a new windows 98 partition, it was time to relearn how to use the program again (long long time).
This program is free now and can be obtained from http://www.airborn.com.au/layout/easytrax.html
along with some improvements (thanks to Commanda).
After struggling with making a rudamamentry library of components, 3 hours later I finished up with a board like this:
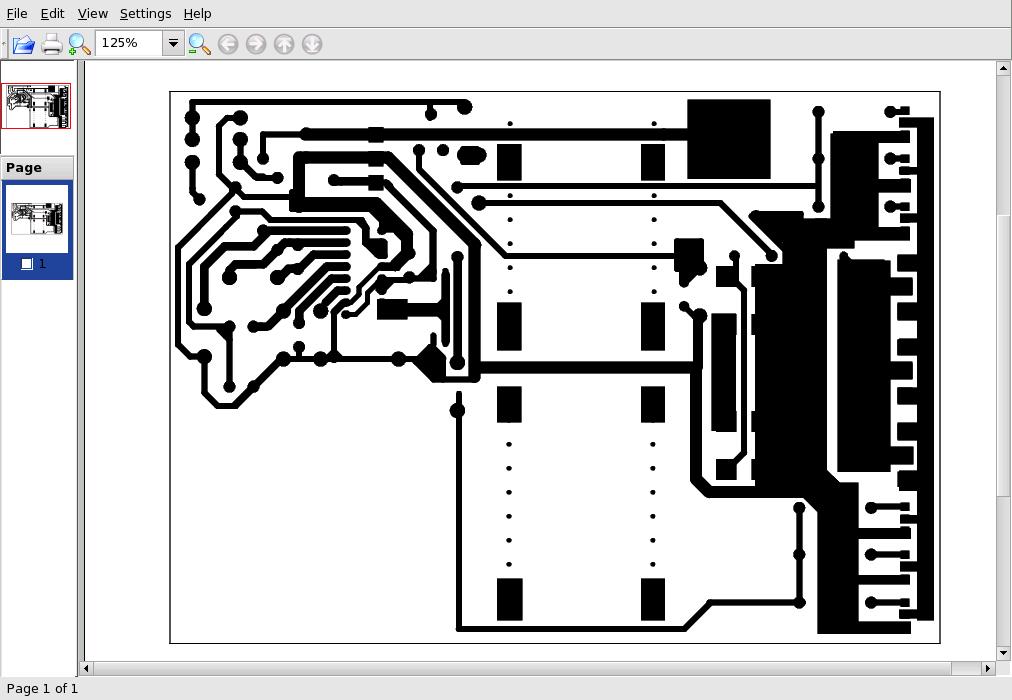
Its not done by an engineer so you get what you get... time to print it out.
Luckily the program had a driver for laser 300dpi and the old brother 730 I had bought across with me had just enough toner to print a page or two. (Moving onto an island is just so much fun).
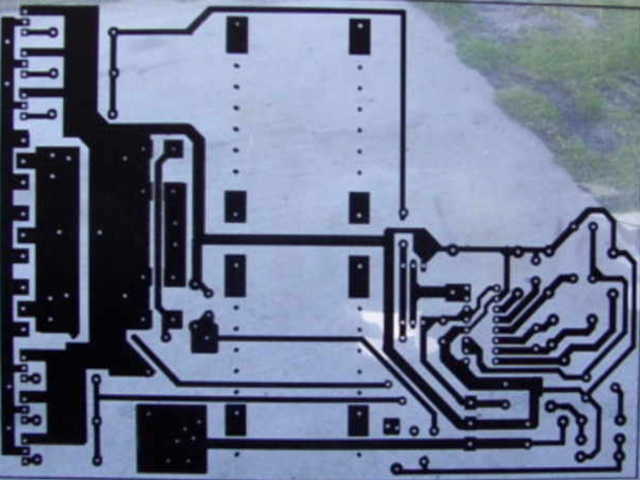
I print it out on two transparencies (o/head projector sheets I think). I use two because this printer is pretty bad, and the toner is very low. I moved the image on the transparencies to different physical locations so that the flaws in the drum appear at different places on the layout. very agricultural yes?
By taping the two transparencies together (on top of each other )we get a image that is mostly black where it should be in two layers. Any drum deficiencies only effecta single layer at differing places, so the theory was that tracks would be mostly covered.
This worked out as pictured here:
After rummaging around through the container outside, I found the picture frame I wanted and removed the glass from it, found the ammonium persulphate and breathed a sigh of relief..... over here you can't just go up to the shop. I've been waiting for a month for my fiberglass to turn up for a stator....still waiting.
So being lazy, I had gotten some pre-sensitized pcb boards from Wiltronics (on the net) and proceeded to sandwich the transparency between the green presensitised board and the glass from the picture frame.
Bewdy, now all I need is a UV light source. A flourescent for 20 minutes at 2" (havent got one out in the shed) or exposure to the sun for 1 minute or so.
So we wait for the sun to come out..........not coming out.....now its's raining again....bum.
The nice thing about oceanic weather is the complete unreliability of the weather. Its still raining, but now the suns out at the same time. I hold the board to the sun whilst standing undercover for 2 minutes....seems a long time to stand still and all the while thinking..... gosh this is high tech.
Now to develop the board.......oh no, can't seem to find the NaOH. When this happened on the mainland we had a dishwasher, and the powder for it was caustic, and could be relied upon to act as developer....a shed in the middle of a paddock does not have a dishwasher. A quick test with the clothes washing powder yeilded no result...damn people frendly wash powder.......I did the unthinkable............
Went in and had a cup of coffee and brewed over my delimma....The good lady wife suggested oven cleaner......silly women..bloody oven cleaner that won't work says me...
It was ten minutes later that I looked with satisfaction at my nicely developed board:
sheepishly went back in to inform she who must be obeyed that she was right, and I was wrong.....some days it don't pay to get outta bed.
Scrabbled around the shed looking for a suitable container to etch the board in. It must be corrosion-proof, disposable, tough, and I decided a 5kg plastic nail box for 4" bullethead nails looked perfect......soo out they go.
Armed with the newly aquired "etching tank" I added about a tablespoon of ammonium persulphate to 1/2 inch of hot water, and dumped the board in.
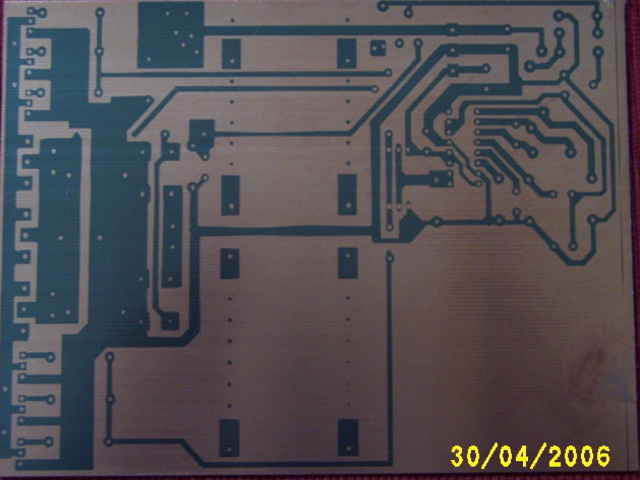
I sloshed the board around in the mixture for ten minutes.......I've had enough, it's too slow.....add more ammonium persulphate.....little bit more.....now I can see it peeling off (small exaggeration). it's almost done:

Note the lovely yellow nail container (i mean etching tank.).... Decided that makes it go faster.
Well half the day is gone and we have a board that needs drilling. It was some time later that I found the minidrill, and importantly the mini-bits that go in it,and filled the desktop with another bunch of tiny holes. I have discovered that the drill drills quickly through the fibreglass, and that the trusty bench is at a different rate and sound so I know instinctively to move on to the next hole.. Good for me ..not good for the bench.
Well the next hour was used to load the board as per this overlay:
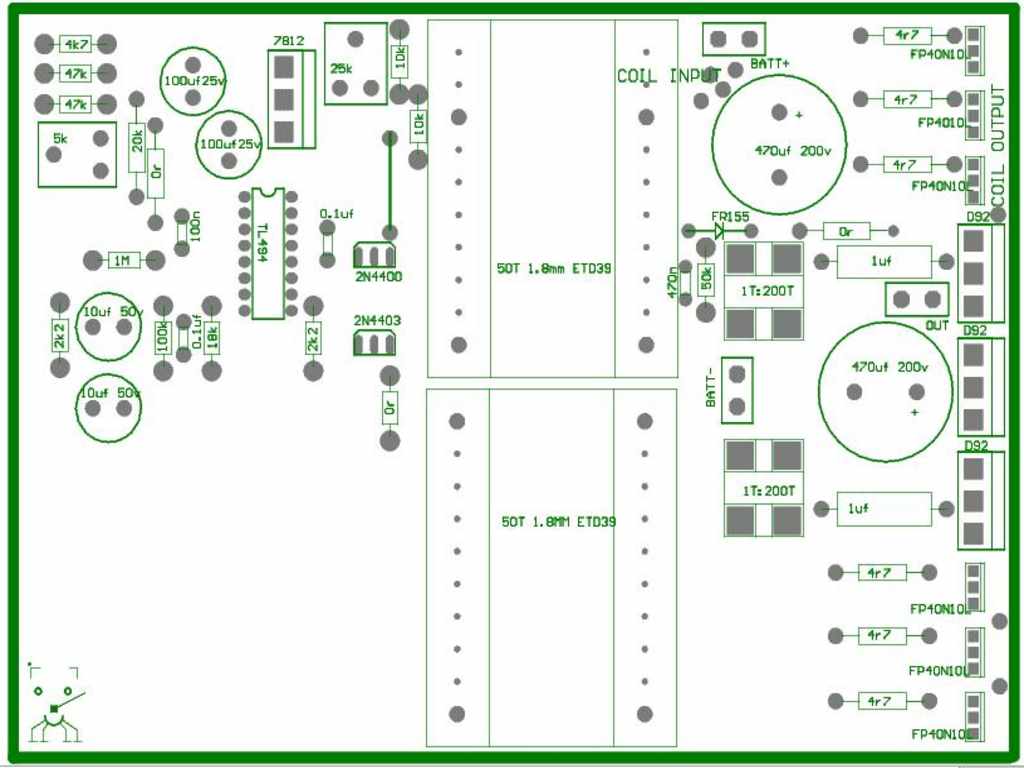
There is no trick to this, I use an ic holder to take the tl494 so that if I destroy it in testing, it is easy to replace. The coil is stolen from the original one I built a few days ago (50t ETD39)
It ends up looking like this:
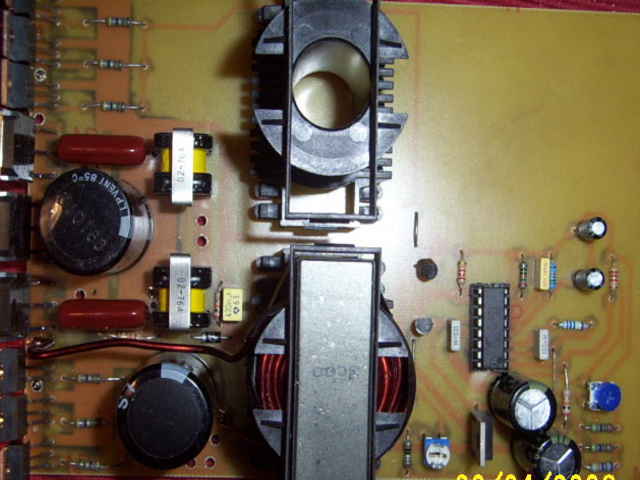
So yes it can be done easily from scratch... design, board design, load and test in a single day.... This makes it very easy when compared to making the turbine itself
Testing was as follows:
Tentativly hooked up the power and the load, and the poor layout of the design was immediatly apparent. The waveform was ok down at lower levels, but started to wobble around a bit at higher levels. A 470n cap across the 1M resistor on the l/hand side of the overlay stopped the spurious voltage spikes, and the fets ran cool at 200W input for about two minuites. The diodes warmed up mildly, but that was all. At 300W, my battery on the recieving end was getting far too much charge and was held for only long enough to feel a slight warming of the fets.
It can be noticed that there is provision for a second coil, which I havent tried yet, but will wind it the same as the first inductor, and this should increase our power handling to well over 600W.
Just to get a better idea of how the switching wave was, I pulled out 5 of the 6 fets to find how heating went with only one to carry the switching current. 100w warm.. 200W nice and warm after a minute or so, 300W, now it needs a heatsink. Not superhot, but you could tell that without cooling, it would last only a few minutes.
All in all, very happy with the output. Whoever asked for a booster to drive 1 12v battery to charge another.12v battery.. this will do it at 20-25A or more in this config, or if the second inductor works as planned, 40-50A.
I don't have a copy of the circuit, as I made parts of it up as I drew the board. (I can hear the sounds of discust by people who design things properly. It is based on the circuit from Oatley electronics
http://oatleyelectronics.com/pdf/k098.pdf
The voltage regulator is different from this but same as silicon chip version...no circuit of this I'm afraid. Just reverse engineer the board. The output stage is roughly as Flux had described, and the current sense and voltage sense are last minute additions on the layout board.
The current reg will need a slight mod to use as a boost converter as per Flux, and I don't have the proper hall effect diodes over here, but if we were to sense the three phase by way of the singleturn current sense you could achieve roughly the same thing. (one line of "before the bridge diodes" of the genny output)
All in all, it was to show the folks out there that it is not the smoke and mirror enterprise that mppt has been seen as.....no one will give a clear and concise circuit and layout for that. why...I don't know, but Flux's setup is almost as efficient as a good mppt, and has redundency and simplicity built in, and is a 1 day project... and if you don't have to design the board and circuit, it is half a day project.
This current one will suffice for a large alternator if used with two coils. Further testing will show the upper-limits of this device, but 12v-24v is easy. It should do every bit as well at higher voltage, and it's wattage will probably increase as well, as the currents will be less.
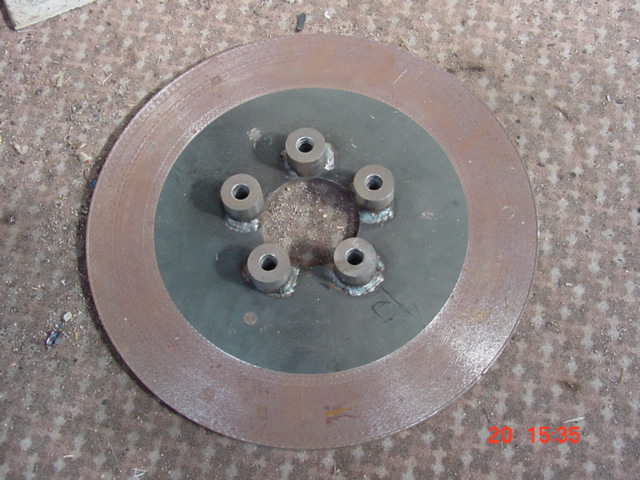
The old test bed is this one...
here it sports some heat sinks as i tried a 'what will she do mister.... 40A input fets still held together, but started to warm fairly fast.... certainly not dangerously so. The battery fizzed loudly, so stopped the test to destruction...spoiled my fun a bit.
If anyone is interested the board layout in pcb format for autotrax is boost5.pcb in my files. I will try and get hold of the hall effect np25 that flux suggests and do another more closely modelled along the lines of Flux's latest circuit ( if he doesn't mind, or isn't going to present a project for it )
It has one drawback as a standalone power supply. It relies on the recieving batteries as a voltage clamp. It will require a static load to keep it under control without this clamp..... will look into this, as with this solved, it may be a useful step-up converter in it's own right
still havin fun..............oztules
