Hello everybody,
This is the tale of a man that lived too far to have access to the toys you're all playing with. As a result, this man being so passionate about RE energy started to make his own toys. And here's one of his favourites - his tiny solar system.
The PANEL
The saga started in one day when a supermarket around here had solar lamps at discount price. So I headed there and buyed 9 of them. There were very nice solar lamps, stainless steel body, a 600mA NiCad inside along with one LED and a booster/charging circuit. I gently took apart all the solar cells on top. This was easy. Too easy, I'd say. The individual output was dissapointing, 2V at 50mA max. But I went on with the plan.

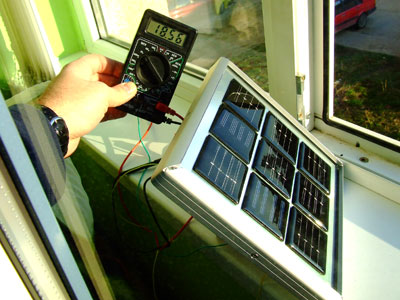
I connected all the cells in series and got 18.9V at 50mA. That's 0.9W of power. Talk about dissapointment... But hey, it's supposed to be fun so let's carry on.
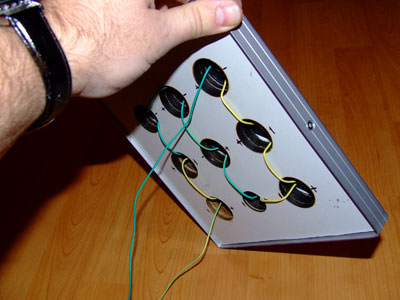
Took some plywood and drilled 9 big holes equally spaced. Put one 0.3mm aluminium sheet over that and glued the cells over the holes so that I can have acces to the poles on the back. These cells were already waterproofed so the only exposed area were the contacts on the back. The plywood received one aluminium frame (I like aluminium) made from a single profiled bar used for stairs I guess...
I connected the cells in series and covered the connecting wires with a sheet of plastic. The whole thing was waterproofed using silicon caulk all over the sides.
The result started to look like a solar panel!

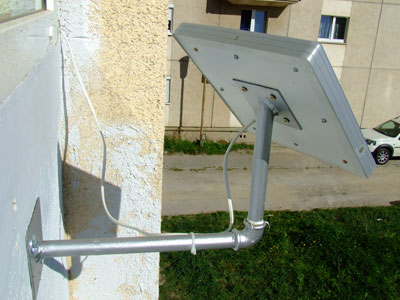
I then made a panel support and put it outside my window. It looks like this:
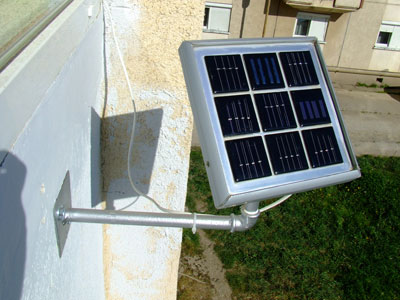
Pretty neat. My father-in-law suggested me to use gas pipes. And they were already threaded so I could turn the panel on E-V axis.
I also kept all the 9 ex solar lamps in original shape so they could be used again someday. The leds were nice, the batteries were cheap but useful and the booster circuit also usable.
As I was looking at my first solar panel I realized it's just a toy. No real power can be obtained this way except by using hundreds of these tiny cells. The volts were OK but the mA's were way low. So I started to think small. It's not like I had a choice. I'll be using one of my 12V ledbulbs I made a while ago (more about this at http://www.fieldlines.com/story/2007/1/28/215243/977 ) as a load and a 1.3 Amps litle SLA battery I found around here for daylight charging.
The LIGHT
I started working at the ledbulb circuit since I needed it to turn itself off in daytime and on at night. The solar lamps were great for this but the circuit was not usable as it was designed fot 1.2V. So I made a light sensing circuit along with one ledbulb placed inside a solar lamp.
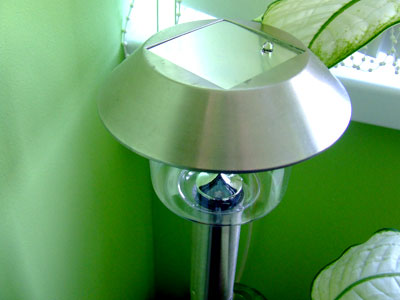
This is the photodiode on top of the lamp.
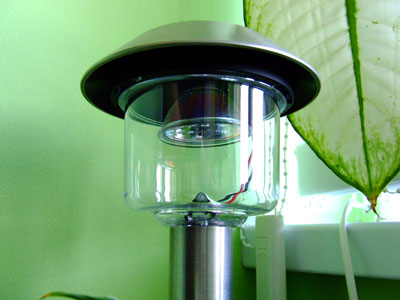
This is the ledbulb inside. The wires comes trough the lamp's foot and the circuit is inside the lamp's top side. It was nice to use this lamp as I was starting to feel sorry for dismantling them.
This particular bulb takes around 30 mAmps and uses 7 white LEDs. The day/night cycle worked great. No power consumption while turned off. That's was good.
The BATTERY.
The original lamps came with 600mA NiCads. I decided that my panel could charge a 1.3Amps small SLA, given enought time and sun. I was not thinking about the time it would take at first. To test my rig I connected the battery to the panel and the lamp to the battery. It worked like a charm, and my wife was happy that her flowers could now enjoy permanent light. The voltage was more than the battery wanted but the low 50mA current made overcharging a very low risk. As days passed by I noticed the battery going down to 11.8 Volts in the morning and I started to think maybe the load is too much. Or the panel is too little. It was sunny so what could be wrong? I then realized that the panel was only surface-charging the battery. It was charging but tha balance was negative, meaning It charged a little less than it discharged. This was discouraging again. I could make another led bulb with less leds ... hmm... I put aside the project for a while. And got interested in all sorts of electronic circuits.
I found a low voltage alarm circuit for 12V SLA's and a LED voltmeter circuit. Gradually, my mine started to put all this together. A solar controller, with low voltage alarm, LED voltmeter, some voltage regulation, a low voltage disconnect feature, all this would be helpful to make the most of my tiny solar stuff. I've had help, I must admit. Credits can be found at the end of this diary entry. Without help, what follows would have not been possible.
The CONTROLER
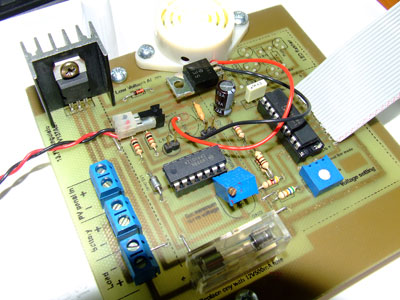
I started making a circuit that featured LOW Voltage Alarm & Disconnect, LED Voltmeter and 13.7V Regulator in one piece. It was pretty hard for a beginner in electronics like me but I made it. This was the PCB. Toner transfer method using regular paper and nail polish cleaner.
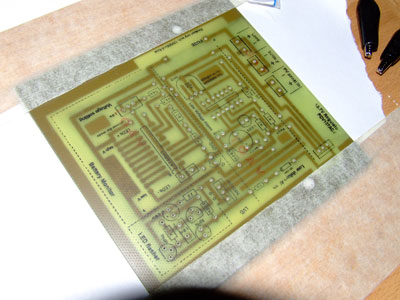
The 13.7V Regulator is is in fact a PB137ACV regulator. Thanks Glen for suggesting it to me! It takes up to 800mA (with cooling) and it's so very simple to use. For my need it was perfect. It's a great asset for lower than 1A systems.
As the ordered components started to arrive, the controller was taking shape.
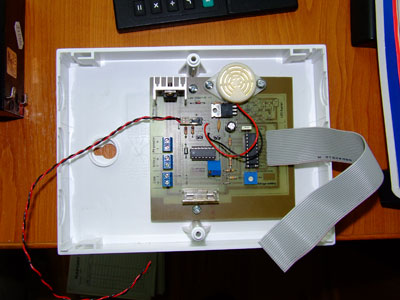
Then, I looked for a fusebox that would hold my circuit along with the battery. I found this one and it looked OK to me.
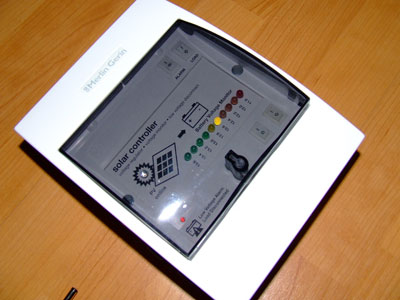
And I started to make the front panel. This was first printed on a laser printer and then all the holes were drilled after the self-adhesive label was laid upon a white plastic piece.
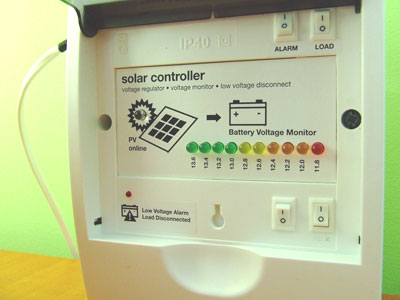
I mounted the switches (Alarm buzzer off, Load on/off disregarding the LVA, Circuit OFF, and some I will explain later.) This was the end result. Pretty good.
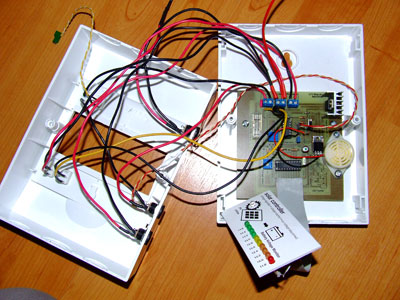
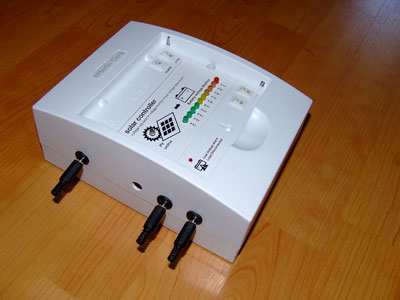
The wiring got messy because of the so many options I wanted to have. I drilled holes for the external power connectors. Those are Panel IN, Load OUT (with LVD protection) and Aux IN for a future bigger SLA if I'll have a future bigger panel.
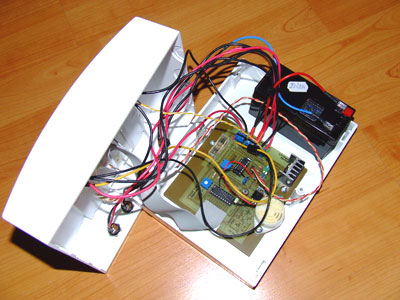
The whole circuit was now complete. Time to test it. Actually, I tested every circuit on this board as I finished it so I expected no surprizes.
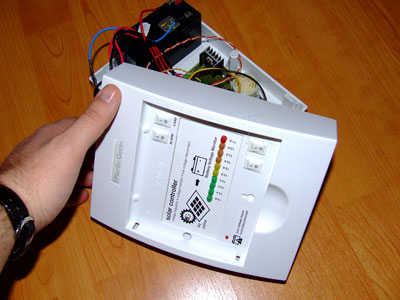
I was lucky with this box. A little big and bulky but the plastic was soft and never cracked no matter how many holes I drilled into it.
The whole circuit was now complete. Time to test it. Actually, I tested every circuit on this board as I finished it so I expected no surprizes.
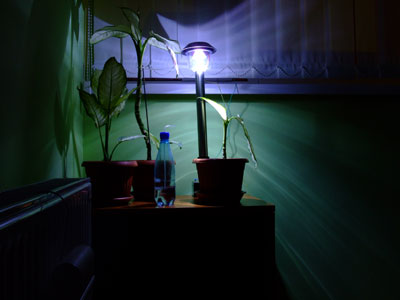
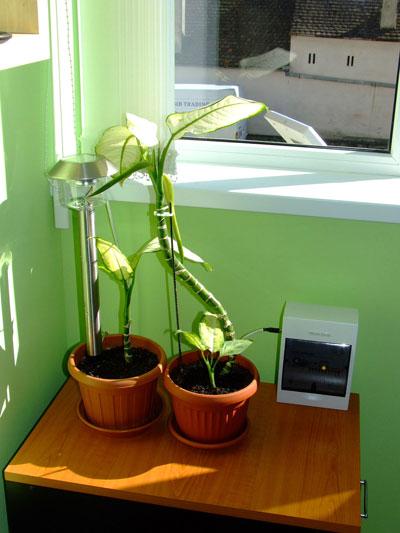
It was time to put it in its final place. Guarding my wife's flowers and taking care of their light without me constantly checking the battery.
This is the final setup. You can see the panel rim outside the window and the lamp in the flower pot. The controller box will be mounted on the green wall behind.
CONCLUSION
Man, this was fun! It took a month and a half to get to this point but mostly because my spare time is limited.
All in all I ended up with a solar toy. There are benefits, of course. Using this panel I can leave the light on all night but I have to wait two days to get the voltage back in.
PROs
- My wife is happy :-) This surely beats everything else.
- It was my first solar energy approach. The benefits are small but the amounts of fun I had and the educational value is huge.
- Great for flowers. (Don't laugh but the flowers were smaller at first, without this light. It looks like the added light really helped)
- Upgradeable. The circuit is connected so that one external battery can be used instead of the internal one. With a bigger solar panel this would really make a usable system.
CONs
- There are a lot of con's. I won't count them all here, there aren't that important. The main problem is that the coltroller is a load all by itself, taking 15mA just to show the voltage. My limited input current made me add a switch that bypasses the whole circuit and feeds the battery directly from the panel, via the PB137ACV. In this mode, the load is off so no other factor can lower the voltage. This made the charging process so much faster. With the circuit on, the charging current was around 30 mA and without it up to 50mA's - the whole panel output. I tried to lower the circuit consumption by using blinking led's but nothing changed. One future solution would be to use a 555 timer-based flashing circuit set to a low frequency to feed the LED voltmeter. The LV Alarm must be fed continuously but it takes VERY little power.
- The price. This was one expensive toy in the end. But overall cheaper than its commercial counterpart. The solar lamps were cheap. But cheap multiplied by 9 gets expensive. And the power output is very low. The rest is not so expensive.
- The dissapointment I get when people outside ask me how many TV channels do I get by using that weird panel-like antenna...
CREDITS
There are a few persons I'd like to say thanks. To my wife for her never-ending understanding. To Glen, a great guy and a real friend. Without his help this would not have been possible. To my father-in-law that helped me make the panel mount without asking too many questions. :-)
The RE energy here in Romania is regarded as rich-people's way to escape everyday's living costs. No real government support is provided so far and the PV panels available here have VERY expensive prices. Windmills and such are nowhere to be seen. Water generators are only used when isolated touristic locations are too far up in the mountains to be connected to the grid. The environment policy embraced by our country after joining the European Union states that a minimum of 6% of the country's energy must come from renewable energy sources. So I guess things will have to change around here someday. Hopefully, soon enough.
Cheers,
Claude
