Author Topic: alternator for 10' progress, mostly pictures  (Read 1182 times)

0 Members and 1 Guest are viewing this topic.

Janne

  • Full Member
  • ***
  • Posts: 244
  • Country: fi
  • Turbiini
    • My image gallery
alternator for 10' progress, mostly pictures
« on: September 15, 2007, 05:53:50 PM »
I'm building an alternator for my 10' prop, thought I'd post some pictures of the making. Comments and better ideas are still welcome if you see something odd :)


It's going to be a 12 volt 5 phase unit, with each coil connected in star and the 10 ends going to rectifiers. I think i can better avoid circulating currents by not connecting the coils in parallel, but instead bringing all the leads to the rectifiers.


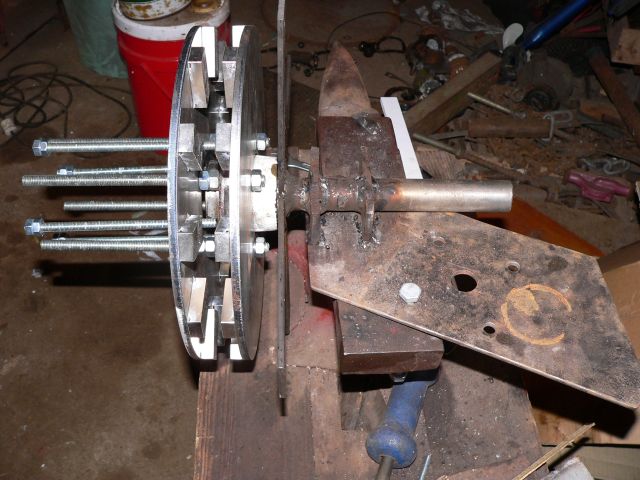
here's a shot of the current state of the alternator. I assembled the magnet rotors to test what number of turns I'd need for the right cut-in speed. The hub(bearing) is from a Saab 90 car.. it should be more than able to handle the loads experienced here. I'm going to use the other rear bearing for yaw bearing.

I still need to weld the tail hinge and additional bracing to the frame before it's ready for paint.


The magnet rotors. Magnets are just tacked in place with super glue. I needed to jack the first 6 cm's with the jacking screws, after that i was able to pull them apart with my hands. I'm planning not to cast them in resin, but glue them in place with epoxy, and add a stainless steel band around the magnets for extra insurance.

The magnets are the common 2"*1"*0.5" sized, ordered from the host site.

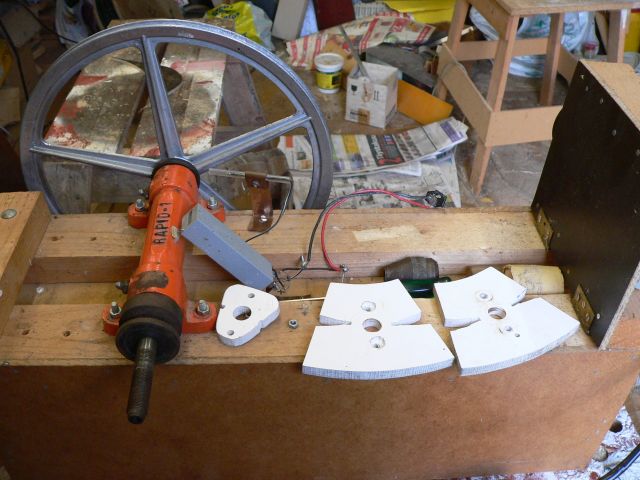
The discs were laser cut to ease the progress. Well worth the money, I think.


A shot from my coil winder. There is also a dc motor attached(bottom shown in the right edge of the picture), but i'm not using it this time. The coil formers are made from a 10mm thick "COP plast", a foamed pvc board with hard "films" on top and bottom. There is also a reed relay and a counter to ease counting the turns on the coil.


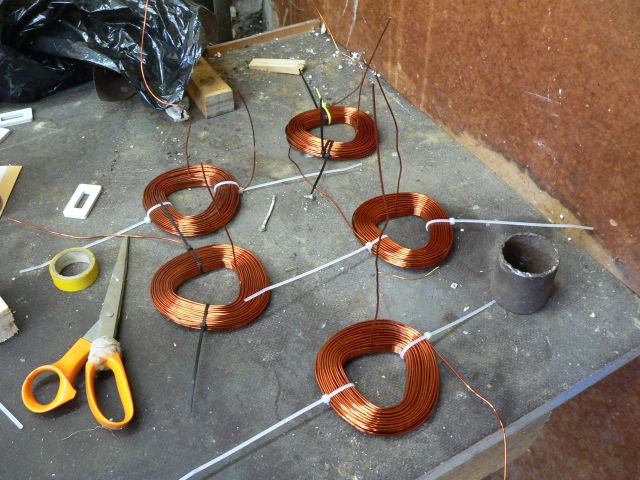
I managed to make 5 coils before i ran out of magnet wire. They're 1.4mm thick wire(about awg 15), with 95 turns on each.


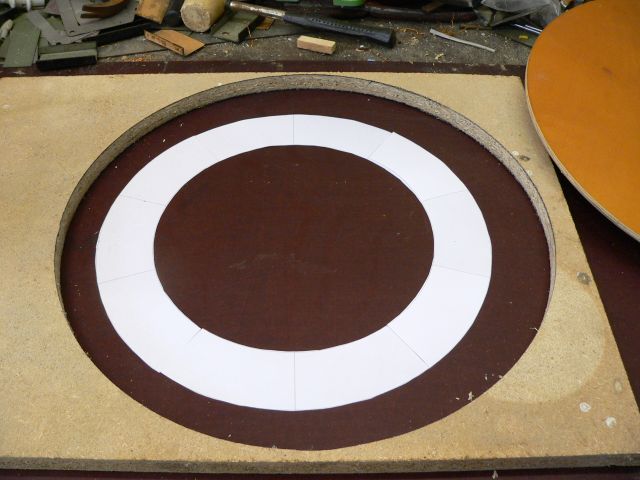
Stator mould. Not showing the picture are the top lid and center island. I'm planning to use regular polyester resin with fiberglass mat reinforcings. I'm aiming for total stator thickness around 11mm, which would allow a nice tight airgap for earlier cut'in. The average winds around here are rather calm, so i think earlier cut in is the way to go. I made the mould with a hand router.


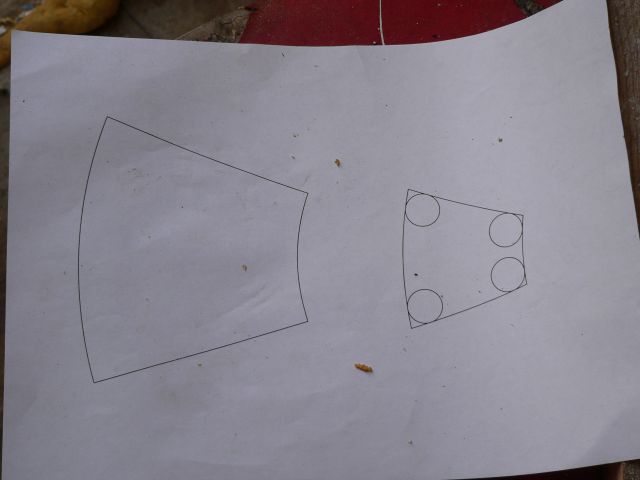
When i need a specially shaped part, I like to first draw them with cad, print them, and use it as a guide to cut the part with a band saw. It seems to work rather accurately, kinda like the poor man's CNC machine.


The 10' prop that was carved earlier, it's proven to be good, but was a bad match for my first attemt at making an alternator.


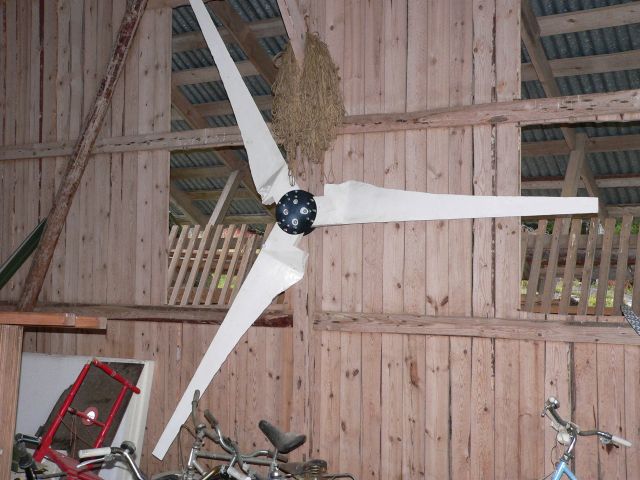
After the 10 footer is complete, it's going to replace the 5' machine, completed earlier this summer. It works ok, but is not producing nearly enough power in the low winds we have here, especially in summer time.


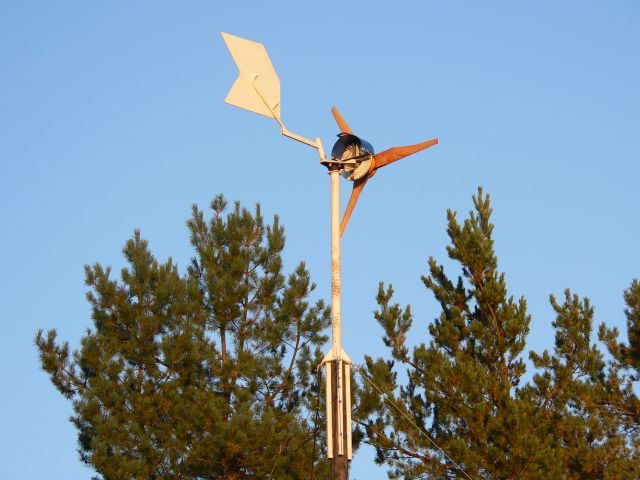
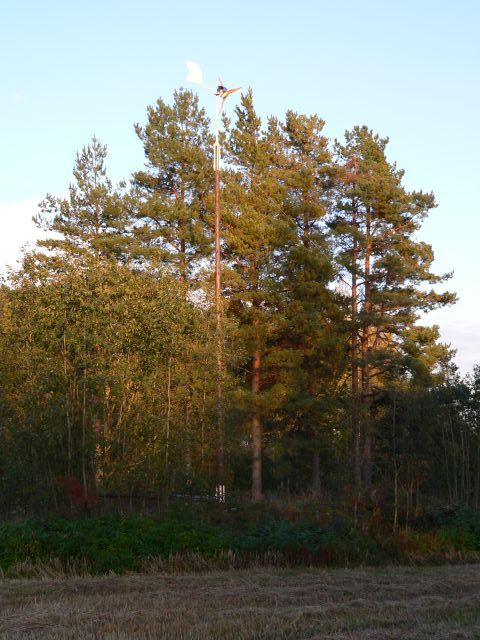
Closeup of the 5 footer. Those trees are going to be cut down, after that there should be more than enough free space in all directions.

« Last Edit: September 15, 2007, 05:53:50 PM by (unknown) »
Nothing's as easy as drilling a hole in the wrong place

CmeBREW

  • Hero Member
  • *****
  • Posts: 615
Re: alternator for 10' progress, mostly pictures
« Reply #1 on: September 15, 2007, 06:20:56 PM »
Very impressive work Janne! I don't see many veering away from the common 3-phase set-up. There are so many combinations, it confuses me. I count 12 mags (pole), so are there 10 coils?? 5 phase ,with 2 coils per phase? I'm not sure.

Those are nice looking coils. Nice looking everything.  Good idea about simply epoxiing the mags. It looks like those big rectangle mags act like a fan to help cool the coils.
« Last Edit: September 15, 2007, 06:20:56 PM by CmeBREW »

RP

  • Hero Member
  • *****
  • Posts: 722
  • A dog with novelty teeth. What could go wrong?
Re: alternator for 10' progress, mostly pictures
« Reply #2 on: September 15, 2007, 08:25:08 PM »
"It's going to be a 12 volt 5 phase unit, with each coil connected in star and the 10 ends going to rectifiers."


I don't understand this part.  Connected in star would only have 5 ends going to the rectifiers.  Do you intend to rectify each phase seperately?  That would be Jerry wired, not star.

« Last Edit: September 15, 2007, 08:25:08 PM by RP »

feral air

  • Sr. Member
  • ****
  • Posts: 293
Re: alternator for 10' progress, mostly pictures
« Reply #3 on: September 15, 2007, 11:21:46 PM »
Impressive work but a shame that the trees have to come down.
« Last Edit: September 15, 2007, 11:21:46 PM by feral air »

Janne

  • Full Member
  • ***
  • Posts: 244
  • Country: fi
  • Turbiini
    • My image gallery
Re: alternator for 10' progress, mostly pictures
« Reply #4 on: September 16, 2007, 03:12:15 AM »
Okay, jerry wired would be the correct term. It would be almost the same, if the coils(connected in star) in each phase would be wired in paraller instead of the normal series connection. But i think jerry-wiring will get rid of any circulating currents, which would occur if the coils were not perfectly positioned and wound. And when building things by hand they never will be perfect.

My goal with all this 5 phase jerry wiring thingy was to avoid winding coils with several wires at hand(several wires wound into one coil) And i happened to have some of that 1.4mm diameter magnet wire lying around, which i think is a proper size for this system.


I'm not so good at trying to explain things like this, hope you can understand what i'm trying to say. :)

« Last Edit: September 16, 2007, 03:12:15 AM by Janne »
Nothing's as easy as drilling a hole in the wrong place

electrondady1

  • SuperHero Member
  • ******
  • Posts: 3122
  • Country: ca
Re: alternator for 10' progress, mostly pictures
« Reply #5 on: September 16, 2007, 07:24:43 AM »
janne,

the mill your building should work great.

but this is the 21 century.

why not go over and give those trees a hug and move your mill ?
« Last Edit: September 16, 2007, 07:24:43 AM by electrondady1 »

Janne

  • Full Member
  • ***
  • Posts: 244
  • Country: fi
  • Turbiini
    • My image gallery
Re: alternator for 10' progress, mostly pictures
« Reply #6 on: September 16, 2007, 08:53:41 AM »
well, i originally chose this site because it needed the least timber work to get a good clearing... after all i only need to cut down those 6 pine trees to have enought clearance in every direction. Any other nearby sites would need some serious timberring to make it (or at least 85' high tower)work.


If i had an aerial picture to show, you'd understand that in the middle of this forest the 6 trees won't matter so much :)

« Last Edit: September 16, 2007, 08:53:41 AM by Janne »
Nothing's as easy as drilling a hole in the wrong place

electrondady1

  • SuperHero Member
  • ******
  • Posts: 3122
  • Country: ca
Re: alternator for 10' progress, mostly pictures
« Reply #7 on: September 16, 2007, 11:18:36 AM »
sorry if i spoke out of ignorance janne.

i am living in the fastest growing town in ontario.

there were only 450 people living here when i was a boy.

now there are over 16,000.

and they expect another 10,000 over the next ten years.

the drone of chainsaws is constant.

i am a bit freaked out by it all.
« Last Edit: September 16, 2007, 11:18:36 AM by electrondady1 »

TomW

  • Super Hero Member Plus
  • *******
  • Posts: 5130
  • Country: us
Re: alternator for 10' progress, mostly pictures
« Reply #8 on: September 16, 2007, 02:12:01 PM »
janne;


I would agree with some that the trees need space too, but. Some of us have literally thousands of trees in the "way" in some spots and less in others. I try to work around the timber but if I need to take out a few trees for a turbine or other project I just cut them up for firewood so they get used then look at the quarter section plus of timber we leave alone other than sustainable logging and figure it was the lesser of two evils.


Great to see folks doing stuff and posting about it. Thanks.


To a hammer everything is a nail.


Cheers.


TomW

« Last Edit: September 16, 2007, 02:12:01 PM by TomW »