Background:I wanted to build a 2-3kw wind turbine and after finding the OtherPower.com website ran across their 17' one which looked like what I had been wanting.
My wife and I live in NE part of rural West Virginia on about 7 acres on top of a mountain ridge with an elevation of 3000'. From our property we have a panoramic view of about 50miles in almost a 270 degree radius. There is always wind here and it was the logical choice for me to make and install my wind turbine.
I did not want a tower with guy wires but instead wanted a free standing unit.
I required a retractible 10' tower stub to essentially bring the turbine down to the top of the tower for maintenance. In addition I needed to build a davit crane which will be permanently be mounted on top of the tower in case I need to remove the turbine.
The yaw bearing and components will be considerately 'beefed up' from the OtherPower.com 17' turbine. Structurally it is closer to that used for the 20' one.
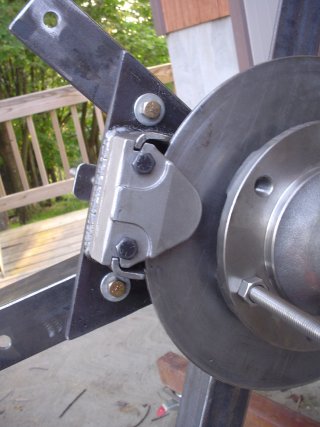
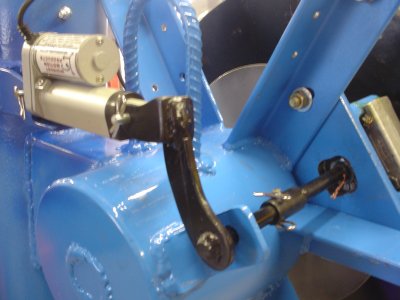
A positive stopping mechanism will be used as my area is prone to high winds, I will be using a mechanical disc brake caliper that is engaged using a 12v dc linear actuator. This provides positive stopping and release of the brake pads from the brake rotor, unlike hydraulic calipers.
A complete project build website has been made which has far more detail that that which follows, it can be found HERE.
Here is progression of building and flying my 17' wind turbine:
4.27.07 Matt Sherald from Pimby (Power In My Back Yard) came by to do a quick site survey. Pimby has been working on a number of local projects, a lot of commercial wind farms and Matt's partner Jeff Melnick is a master electrician, they both seem very pleasant and quite capable.
Lots of research follows.
- 14.07 Talked with Dan Simmonds from AN Wireless, and ordered up an engineering study to see if their HD-70 would work for my application. AN Wireless makes a 3-sided lattice tower, it is not able to be manually lowered and requires a crane for installation.
- 26.07 I receive engineering study from\ AN Wireless and their tower suits my application! So I place order for HD-70 (70' lattice tower), step bolts, 3/8" life line system, dual grounding system and 6 mounting brackets for the plates to hold the stub.
- 20.07 Picked up my tower sections using my trailer and brought them home.
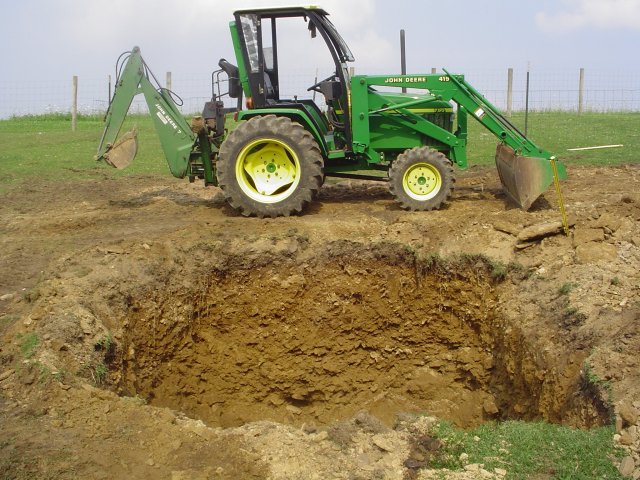
- 4.07 Dug out the hole for the tower foundation using my back-hoe
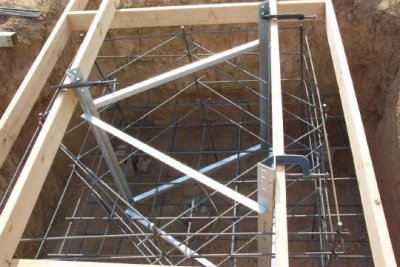
Made up the rebar framework for the tower foundation using layout specified by AN Wireless engineers. And 80' long dug trench for conduit from foundation to my garage, laid 2 separate runs of 1-1/2" pvc conduit.
8.13.07 Installed rebar and lower tower section into foundation pit and poured 12yds of 3000psi concrete with the help of my good friend Paul Schreiner of PS Composites.
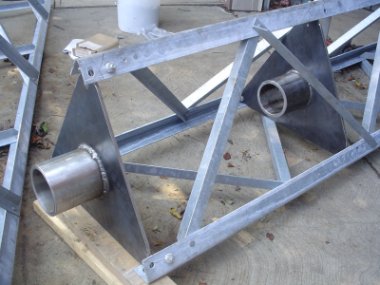
8.18.07 Picked up most of steel necessary to fabricate yaw bearing and tail.
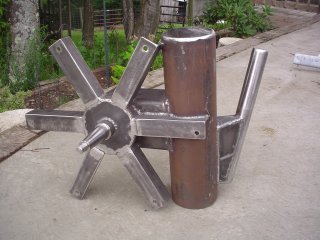
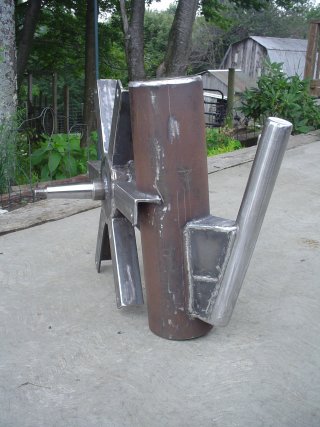
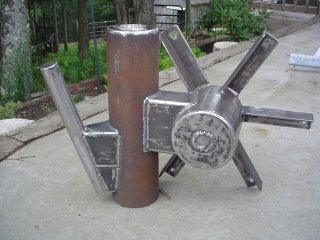
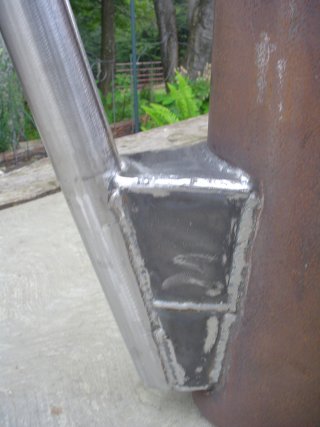
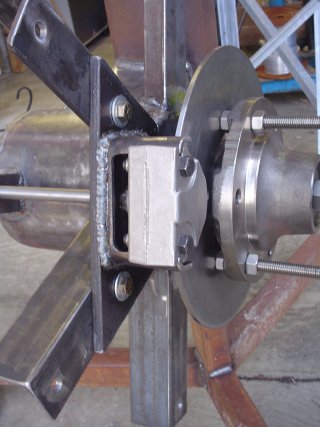
8.19.07 Basically finished with yaw bearing and tail.
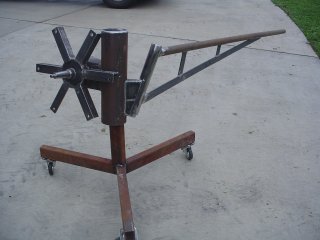
8.24.07 Mount a disk brake onto the yaw bearing for stopping the turbine.

8.25.07 Fabricate the plates that hold the stub onto the tower.
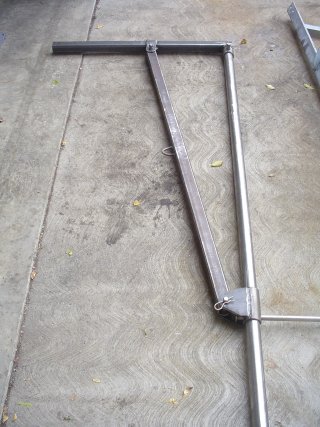
8.26.07 Fabricate the basic davit crane for mounting onto the tower.
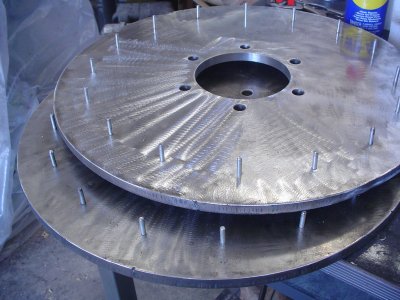
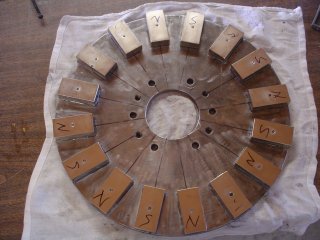
9.4.07 Fabricate the 18" diameter rotors, I put 3/16" pins in where each magnet will be mounted, the magnets I purchased were 1-1/2" x 3" x 3/4" with a 3/16" hole in the center.
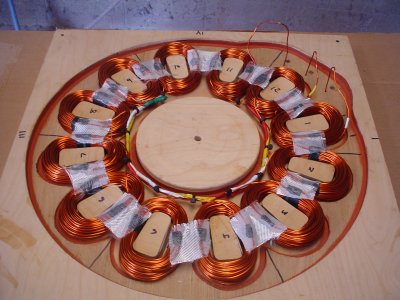
9.6.07 Completed coil winder got all 12 coils made. Completed building stator mold. Went over to PS Composites. and Paul and I used a special high temperature epoxy resin to make the stator.
9.7.07 Made up some work platforms for the tower and mounted brake winch for the davit crane.
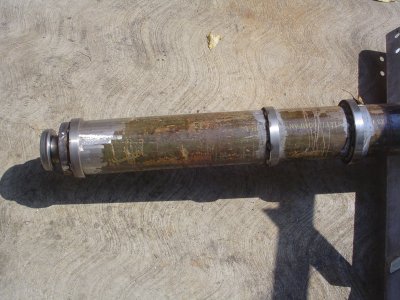
9.8.07 Fabricated the mount on top of the stub for the 1932 Ford Model A thrust bearing. Also fabricated collars for guiding the yaw bearing on the stub.
- 9.07 Completed fabricated the remaing portions of the davit crane.
- 15.07 Fabricated a pulley system for guiding the cable from the hand brake winch to the bottom of the davit crane.
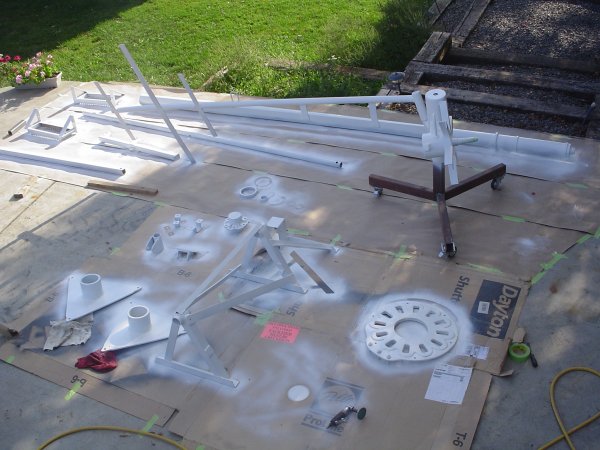
- 16.07 Using epoxy primer I primed the yaw bearing, stub plates and shaft, stator and all tower modifications.
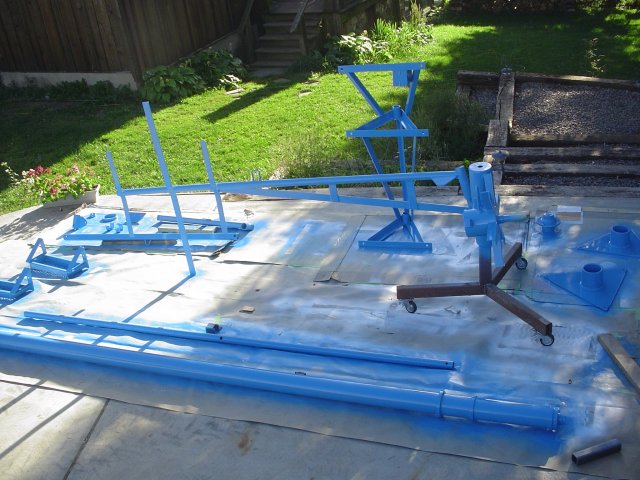
9.21.07 Applied cobalt blue polyurethane enamel paint to all primed components.
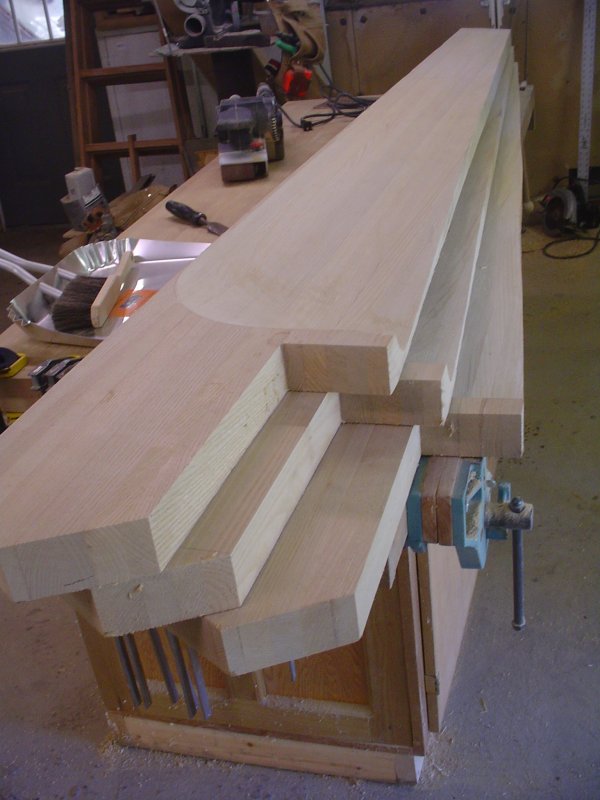
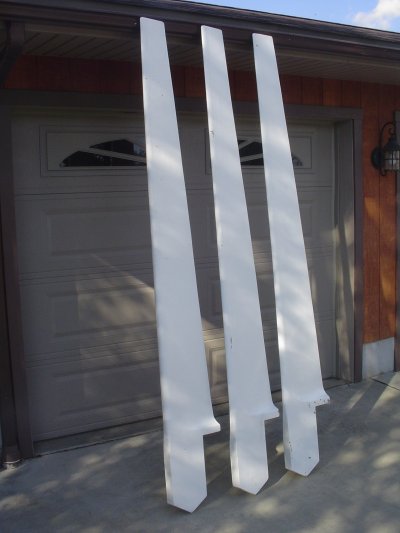
- 22.07 Planed up planks of sassafras and cut into 2-1/2" boards enough to make the 3 blades.
- 23.07 Glued up the 3 blade blanks and planed them down to 2-1/4" thickness.
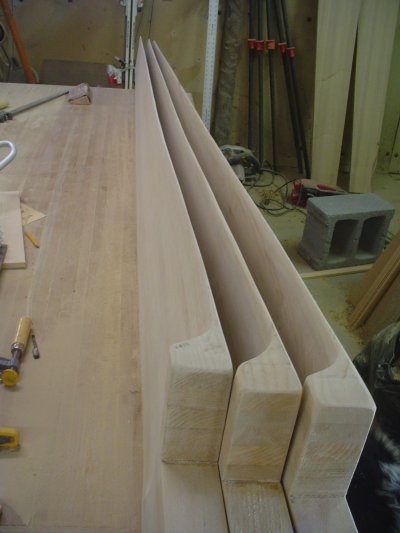
- 29.07 Cut the faces of the blades and set the pitch angle.
10.4.07 Completed the back sides and leading edges of the blades.
10.6.07 Completed applying 6oz fiberglass cloth to all blades, sanded and epoxy primered them. Made the 30" diameter blade hubs from 1/4" steel plate.
10.7.07 Put all magnets onto rotors, used polyester resin onto both rotors. Cut out tail vane from 1/2" plywood
- 15.07 Made mount for linear actuator onto the yaw bearing. This will be used to engage/release the disc brake. Began assembly of the turbine rotors and stator, fabricate some aluminum spacers to space the rotors apart.
- 17.07 Crew from Pimby arrive and begin assembling the tower sections in field.
- 18.07 Purchased S/O cable to run from turbine through the stub to the first electrical box. Got electric winch mounted to tower, this will be used to raise/lower the stub as well as it is moveable to the davit crane for raising/lowering from top of tower to ground.
Blades mounted onto the steel hubs.

Fabricated linkage to go from linear actuator to the disc brake caliper. Yaw bearing assembly is now complete.
10.19.07 Tower erection day! Very large commercial crane was commissioned to raise tower, It was deemed too windy to mount the blades and tail section so just the yaw bearing was placed on top of the stub.
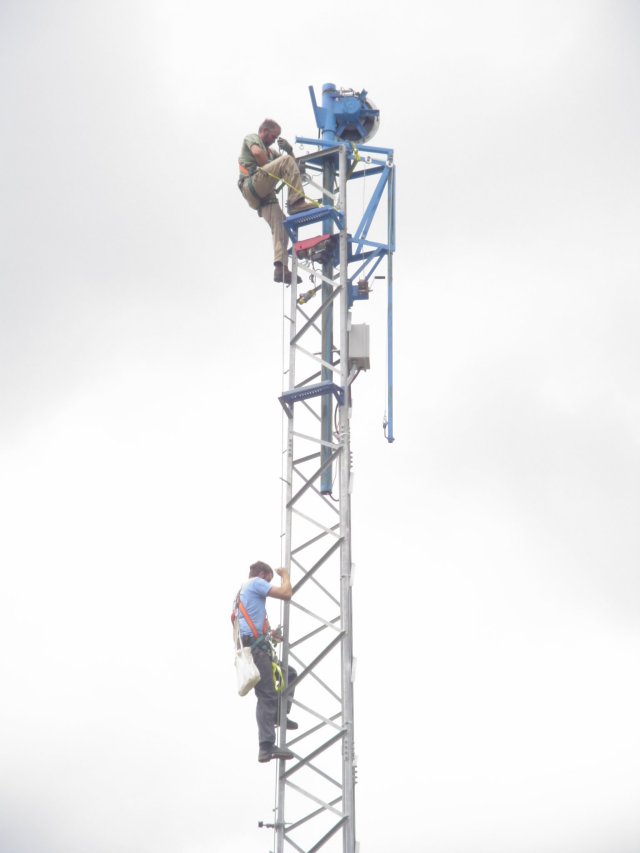
Tower being climbed for the first time
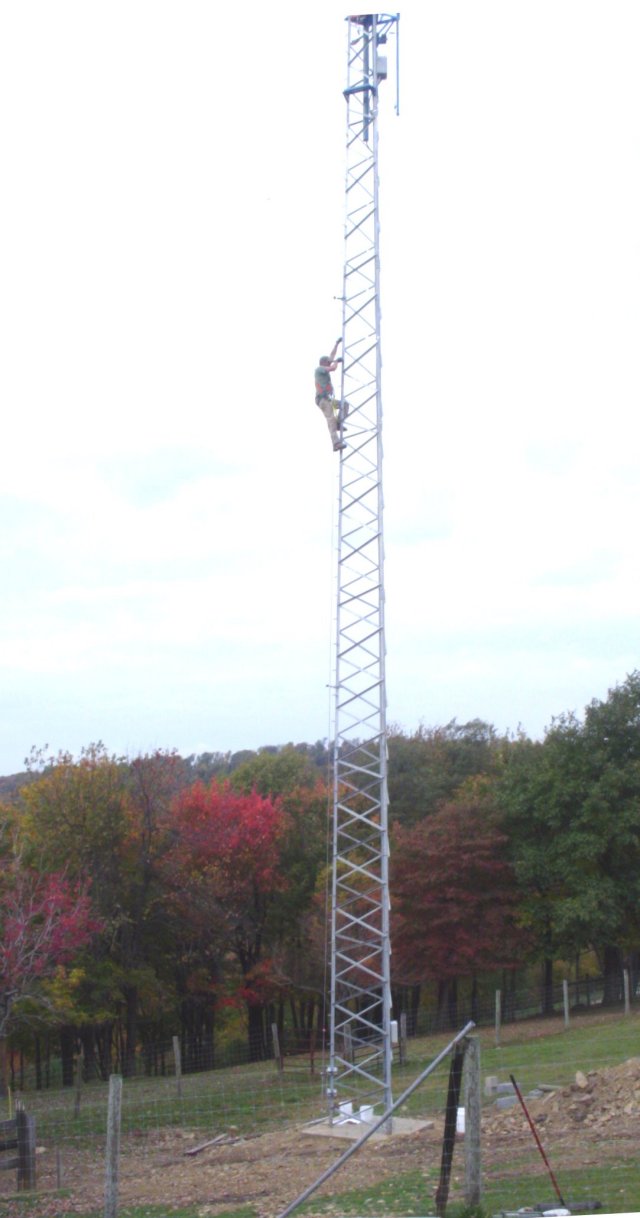
Yaw bearing installed on tower stub
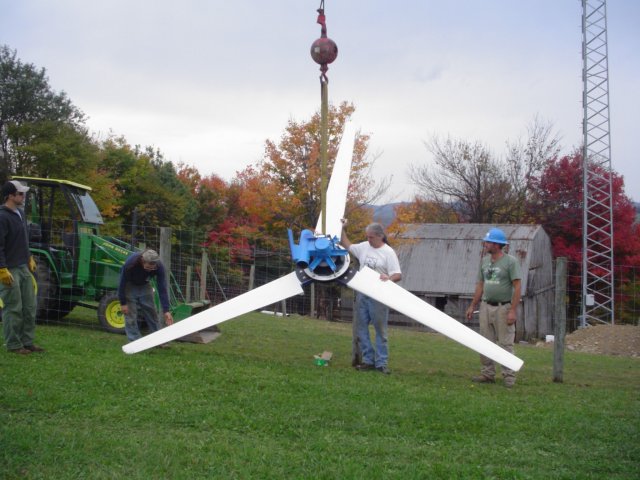
Balancing the blades