This one I tried just for giggles.
Turned out pretty good, if I don't say so myself.
Even though incandescent is generally not considered a good dump, I thought this would be an interesting exception, particularly since the wattage is known for a given voltage. Watts is Watts.
I
DO NOT recommend this for anything besides a solar dump load. This is because a solar panel can only create a finite amount of power, regardless of how much light strikes it. Wind, hydro, doggie? Much more unpredictable, and high power transients will pop the filaments, leaving you with a potential runaway situation! You've been warned!
I utilized the high heat density and phase change properties of a not-quite-so-everyday material to provide a place to dump juice, and get a little entertainment out of the deal while I'm at it.


Its two 55W halogen lamps in parallel, sunk into a jar of wax. I'll leave the nitty gritty details of the actual lamp(s) and how you're going to connect the innards to the outside world up to you.
Wax has peculiar thermal properties. It melts at a low temperature, but doesn't make an uber-great heat transfer material. This can work both for and against you, depending on how you use it.
First exploit: When a material undergoes a phase change from solid to liquid, it needs more energy than what is required to simply warm it up. Wax is a solid at room temperature, but needs quite a bit of heat to liquify. This was proven by the astronomical 15 minutes (total) that just a cup of water (as a transfer medium) needed in a 1000W microwave (every few minutes) to finally melt it all!
Second exploit: Since it does not transfer heat as efficiently as something like water, the container needs to accommodate for this. Hence tall and skinny. The portion where the lamps are will heat sooner than the top or bottom, and so the molten wax in this region will reach the surface of the glass much sooner than if the wax were equally as thick on all sides. The heat can then readily dissipate.
Third exploit: The heat transfer out of the jar is exponential with the heat provided for input, and so there is very little chance for thermal runaway. You'll blow the filaments before this thing overheats.
Fourth exploit: The bottom of the jar would ideally be in contact with a cool surface during operation, further providing the tendency for a 'permafrost' of wax at the bottom.
Ok, so it works.

Please note that this design should not be used at full power (lamp total rated) for extended periods, but suffice to say, as built here, it handles 60W (and a little more) for continuous periods without the first signs of trouble. I'm a tad over 50% total rated lamp power at the maximum input that I give it.
Here's how it went down, beginning to end (more or less):
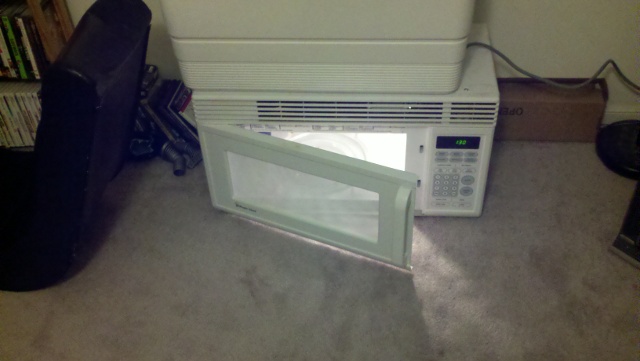
First step: Keep the wife happy. Don't use your 'installed' microwave oven for your experiments. This should kinda carry across the board, I'd hope.

Now that the disclaimer is out of the way, here are the lamps. They work well for this application, but I got tired of providing them with air to keep them cool and not worry about what they might come into contact with while doing their thing...
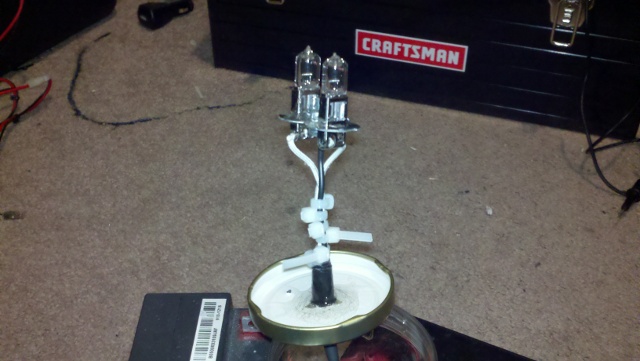
The first thing you want to do is melt the wax. For this I used yer regular over-the-counter canning paraffin wax; took 3 'bricks' (4 in a box) to fill the jar:

This is one reason for the junker microwave. Mine works fine (although I think it's lost a little power...), just has a mind of it's own (likes to start up by itself and run until the thermals trip on it (hence the power loss thing). Either way, the wife doesn't care if I power it up (although she flinches sometimes at the things I like to do with a microwave, but thats another thread haha)
Its going to take some patience to get even that much to melt. Paramount is not getting ANY water in the jar! GO SLOW, DON'T BOIL THE WATER! If you do get any water in the jar, you'll have to separate it, which can get messy! JUST GO SLOW! A minute at a time, 5 in between.
Trust me.While you're waiting for the wax to melt, in between reheats, prepare the cover for the jar to accept the two wires leading to the lamps, as well as a small vent hole to allow for expansion and contraction of the air inside the jar. This hole really only functions once; during the initial cooling cycle after final assembly. The only time it will be of use after this will be if you liquify a good portion of the wax due to dumping. This does not mean it is not important -
don't 'leave it out'; you risk breaking the jar should the pressure inside get out of whack at some later time.
I used heat shrink tubing on the splice, and 5 minute epoxy for the initial anchoring of the wiring to the lid.
In the process of melting the wax, you're inevitably going to introduce water into it (from the steam if nothing else). Don't fret. There's an everyday compound sitting right there at your stove (but that's not where you are,
are you 
) that will help you resolve this. Go get it.
Depending on what you have available, your process will differ.

Salt is hydroscopic. Translated, this means it likes water. But because of that, you will need to dry out a small supply (a tablespoon or so) before you can use it. That which sits on your table may already be somewhat saturated, and you would have no way of knowing it.
One word of warning before you get into this whole salt-drying thing: Normal, average, everyday table salt contains sodium iodide, which is supposed to be there to supplement your diet. This is all fine and good, but the manufacturer is counting on the idea that you won't be heating it to anything considered extreme. It's not very likely at all with the temps we're talking about here, but there is a chance, given the right circumstances, that the iodine
can be released from the salt, which is toxic. If you see any purple smoke, or suddenly get a headache, shut it down, leave the room, let it cool, and allow the area to ventilate before returning to try a different kind of salt.
For this reason, I recommend using a salt that has not had iodide added. White sea salt works best. Others may work as well (tried pink Himalayan salt, for example), but they may prove unsuitable due to other impurities (some of the pink salt turned brown). Pure sodium chloride will not discolor with the application of heat (at least in the amount your stove can give it).
Another word of caution... When drying sea salt (or any other, if you're daring), moisture of any amount that is in the salt will
violently escape in the presence of the heat, and exits the pot with significant velocity. I saw pieces fly all the way across the kitchen! Use a clear cover, propped part way open (to let any moisture that does reveal itself escape) to keep the salt in the pan. It will fly around somewhat like popcorn (just not anywhere near as frequently) until the water is gone. Once you can reach medium-high heat without any more popping, the salt is dry.
Now we add the salt to the wax:
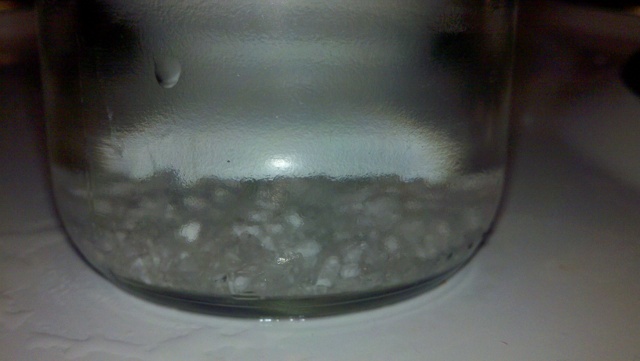
Make sure you have NO VISIBLE WATER in your wax (you will be able to see the barrier if it exists; the wax will be floating on the water). Once you have verified that you have nothing but wax in the jar, add a small amount of the dried salt in the bottom of the container. This will absorb any water that may remain in its path on the way down. Stir it gently with a plastic knife to ensure that the salt finds as much water as possible. When the turbulence has stopped, the salt will quickly settle to the bottom of the container, as it is not soluble in wax.
Next, preheat the dump lamps. This helps ensure good flow from the wax when the lamps are inserted into the jar. Gaps and air pockets can cause trouble, and reduce the wax's ability to transfer heat. To do this, I connected mine directly across a 12V SLA for about 15 seconds or so, and then let them cool slightly so that the temperature was even. I repeated the procedure once more just to make sure. Your milage may vary. Avoid TOO much heat, as even though the wax is hot, the lamps can get MUCH hotter, and the thermal shock of plunging them into a radically cooler pool of wax may cause the bulb envelopes to shatter. We don't want that. If you insert the lamp assembly into the jar and see wax turning white around anything, the preheat did not get to a high enough temperature. Remove the lamps, heat them some more, and try again until you get a nice, 'transparent' insertion, with no wax 'frost' and no bubbles. Once you've got it inserted properly, tighten the cap securely.
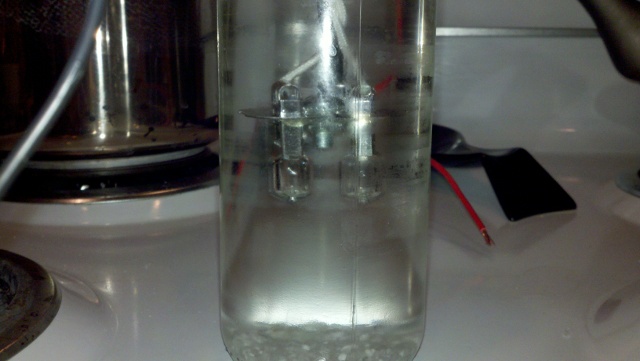
Now you need to allow the entire assembly to cool, but in doing so, stage it so that the bulbs remain roughly centered in the jar, both top to bottom, and side to side. The closer this is to perfect, the more uniform the heat transfer will be, and the cooler the entire assembly will operate when it is dumping.
In these two pics, you can see that the wires have been propped up and manipulated to facilitate the centering of the lamps during cooling.
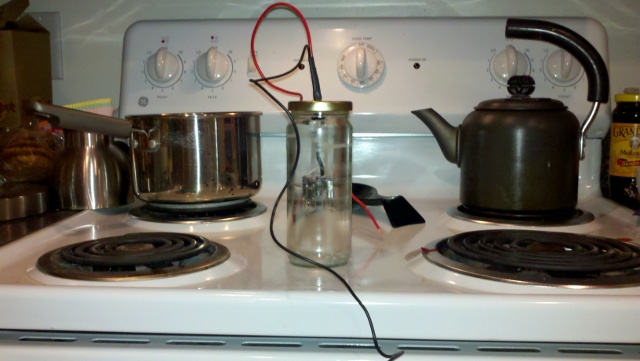
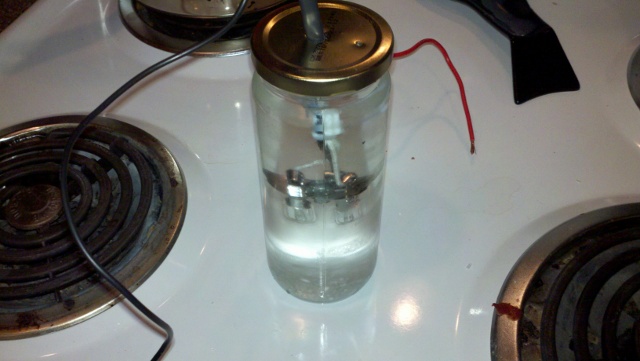
You can also see the vent hole in the lid in this picture. It's small, about the size of pencil lead. Be careful when you're doing final assembly that you don't inadvertently plug the vent with wax!
Leave the jar to cool completely
at room temperature once you are satisfied that the bulbs are going to stay centered. Avoid the temptation to assist the cooling process. Trying to force the temp down too quickly will result in distortions in the solidified wax, potentially leading to problems later on, up to and including glass breakage from uneven pressures developing during dumping. The jar I used took about 2 hours to become completely translucent, but be warned - this is not a sign that it is completely solidified! The wax nearest the glass will solidify
first, leaving a liquid core in the center that the lamps can slosh around in, leading to heat distribution problems later. Wait until the jar has cooled to room temperature before disturbing it! Overnight is preferable.
Once the wax is solidified, it's ready to go! Here's mine dumping about 25W:
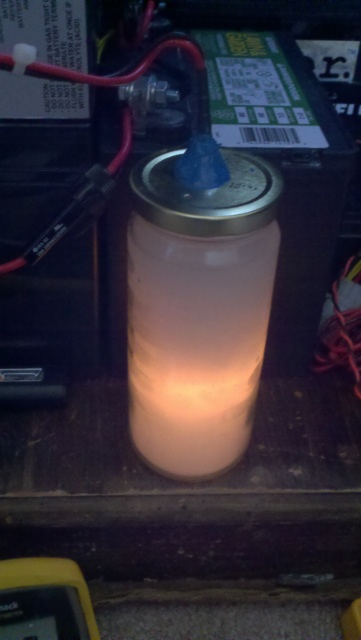
The glow is a little deceiving in this picture, the camera was compensating for the lower light levels that I was trying to create to get better contrast, and so it appears to be glowing much brighter than it actually is.
The final touch is the blue RTV silicone 'strain relief' on top of the jar to help support the entire structure. This prevents the lamps from going off center at a later time should you find yourself completely liquefied.
Enjoy!
Steve